Aquafaba Ice Cream (No Churn Vegan Ice Cream)
This aquafaba ice cream is simply the best way to make ice cream without an ice cream maker. It comes out light, fluffy, creamy, and delicious every time. Easily make your favorite ice cream flavors by adding fruit, chocolate, peanut butter, or caramel. This no-churn ice cream is vegan, nut-free, and gluten-free too, so everyone can enjoy it!

Want to save this recipe?
Enter your email below and get it sent straight to your inbox. Plus, get more amazing vegan recipes that will satisfy your cravings!
Why make this recipe
Make your ice cream with aquafaba for a light, fluffy ice cream that stays soft enough to scoop even when completely frozen.
What is aquafaba?
Aquafaba means bean water in Latin. It is the liquid that you drain off a can of beans. This cooking water contains enough protein from the beans to act like egg whites in many ways; therefore, you can whip it into a meringue or a whipped cream-like substance.
This is better than ANY store bought vegan ice cream! My omni husband, parents, and in-laws all love it too! I will never buy ice cream from the store again – this is perfect and SUPER easy!!
In my last batch, I mixed crushed oreos into the milk mixture and oh my goodness, it was amazing!!!Thank you so much!!!!!!
—Kelly
Ingredients and substitutions
- Aquafaba – the liquid from a can of garbanzo or white beans. You can use red or black beans, but that will also be the color of your ice cream.
- Cream of Tartar – or lemon juice as an acid to break down the protein and make it form a fluffier meringue.
- Sugar – to sweeten the ice cream. I like to use powdered sugar since it doesn’t weigh the aquafaba down as much and gives you a light and fluffy result. You can also use granulated sugar.
- Plant-Based Milk – like soy, almond, oat, or cashew milk. This gives the ice cream a creamy dairy flavor.
- Vanilla Extract – for flavor.
- Oil – for the richness of ice cream. Canola oil works best, but you can use any neutral-flavored oil. You can omit the oil, but it just won’t be as rich and creamy.
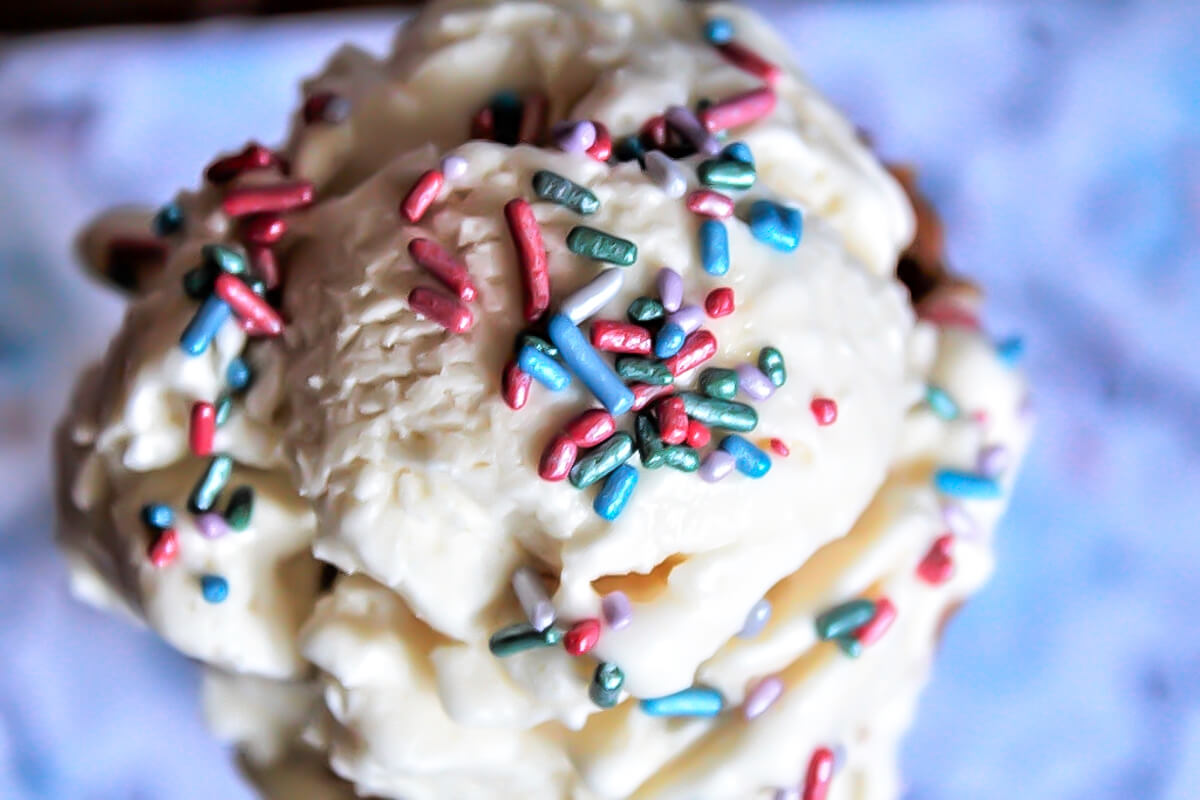
- Flavoring – you can add chocolate, pureed berries or fruit, caramel, or peanut butter for your flavor of choice.
Helpful tools
- Mixer – a stand mixer is nice to have, so your arm doesn’t get tired, but you can use any electric mixer.
- Container – with a good seal to store the ice cream.
How to make aquafaba ice cream
A full printable version of this recipe with ingredient measurements is available at the bottom of this post.
Make the aquafaba ice cream base
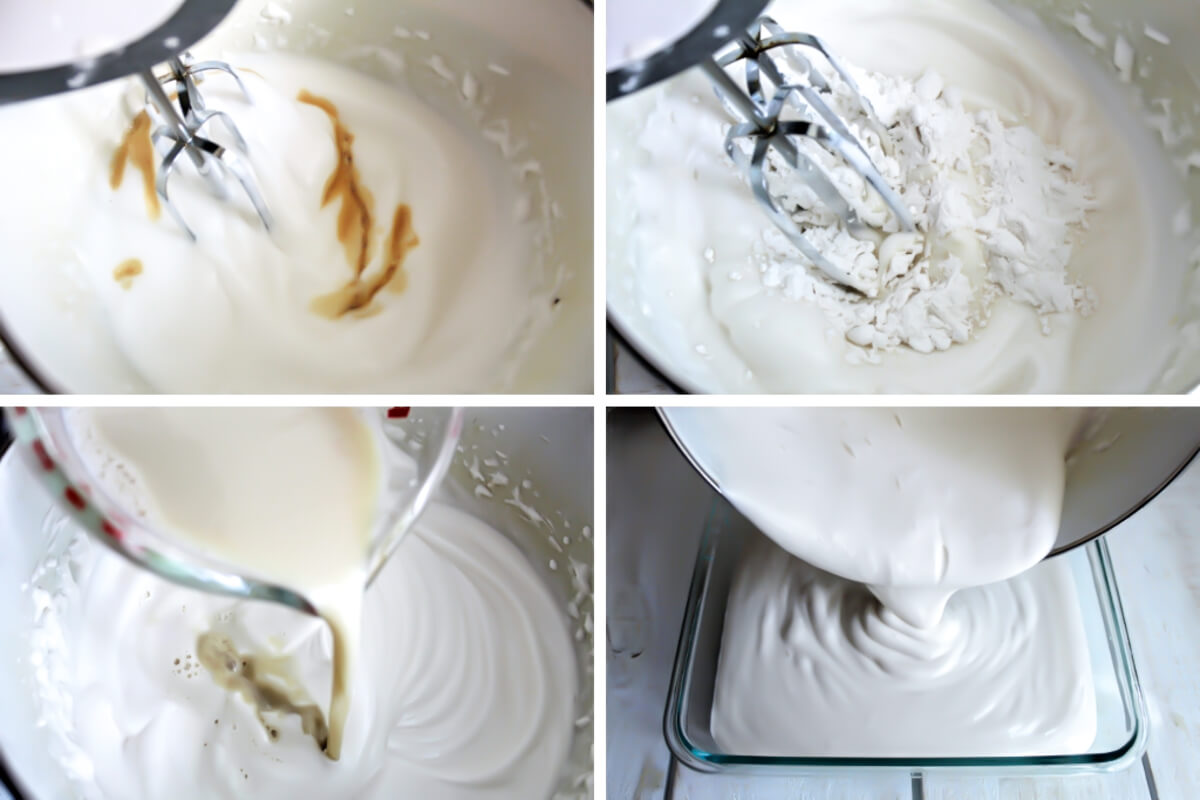
Step 1 – Drain a can of chickpeas into a medium-sized mixing bowl, then sprinkle with cream of tartar. (This will be 3/4 cup of aquafaba liquid).
Step 2 – Beat on high speed with a mixer for 6 minutes until very fluffy.
Step 3 – Add a tbsp. of vanilla and beat again for about a minute.
Step 4 – Continue beating the aquafaba while slowly adding the powdered sugar, a few tablespoons at a time, until well blended and very fluffy. (This should take about 2 more minutes.) Make sure to beat the aquafaba for a total of 9 minutes from start to finish.
Mix your flavor options
Flavor Options
- Vanilla: An additional teaspoon of vanilla
- Strawberry: Add a ½ cup of fresh strawberries
- Chocolate: Add 1/4 cup cocoa powder
- Peanut Butter: 1/3 cup peanut butter
- Coffee: Add 1 tbsp. instant coffee
Step 5 – Put milk of choice, oil, and any flavor of choice (Berries, chocolate, coffee, etc) into a blender and mix for about 30 seconds.
Step 6 – Pour the milk mixture into the fluffy aquafaba a little at a time, folding in as you go. Don’t over-stir or your ice cream will lose its fluffiness.
Step 7 – Pour into a freezer-safe container (large enough to hold 6 cups of ice cream) and immediately freeze for at least 4 hours to set completely.
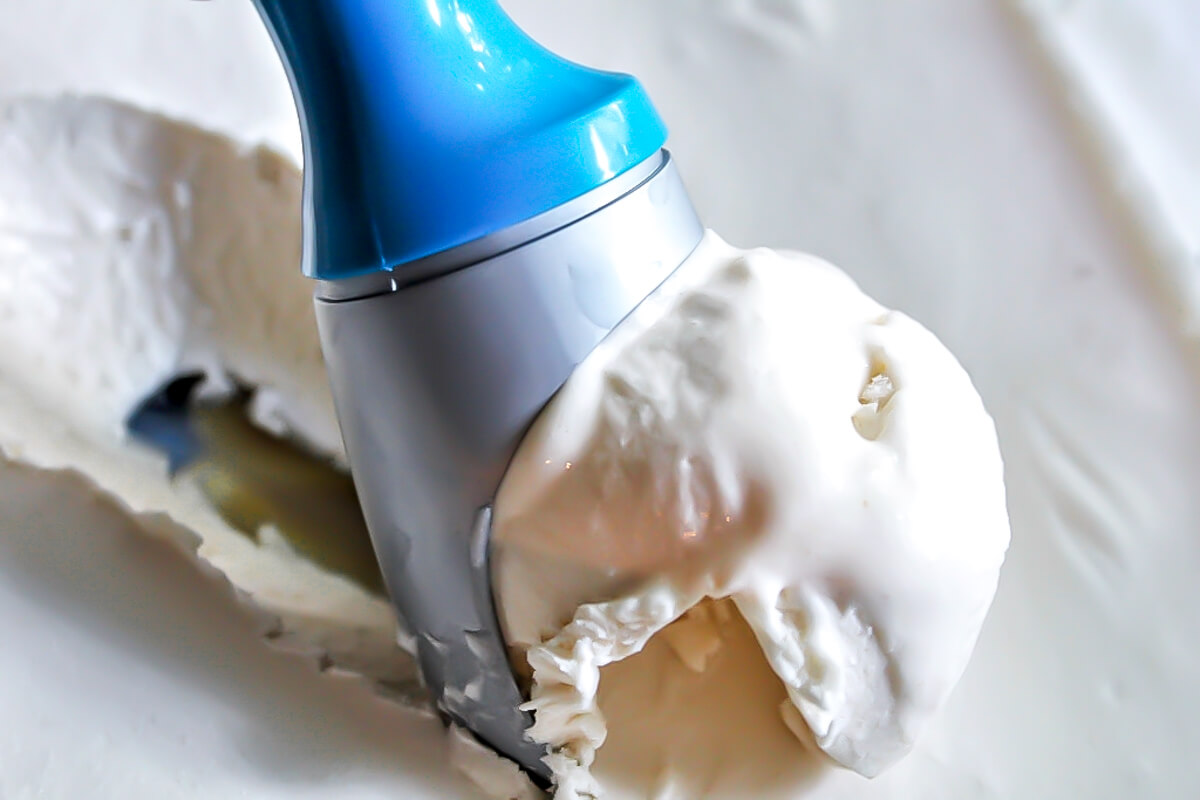
Step 4 – Your ice cream will set perfectly and be easy to scoop out of the pan even days later.
Pro Tips
- I like to use these 6-cup-sized Snapware containers because the batch fits perfectly, and they have airtight lids so your ice cream doesn’t absorb freezer flavors. If you don’t have a container like this, cover your ice cream with plastic wrap to seal in freshness.
- Be sure not to overbeat once the milk mixture has been added.
- Omit the oil to make it fat-free. (It’s just not rich and creamy without oil).
- Use canned coconut milk instead of other plant-based milk. (If using coconut milk, there is no need to add additional oil.)
Storage
Freeze: Store the aquafaba ice cream in an airtight container in the freezer for up to 3 months.
How to add more flavors
To add swirls of flavor, make the vanilla ice cream, then fold in chocolate syrup, vegan salted caramel sauce, peanut butter caramel, or chocolate chips just before freezing. You may want to give it another stir about 1 hour after freezing if the items look like they are sinking to the bottom.
How to make an ice cream Sunday
Top your aquafaba ice-cream with vegan salted caramel sauce, berry compote, or vegan butterscotch sauce. Add fresh fruit like bananas, strawberries, or blueberries.
Aquafaba ice cream recipe

Aquafaba Ice Cream (Vegan No Churn Ice Cream)
Ingredients
For the Aquafaba Ice cream base:
- 3/4 cup aquafaba, (the liquid from a can of chickpeas)
- 1/2 tsp cream of tartar, or lemon juice
- 1 tbsp vanilla extract
- 1 cup powdered sugar
Blended Milk Mixture:
- 3/4 cup plant-based milk of choice, (like soy milk, oat milk, or coconut milk)
- 1/4 cup canola oil, or any other neutral flavored oil
- 1 tsp vanilla extract, (additional for vanilla ice cream)
Or Pick One of the Additional Flavor Options:
- 1/2 cup berries or fruit
- 1/4 cup cocoa powder
- 1/3 cup peanut butter
- 1 tbsp instant coffee
Instructions
- Drain a can of chickpeas into a medium-sized mixing bowl and sprinkle with some cream of tartar. (This will be 3/4 cup of aquafaba liquid).
- Beat on high speed with a mixer for 6 minutes until very fluffy.
- Add a tbsp. of vanilla and beat again for about a minute.
- Continue beating the aquafaba while slowly adding the powdered sugar, a few tablespoons at a time, until well blended and very fluffy. (This should take about 2 more inu)tes). Make sure to beat the aquafaba for a total of 9 minutes from start to finish.
Blend the Milk Mixture and Flavor of Choice
- Put milk of choice, oil, and any flavor of choice (Berries, chocolate, coffee, etc) into a blender and mix for about 30 seconds.
- Pour the milk mixture into the fluffy aquafaba a little at a time, folding in. Don't over-stir or your ice cream will lose its fluffiness.
- Pour into a freezer-safe container and immediately freeze for at least 4 hours to set completely.
Notes
- Be sure not to overbeat once the milk mixture has been added.
- Omit the oil to make it fat-free. (It’s just not rich and creamy without oil).
- Use canned coconut milk instead of other plant-based milk. (If using coconut milk, there is no need to add additional oil.)
 Did you make this recipe?Please leave a star rating and review below!
📌 Be sure to follow me on Pinterest for new vegan recipes!


Really enjoyed this recipe! So easy and delicious! My only problem was both times I made this, it came out with a consistency more like the old “ice milk” than ice cream. Not as creamy as I would want. Did I undermix/overmix?
I, also, cut the sugar amount down. It was delicious, but WAY too sweet for me.
Thank you for a great recipe!
Well, drat. I’m using coconut oil and it seems to be clumping into bits when mixed with the milk. I wish I had just skipped the oil. The aquafaba itself turned into some lovely whipped cream, but now who knows what will happen with the coconut oil in the freezer!
Yeah, coconut oil turn solid any less than 75 degrees or so, so it’s not going to work well mixing with ingredients that are already cold. I hope that you give it a try again.
I’ve made this recipe a few times already, and while it’s finicky, I really enjoy experimenting with it. Even though I stick with the same basic formula each time, sometimes the liquids separate and I get the icy layers others have mentioned. *shrugs* I think it helps for most of the ingredients to have a higher fat content.
So far my fave flavor is peanut butter. In addition to the aquafaba and cream of tartar, I used 1/3c sweetener blend (xylitol, allulose, monkfruit, stevia), 1/2c coconut milk yogurt, 1/3c peanut butter, + 1/4c melted coconut oil. I whip the aquafaba for 9min; while that’s going, I add all of the other ingredients to a pan on the stove to melt together and cool slightly. After the 9min, I slowly add the liquids with the mixer on low. Turn it off, and add extras (in my case, cacao nibs + carob chips + chocolate chips).
Probably my second fave is coconut, adding coconut extract to the mixture along with mini chocolate chips. I tried making strawberry, but the fruit just turned out to be icy chunks; I’m thinking puree or jam would be better. I have garden rhubarb right now and think jammy rhubarb in a coconut or almond ice cream would taste good. I would like to keep it on the healthier side, but I can’t help but think of adding something caramel-y, or perhaps homemade cookie dough bits to the peanut butter flavor.
I’m glad that you have experimented with so many flavor combinations, Karla! 🙂
I’ve made 3 batches of this within a week! It’s delicious. Great recipe!!! Thank you.
You’re welcome, Lizie! I’m so glad that you like it!
Excellent recipe! It tastes exactly like actual ice cream. I made it because I’ve never made a vegan ice cream that didn’t freeze solid in the freezer, so this one sounded perfect. The taste was perfect. The texture was almost a little too fluffy for me (not necessarily a bad thing!), so we let it sit overnight in the freezer and it firmed up more and got a slightly denser texture. It was absolutely perfect and cost pennies to make!
I’m so glad that the recipe turned out well for you!
Has anyone tried this in a Ninja Creami?
Here’s a modification I am working on. If I get it right, the ice cream will have the nutrition of a full meal, without the high fat, carbs or calories of ice cream. So far, I’ve got the taste right, but it is freezing too solid for my taste. I probably need to whip the aquafaba more, & fold the to mixtures together more quickly, to keep it from collapsing:
Replace the vegan milk with half a pkg of silken tofu, blended with a bit of water or milk to get a thick creamy consistency.
Add 1/2 tsp of butter flavor & 1 tsp of 50-50 xanthan & guar gums to get butterfat taste & mouthfeel, without the oil, as well as incorporating a gel to help maintain the foamy consistency of the whip.
Here’s a suggestion that turns this ice cream into a fully nutritious meal! Rather than the milk, puree half a block of tofu in a food processor, adding the sweetener & the oil to this rather than the aquafaba. Add 1/2 tsp of xanthan gum and only as much milk as need to allow the puree action.
Add 1/2 tsp of guar gum to the aquafaba while whipping it. And, if you have it, add a tsp of butter flavoring, to enhance the richness.
Otherwise, follow this recipe, combining the whipped aquafaba & pureed tofu, mixing only for 30 seconds or so…only enough to fold the two mixtures together well. The reason for using the two gums is that they have a synergistic action with each other, enhancing their gelling action.
Finally, as an alternative to the oil, you can drop in half of an avocado (or whole mini avocado) while pureeing the tofu. This will add healthier fat, will marginally, if at all, affect the flavor.
My first attempt was a failure, but totally my fault – I didn’t have my stand mixer on the highest setting, oops! It separated in the freezer, so I ended up throwing it in my food processor to mix again, and re-froze it. Obviously this first attempt was not fluffy, but it still tasted great! More like Italian ice texture. I didn’t want to give up, because Monica’s recipes are awesome and I really didn’t want to spend $5 a pint on non-dairy ice cream. This time I put the stand mixer to absolute high, and it worked like a dream. I could tell the difference right away. The mixture froze beautifully and was delicious. I can’t believe how easy it is to make (once I stopped being a wimp with my stand mixer, haha!) and I’m really grateful I don’t have to go and buy an ice cream maker or something. I used homemade aquafaba from making chickpeas in the instant pot, and had enough to make two batches. Thanks for yet another amazing budget-friendly recipe!!!
Hi – Is there a substitute for the sugar? My husband cant do the added sugar. What adjustment would be needed to make this without sugar?
You can replace the sugar with any sugar substitute that he can have or leave it out completely. If you don’t sweeten it at all, it won’t taste much like icecream.
understood. Monk fruit and Xylitol seem a good choice then. Many thanks for the response- Going to give it a go 🙂
Amazing thank you so much – huge hit
I’m so happy that you liked it! 🙂
Just made it and I’m so exited how it will come out! I used soy milk and a mixture of peanut oil (for it’s neutral taste) and rape oil (for it’s yellow color, also peanut oil was empty) and just added rum raisins for taste – I actually want to know how the base tastes.
But just from working the recipe I can already say that it got so fluffy!
One hint maybe for others: If you whip/beat your milk with a mixer while pouring in the oil in just the sligthest stream, you get a kind of mayonnaise texture. This folds in perfectly with the meringue whithout taking out any of the air! After that, you can still gently fold in other additions like fruit puree or nuts. Cocoa powder and the like I would have mixed with the “mayonnaise” first, as you wrote in the recipe, as it’s just more resistant.
This is better than ANY store bought vegan ice cream! My omni husband, parents, and in-laws all love it too! I will never buy ice cream from the store again – this is perfect and SUPER easy!!
In my last batch, I mixed crushed oreos into the milk mixture and oh my goodness, it was amazing!!!
Thank you so much!!!!!!
Your welcome, Kelly! I’m so happy that it worked out well for you! 🙂
Great recipe and easy too. I followed the instructions exactly, however when I took it out of the freezer it had separated before freezing and was very icy, it still tasted nice though. Any ideas on what I did wrong please? I folded in the vanilla milk…maybe whisking it would have been better? Any suggestions welcome please as really want to try again! Thanks so much for sharing!
I’m glad that you liked the recipe, Maz. Whip your aquafaba for an extra minute or two before adding the other ingredients. Also, some brands of beans have thinner liquid in them than others. It should be about as thick as egg whites. If the brand you are using is thinner, you can simmer it on the stovetop for a few minutes to evaporate some liquid off of it.
Would extra virgin coconut oil work for the oil, rather than refined?
Yes, they will both work, but they have strong flavors. Make sure that you are okay with the flavor that they will add. Enjoy! 🙂
Looking for recommendations to make this “Butter Pecan” flavor.
I made a Fresh Peach flavor and it was great – 3 fresh peaches peeled blended with the milk mixture and a another fresh peeled peach chopped up and folded in before freezing. It was delicious!
I’m glad that you enjoyed it, Rebecca! I haven’t made a butter pecan flavor yet, but I would cook some pecans in vegan butter and then toss them in brown sugar before putting them in the ice cream. You can also use butter-flavored extract instead of vanilla extract for a more buttery flavor. Enjoy! 🙂
Love! Made hummus this morning so naturally had to try this recipe also with the leftover chickpea water from the can! It’s delicious!
Hi Erin – So happy that you were able to use everything and that you liked the ice cream recipe!
I will try it as soon as I get my hands on some aquafaba. Great idea, thank you!
You’re welcome, Angelika! Enjoy! 🙂
I made this for the first time with coffee, crushed almonds, and cherries. Sooooo good!!! I didn’t have a hand mixer so I used a blender…the aquafaba was still runny so then I switched to a whisk for about 2 mins and it got a bit thicker (still wasn’t fluffy), however the end result still wasn’t bad. Had almost an ice cream like consistency, just a tad icy. Can’t wait to use a hand mixer next time!!!
I’m so happy that you liked it, Alicia! It will definitely work better for you with a mixer next time. 🙂
Like the other person who commented I don’t have a mixer so use a hand whisk. Whisked longer than instructions said just to make sure. Added cocoa powder and some chopped up strawberries. Just put in the freezer….heres hoping! 🙂🤞
I hope that it comes out well for you, Moira! 🙂
It did thank you. Absolutely delicious 😋
It worked in my food processor.😉
Electric hand mixer works because I often made fluffy chickpea water with it. It gets a strong peak too. But it takes a bit of time, maybe 5-10 min. In the stand mixer / kitchenaid it takes about 5-10 min as well. Manual whisking I doubt would work. You would need some patience and strength because I bet that could take more than 10 min, if it were to work. But perhaps I’m wrong. I haven’t tried this recipe yet, but I’ll try it today. I’ll try black sesame flavor. Best
Thank you so much for this amazing recipe! I make it with peanut butter and it was so good. I considered trying to make a lemon version, but I wasn’t quite sure if that would work because of the acidity level might do something odd … do you have any suggestions? Thank you!
I’m glad that you liked the recipe, Colette. I don’t think that I’ve ever made it with lemon, but I think that it will work fine. The acidity actually helps the aquafaba hold its form, so it should work. Enjoy! 🙂
You can use Lemon Juice in place of Cream of Tartar to fluff your Aquafaba. I do it all the time and the Aquafaba fluffs the same. But only use lemon juice if you want a lemony flavor. I sub 1 tsp. Lemon Juice in-lue of Tartar.
This was an easy recipe to make, although next time I’ll only add half the amount of powdered sugar or measure it only after sifting it, since it was way to sweet in my opinion. We had it on top of homemade apple crisp.
Hello!
I tried this recipe with aquafaba from dried chickpeas, but it lost its fluff early in the process. There were soft peaks at the 3-4 min mark, is it normal to continue mixing for 5-6 whole minutes afterwards?
Thanks!
It should get soft peeks after 3 minutes or so, but if it deleted then the aquafaba wasn’t concentrated as much as the stuff from a can. You can simmer your aquafaba until some of the water evaporates off of it and it becomes light brown and thicker than water. It will hold much better when it’s concentrated more.
Just an FYI — if you cook 1 lb (2 1/2 cups) of dried chickpeas (soaked overnight and drained) in 5 cups of filtered water in an IP for 17 minutes (release naturally) you’ll get the perfect consistency for aquafaba every time (becomes thick and gelatinous when cooled).
Thanks, Stephanie that is very helpful for readers who want to make their own. 🙂
Stephanie, what does IP stand for?
IP is short for Instant Pot (definitely one of my best investments).
Thank you Stephanie! I like to make my own rather than buying the canned.
This looks so good! I think I need to try it.
I hope that you do. Enjoy! 🙂
Hi, I haven’t made this recipe yet, but hope to try it next summer! 🙂 In any case, I was wondering if I could freeze it in my little ice cream maker rather than place in the freezer. Thoughts? Thanks!
Hi Sheryl, Your ice cream maker probably stirs it while it’s freezing it. This constant stirring will stir out the air from the aquafaba and deflate the fluffiness of the ice cream.
This was fabulous! I made mocha and added Kahluha instead of vanilla, added a bit of xanthum gum and used my ice cream maker. Thank you so much!
You’re welcome, Sharon! I’m so happy that you liked it! 🙂
Hi….i will be making this ice cream in a few days for the first time, i was wondering if i want to make it a caramel swirl ice cream how do i incorporate that to the ice cream?….do i just make the caramel and then swirl it in the aquafaba mixture or do i have to mix it with milk like you do when adding other flavours?
Hi Tiki, you will just want to make the caramel and swirl it into the ice cream just before freezing. Don’t mix it with the milk unless you just want the caramel flavor and not pure caramel swirled in. Enjoy! 🙂
Most delicious homemade ice cream 😍 so creamy and fluffy and super easy to make. I’m so happy I found this recipe, I’m lactose intolerant and finding affordable dairy free ice cream is so difficult and expensive. This was everything I’ve been looking for in an ice cream 😍 so excited to try all the flavor combinations!
I’m so happy that this recipe meets your needs! 🙂
This ice cream turned out fabulous. It was creamy and the taste was wonderful. I did get a thin layer at the bottom but the quality was still good My only issue was that it was way too sweet. I used coconut milk does that make any difference to the sweetness. I plan to make it again maybe with less sugar. Do you think it will affect the fluffiness? Again Amazing icecream!!
I’m so happy that you liked it! You can reduce the amount of sugar with no issue. Enjoy! 🙂
I just made your recipe and I was very impressed. However I had a lot of trouble incorporating the milk mixture into the merignue. I tried folding it in, but I didn’t want to loose too much air. Consequently I have separated layers. Do you have any recommendations on how to well incorporate?
You can turn your mixer back on to the lowest setting for about 10 seconds or fold it in well with a spatula. It is common for it to settle a little, but you shouldn’t have 2 separate layers.
This is amazing! I will never ever throw away my bean water ever again! I recently made six flavors. My favorites so far have been Apple Basil, Rose Blueberry, and Almond Cactus Sangria. I had used full cream coconut milk and almond milk. I preferred the almond milk one. I do have a question, on the bottom of my container there is like a layer of ice. I’m assuming it the liquid portion from the fruit and such that sank down to the bottom. Do you have a suggestion to keep everything more incorporated? I stead of forming that layer on the bottom?
I’m so happy that you like it, Mike! The heavier liquid and fruits will sink to the bottom a little. You can add a tsp of lecithin to the liquid which will help to emulsify it so the fats and liquids stay bonded together and don’t separate.
any way to avoid the sugar? Like silan or honey? Or are they just too heavy?
You can use any sweetener that you want, just add it to the liquid mixture. Enjoy! 🙂
AMAZING!!! It is awesome if you make it a lemon ice-cream or if you make it with cocoa and raspberries 🙂
I’m so happy that you liked it, Irina! 🙂
Oh my gosh I made this tonight and I can’t believe how amazing it is. Exceeded my expectations by far and was so easy! In addition to the vanilla, I added a little bit of a “salted caramel extract” that I found at tesco. It is like caramel cotton candy and I will be making it weekly from now on!
I’m so happy that you liked it, Gillian!
Is it cocnut liquid or coconut cream? (those are the 2 cans I found and don’t know which is cocnonut milk)
Is there not any protein in this ice cream? And what gives it such a high fat content?
Thanks
You can use whatever milk replacement that you want. Coconut cream will give you the richest ice cream. I add oil to the liquid mixture if I use soy milk or other milk without a high-fat content. You can make it low fat if you want, but it will be icier and not as creamy.
Just made the chocolateversion with oat milk.It was delicious. Thank you! My (non vegan) family just asked me to make more. Now that’s a seal of approval!
Thanks Michele, I’m so happy that you all liked it! 🙂
Is it OK to replace the sugar with an alternative like maple syrup?
I haven’t tried it with maple syrup. I think that it may be too heavy and settle to the bottom. Let me know if you try it though.
Maple syrup works!
Thank you very much! perfect icecream! I put too like somebody writted in comment 1/3 cup sugar. wonderful!🌷🌷🌷
I’m happy that you liked it, Darya! 🙂
Hello! I’m so excited to try this recipe. I plan using coconut milk, but I wanted to ask if we should use the whole can of coconut milk (cream and liquid), or just the cream part that solidifies after being refrigerated? Thanks so much!
Using just the cream will give you a creamier ice cream, but it will work both ways.
Love it! Can’t wait to try different flavours
Thanks so much, Jay! Glad that you liked it! 🙂
Hi thank you for sharing this recipe! I’ve made the chocolate version and it turned out awesome. I only used ~1/3 cup sugar as I found that sweet enough.
I used soy milk, just like you.
It turned a little icy, just wondering if that’s because I added less sugar? Or another reason?
Mine gets a little icy after a few days in the freezer. If you use a milk with a higher fat content like coconut or cashew milk, it should help it to be less icy. I hope that helps. 🙂
Wow! Made this a few tmes and worked well each time, once it seemed to have a slight gritty texture not sure why but no matter it was still great.
Sometimes I used less sugar and added other things like maple or rice malt with the milk, I added fresh mango and lemon for sorbet still used some oil to help with creaminess, I used coconut milk and coconut oil not canola, so many flavour options. I checked out the aquafaba recipes for a while before convincing myself to try this. Why did I wait so long? Icecream is no churn and sooo creamy everytime.
I’m so happy that you liked this icecream! I think it gets a little grainy from the water in it. The higher the fat content of the milk you use, the creamer the icecream will be. Enjoy! 🙂
Hi, im so excited to try this, can you use frozen raspberries that are pureed or melted choclate?
Yes, you can use both purred raspberries or melted chocolate. I just caution stirring it too much. Just stir enough to get it mixed in a little, the more you stir the more the bubbles will deflate especially if there is oil in whatever you are mixing in.
i just wonder if i heat up the milk mixture with coffee powder without cooling down and pour to the meringue. Does the hot mixture break the air inside the meringue? Thanks.
It should be okay to do it with hot coffee/milk. I make a hot syrup and add it to the aquafaba to make marshmallows and meringues and it doesn’t deflate it. Good luck! 🙂 You can check out that recipe here…https://thehiddenveggies.com/vegan-marshmallows/
I have been trying to make vegan vanilla since a long time and have failed a few times – i did try aquafaba with coconut milk + condensed coconut milk and it tasted good but not very easy to scoop – i am excited to try your recipe – how long can u store in the freezer? also, can you make thick milkshakes from this icecream since its so fluffy and runny? Please let me know!
Hi Krupa, I have had it keep well for about a month. It starts to get icy after a while. I have never used it for milkshakes, so I can’t say for sure about that. I hope that you enjoy it! 🙂
I’ve just made this with the peanut butter version, and it’s worked great – I’ve had experiences with the meringue deflating to liquid while attempting ice cream before, so this time I added about half a teaspoon of xanthan gum to the meringue before adding the milk/peanut butter mix to stabilise it. I expect that helped it not to separate.
Next I’m planning to make it with soy skyr for frozen yoghurt! Thanks for the recipe 🙂
So happy that you liked it Sara! Thanks for the tip about the xanthan gum! I will test that out for sure! 🙂
Hi Monica! Thank you for the nice recipe. I made chocolate ice cream today and it’s about 6 hours in the refrigerator now, seems to be not icy and soft for easy scooping. I made a mistake pouring all the milk mixture to the whipping aquafaba ( in slow speed) and it turned out to the watery texture, lost its fluffiness. I was little confused with the instructions – should we continue whipping the mixture in the mixer after adding the milk on slow position (Turn the mixer to the lowest setting and beat just long enough to incorporate the mixture.) or just carefully stir with spatula or spoon the mixture to fold in all milk?(Pour the milk mixture into the fluffy aquafaba a little at a time, folding in. Don’t over stir or your ice cream will lose its fluffiness. ) The other question is when we add the berry or fruity puree should we reduce the milk amount ? I thought the fruits have enough water and the final result may be an icy of hard texture ice cream, that what I really afraid of?
So happy that you liked it Zoi! Sorry about the confusion with the directions. I have done it both ways and they both work well. Just don’t over mix or it will become flat as you found out. I have made it with fruit a few times and haven’t found the need to reduce the milk. If you are worried about it being icy, make sure to use a very rich and creamy plant-based milk. If you use a watery milk, it will be icier. 🙂
Thank you for this recipe! I’m hooked on the possibilities now. This was my first time using aquafaba to make anything and I’m mourning all the wasted aquafaba I’ve just sent down the drain in the past.
The ice cream turned out very soft, more like a whipped soft-serve consistency or similar to what you’d get with “cheap” “frozen dessert” (I dont’t mean this as a bad thing – just making a comparison by referring to those supermarket ice creams aren’t made of real cream and have tons of additives but still taste guilty/good and are light and fluffy – but I know this one doesn’t have anything bad added to it since I made it myself!).
One thing someone reminded me to watch out for is EDTA and preservatives in the aquafaba if using the stuff from a can. Next time I’ll look out for that.
I made lavender cardamon flavour. I did blended the dried lavender with regular sugar to make powdered lavender sugar. I had this already made, leftover from a previous recipe, otherwise I would have blended the cardamon in, too. Instead I shook the milk, oil, and cardamon vigorously (since my blender wasn’t working).
I also used an electric hand mixer and it worked great.
Looking forward to trying this again in different flavours!!!
I’m so happy that you liked it Nale! Mourning the wasted Aquafaba made me laugh! 🙂 Lavender cardamon flavor sounds delicious! Make sure you check out my Aquafaba chocolate mousse! I think that you would love that too!
Any thoughts about using stevia for the sweetener?
Stevia should work. I have not tried it personally, but I don’t see any reason that it wouldn’t work. Just add it slowly and taste to get the sweetness that you like. Enjoy! 🙂
I cheated a little because I swapped the balloon whisk for the regular paddle and drizzled in the liquid mixture with the machine on its slowest speed. I also have an ice cream machine that doesn’t require pre-freezing, so I did churn the mixture to give it a head start. The recipe is GREAT! I added peanut butter and shavings of dark chocolate and it was just as good as shop-bought. The fact that ice cream made with aquafaba is scoopable straight from the freezer is a major advantage over other recipes. I will use this as my base recipe from now on – thank you!
I’m so happy to hear that you liked it Julianne! The peanut butter and chocolate shavings sound amazing! I love how the aquafaba keeps the ice cream soft and scoopable too! 🙂
Can I use coconut sugar instead of the powdered sugar if I blend it into a fine powder? Well, as fine as my ninja can process it.
Yes Tere, you can. Granulated sugar will also work, but it just seems to weigh the aquafaba down a little. Pulsing it in you ninja should work well.
Hi,
I have made vegan ice cream before using coconut cream so when I was searching for aquafaba for whipped cream, I came across this recipe of yours. I tried it this afternoon. However, after I did the mixing of aquafaba, I followed the recipe and folded in the milk (coconut milk, so I omitted the oil). When I put it in the freezer and checked after sometime, I saw there was a separation of the fluffy stuff on top and the liquidy stuff below. What did I do wrong? I followed the timing of mixing it as well.
So what i did was, I just took it out from the freezer, and just whipped it again on low speed for a short while just until it is well incorporated and I put it back in the freezer. I just did the mixing in the container itself.
Thank you for sharing this recipe.
It usually settles a little, but not enough to notice very much. I usually use soy milk in mine. I wonder if the coconut milk was heavier and made it settle. Also, if you over stir it, your aquafaba starts to lose its fluffiness.
I made a black sesame flavoured ice cream using this recipe. I did stir it twice through the freezing process to ensure no separated layers in the frozen product, but kept the stirring to the bare minimum. Used macadamia oil and allulose. Next time I will use half the amount of allulose because it is sweeter than my preference, but otherwise it’s a big thumbs up from me for this recipe! I’ll experiment with other flavours in future too. Thanks!
can I double the recipe in one batch or do you recommend making one batch at a time?
I would do one batch at a time. If you over stir it, it will cause the aquafaba to deflate and the “milk” will sink to the bottom. I would be worried that doing a big batch would cause you to stir too much after adding the “milk.”
Hi! I just made this for the first time and I’m wondering where I went wrong. After being in the mixer for about a minute and thirty seconds the aqua faba/cream of tartar mixture was huge and fluffy. I continued mixing it for the remaining seven minutes and added in the other ingredients as indicated. When I froze it though, all the “fluffy stuff” went to the top and the liquid sunk to the bottom. I’m wondering if I should defrost it and mix it again to blend it better? Thank you so much!
It sounds like you did it right for the most part. You may have stirred it too much after you added the milk. You could try to defrost and mix it again, but I’m not sure if that will help. Once it’s overmixed, you can’t get the fluff back. It sometimes settles a little, but it shouldn’t settle with more than a thin layer of milk at the bottom.
I made the vanilla last night using coconut milk and it is a hit here! There is a slight difference in taste, but I can’t put my finger on it. My husband says its the coconut milk, but he didn’t mind it. I do have a couple questions though:
1) when using coconut milk do you use 1 cup to equal 3/4 cup of other milk + the 1/4 fat? That’s what I did.
2) something settled to the bottom. I feel its the bean juice. I folded as little as I felt possible to get the milk stirred in. Anything I could do different to keep settling from occurring.
The vanilla was so good, I made the chocolate tonight using raw cacao powder (and didn’t have quite enough coconut milk, so I made up the difference with homemade cashew milk that I always have on hand). My little guy is happily lapping up a little of the chocolate batter and approves. I’ll know by morning what the final result is once it freezes. I’m prepping for his 8th birthday party this weekend. Not only do we try to eat healthier, I have a niece that has a severe allergy to dairy so I’m hoping everyone enjoys this.
I’m so happy that you liked it! You did the right thing by adding 1 cup of coconut milk to replace the milk plus the fat. Sometimes you get some liquid that settles to the bottom. Make sure to whip the aquafaba for the full amount of time suggested or longer to get the proteins strongly bonded. Then make sure to freeze it immediately after making it. This should help it not settle at the bottom. Happy Birthday to your son! I hope that everyone enjoys it at the party! 🙂
Can i substitute butter for oil?
Yes, that should work the same. Just melt first of course. 🙂
Hi,
Can you use homemade nut milk instead of soy milk?
I’m sure that nut milk will work too. I haven’t tried it yet, but I don’t see why it wouldn’t work. Let me know how it turns out! 🙂
I just came across your recipe today. I am loving the idea of this. I can’t wait to try it. I have few questions before I try it. Have you ever put your ice cream on a warm dessert like warm brownies or apple crisp? Does it melt well while eating it with my warm dessert? Does it change up texture or consistency because it next to something warm or does it change the flavor? Have you added vanilla bean to your mixture along with the vanilla? Also I can’t have cane sugar, maple or honey. Would Swerve powder sugar work in place of the regular powder sugar? I cant find many dairy free sugar free ice cream options out there and sometimes I don’t want to taste coconut while eating my ice cream on my dairy free sugar free brownie or apple crisp. I am so excited to try this.
Hi Rachel, It works well over pie and brownies, but it does melt a little faster than traditional ice-cream since it has so much air whipped into it. It won’t change the tastes, just simply melt faster. I have not added vanilla bean or swerve powder myself, but I think it would work fine. I just don’t know the amount to tell you to add. You can just add it slowly and taste along the way until you like it. I hope it works for you! Let me know how you like it! 🙂
I finally got around to making this. Thanks for replaying back to me. I did not add the vanilla bean but I did use the swerve powder sugar. I followed the rest of the recipe exactly the way it is listed. I put it in the freezer and it was only in 3 1/2 hours before I needed to serve dessert (a warm sugar free and dairy free apple dessert). It was creamy and a little soft but tasted the way I was hoping. The next day I had some of my leftover dessert with this ice cream. It was very grainy and not at all like the day before. I am not sure why the long it sat in the freezer it became more grainy. It could be because of the swerve powder sugar but not sure. Just responding to let you know how it went. Again it has been very hard for me to find a sugar free and dairy free ice cream that does not taste like coconut or like frozen bananas. Missing the taste of just plain vanilla ice cream. I have used the aquafaba and swerve sugar in other desserts with great success. This is why I was so hopeful. Thanks again for the great recipe and for getting back to me so quickly.
Instead of swerve, next time you should try Allulose. I read in some articles on keto blogs that erythritol causes ice crystals and hardens ice cream, and that allulose keeps the homemade sugar-free ice cream creamy and soft. I haven’t tried it myself as we can’t get allulose in Canada (not approved yet by our FDA) but I would definitely be trying this if I could!
This sounds amazing! Have you tried making it with the Aquafaba after cooking chickpeas from scratch?
Yes, you can use the liquid from when you cook them from scratch. The amount of cooking water you use will change the amount of protein in the liquid and change how it whips up. You want your cooking water to be slightly thick once it cools to whip up the same as canned chickpeas. (You can also use white beans or other bean liquid). Let me know if you try it. 🙂
I don’t have a mixer, can I use an immersion or regular blender for the entire process?
I don’t want to waste all the ingredients. thanks!
You need to whip a lot of air into it, so you will really do need a mixer, it just won’t work the same using any other method. I cheap little hand mixer will work fine.
Wow this recipe is so good! I’ve tried to make vegan ice cream before with coconut milk, and was left really disappointed when it turned out hard like popsicles. This turned out beautifully soft and easy to scoop, and as another reviewer mentioned, you get so much bang for your buck! It makes such a large quantity for what goes in it!
I was wondering though if we could half the sugar or use a different kind? I’m not a huge fan of the taste of powdered sugar, and the lingering taste it gave bothered me a bit. I also just don’t like super sweet desserts. I know that lots of sugar is normally necessary for vegan meringues to make stiff peaks, is that the same case here?
Oh by the way, I heated up the milk and added two heaping tablespoons of coffee and let it steep for 30mins, since I don’t have instant coffee. It worked perfectly and the coffee taste was divine!
Thanks so much!
Hi Kara, I’m so happy that you liked it! Yes, you can use any other sweetener that you would like. If you use something liquid like maple syrup or agave, just make sure to add it to the milk mixture and don’t add it to the aquafaba while it’s whipping up. I find that the powdered sugar is a little lighter and smoother than other sugars, but regular granulated sugar works well too. Great idea for the coffee! Thanks!
delicious ice cream
Wow….this stuff is amazing! I’ve tried making my own ice cream before but its always a pain. This couldn’t be easier and you can make tons of it for almost nothing (I’m cheap and rarely buy it at the store due to the expense).
My kids love it and don’t even realize what they’re eating. Thank you for inventing so many great recipes!
You’re welcome Hannah! So happy to hear that you and your family like it! 🙂