Soy Yogurt (How to Make Yogurt from Soy Milk)
Vegan soy yogurt that’s thick, creamy, and delicious! Free of sugar and gluten and made with soy milk and everyday probiotics! It’s so easy to make your own you may never need to buy vegan yogurt again!
Living without dairy for the past 24 years, I have made many attempts to make my own vegan soy yogurt. Years ago, the Silk brand sold large containers of plain and vanilla yogurt. These were great and my family loved them.
Before going vegan, I used to make dairy yogurt in a cute little yogurt maker, but it was extremely fussy and messy. After going vegan, I made a few cashew/oat yogurt attempts, but they were equally fussy and messy, and never turned out right. I have a lot of confidence in your recipes, so when I decided to try this one I doubled it right off the bat. Monica, you are a genius! I cannot believe how easy it was. I snuck a little taste as I was transferring it to containers, and I am so thrilled. This is easily half the cost of store bought yogurt, plus less waste and no additives. Thank you so, so much!!
— Lindsay
Over the years the containers got smaller, they got more expensive, and they changed from organic to non-organic soy. I tried many other brands and varieties including coconut and almond yogurt, but my family hated them, and they just wanted soy yogurt again.
Homemade soy yogurt is ticky
I like the challenge of making things vegan, so I took on the yogurt challenge with a smile. That is… until I failed about 20 times. It would come out occasionally, but it never really tasted as good as the vegan soy yogurt that I used to buy until I started to use the Instant Pot method with plain unsweetened soy milk.
What method should I use to make soy yogurt?
I have used many methods over the years. I made it in a slow cooker, in the oven with the light on, and even borrowed a friend’s yogurt maker. The yogurt maker had the most consistent temperature, so it did work the best, but it only made very small batches. It would take ½ a day to make it and 15 minutes for my family to eat it all.
Is an Instant Pot worth it?
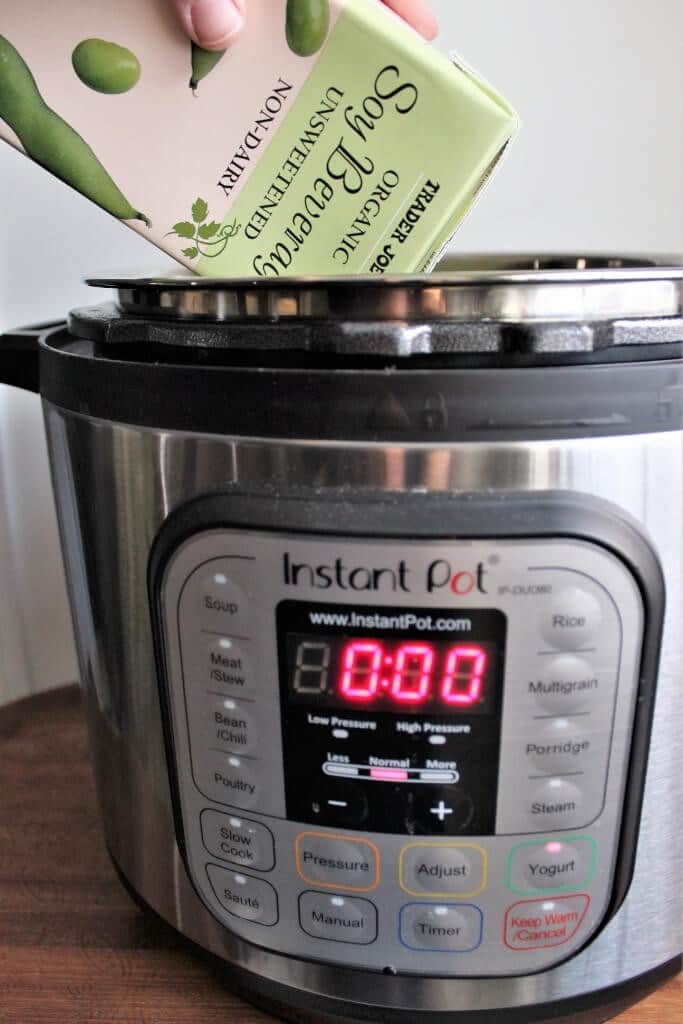
Yes! I finally splurged and bought an Instant Pot with a yogurt setting! It makes it so much easier, and it’s totally worth it if you plan on making yogurt regularly! Instead of pouring milk into little jars, you can just pour the milk directly into the instant pot and you’re ready to go!
I frequently double the recipe and make 8 cups of yogurt at a time.

Making this vegan soy yogurt with an instant pot is so easy, that my 9-year-old has actually claimed it as his job.
How to make vegan soy yogurt
Step 1 – Simply pour a 32 oz container of soy milk into your Instant Pot.
Step 2 – Add the starter (or probiotic for the first batch).
Step 3 – Give it a little stir.
Step 4 – Press “yogurt” on the Instant Pot and set it to 15 hours.
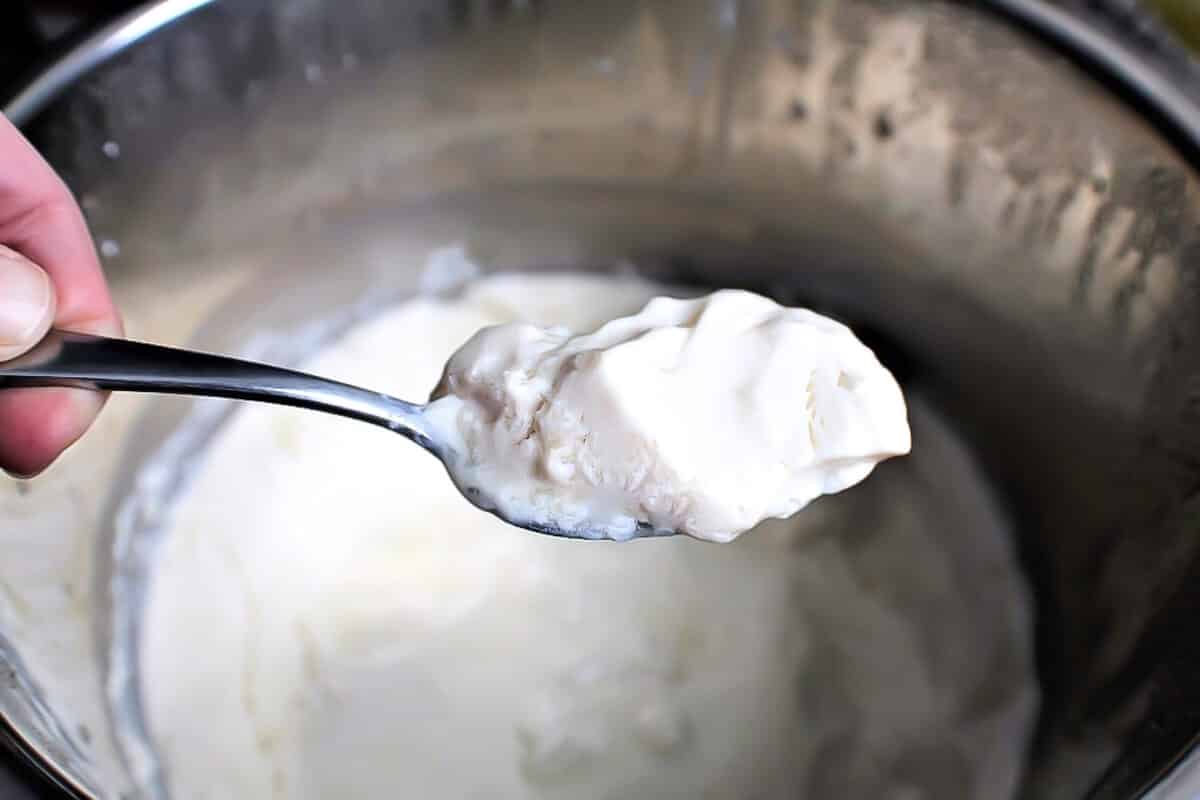
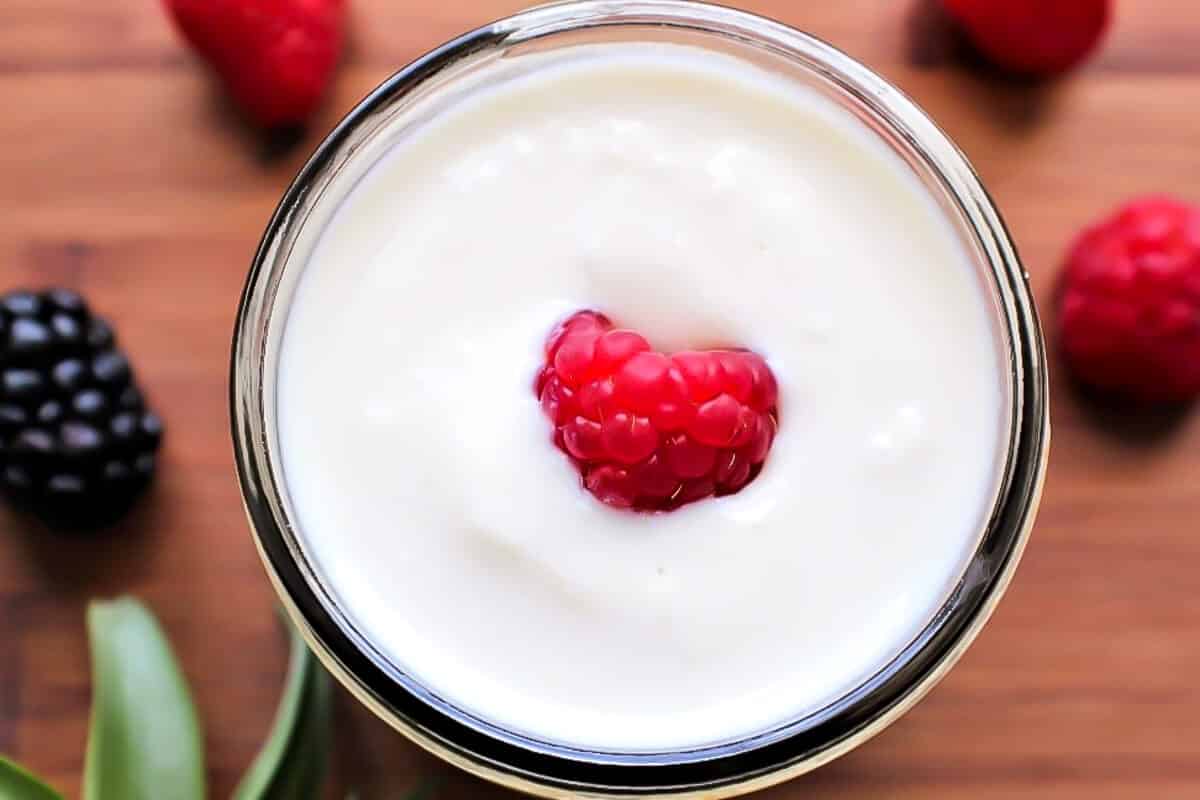
Step 5 – Come back 15 hours later to find beautiful thick, creamy, vegan soy yogurt!
Note: (It will start to look like yogurt after 8 to 12 hours, but I always give it 15 hours to allow more beneficial bacteria to grow and give it more of a yogurt tang).
What type of soy milk is best for soy yogurt?
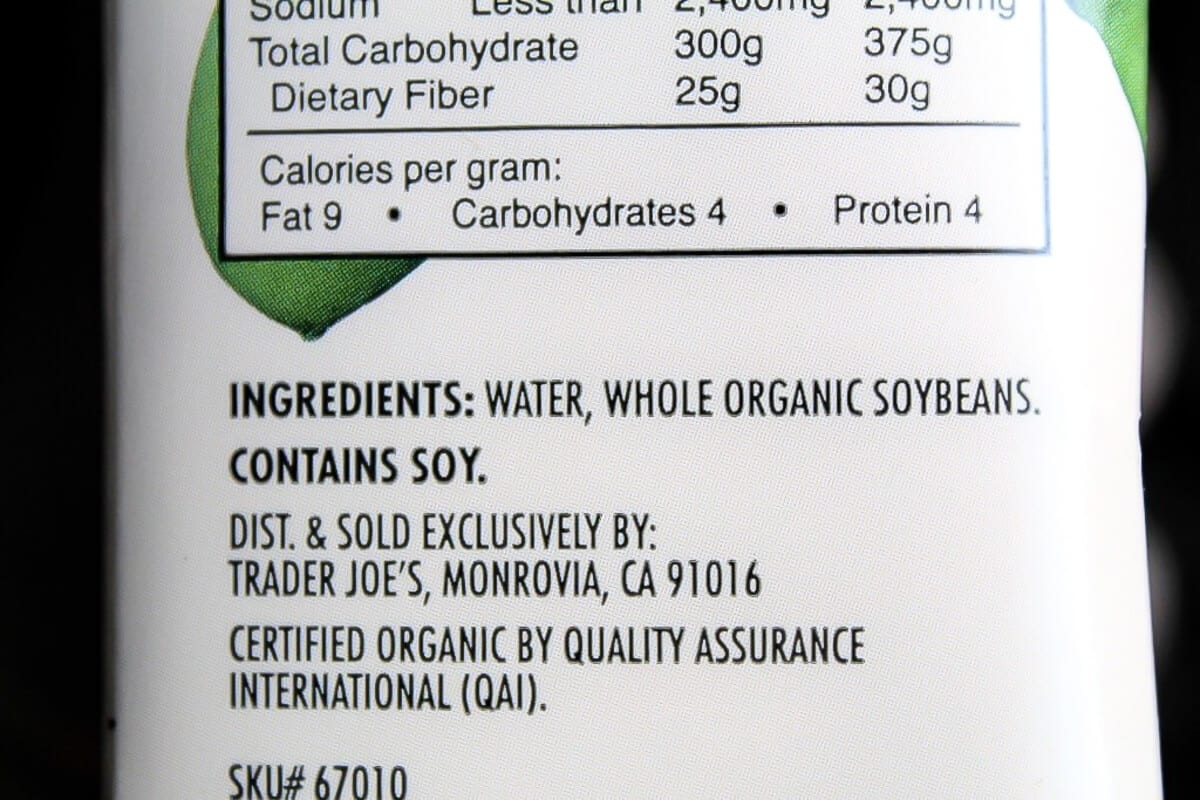
There are only a few ways that you can mess up this yogurt, the main way is to use the wrong soy milk. There are so many kinds out there it will make your head spin. However, there are only a few that work to make vegan soy yogurt. You must use the ones that only have soybeans and water, any added sugar or vanilla will ruin your yogurt! I like Trader Joe’s brand, but Westsoy also makes a plain variety that works well too.
What is the best starter for soy yogurt?
At first, I was intimidated by the yogurt starter, but it turns out that you don’t need anything fancy. You can just use any probiotic that comes in a capsule that pulls apart to sprinkle the contents into the soy milk. (I use a general acidophilus probiotic with 2.4 billion CFUs per serving that comes in a vegan gel cap).
Pro Tips
- Make sure to use a whisk and stir well after adding each capsule until you can’t see any powder.
- Only 5 of these capsules are needed to put in 4 cups of soy milk the first time you make your yogurt, then save a ½ cup of yogurt to use as your starter and you won’t need the probiotic again unless your starter stops working. (Starter typically lasts a few months. Don’t use it if it changes color or starts to smell funny).
Your first batch of yogurt will come out okay, but not great. Don’t worry, this is normal. It is only after you save your starter and make another batch or two, that your yogurt will start to taste amazing! I have been using the same starter for months now and it just keeps getting firmer and tasting better with each batch.
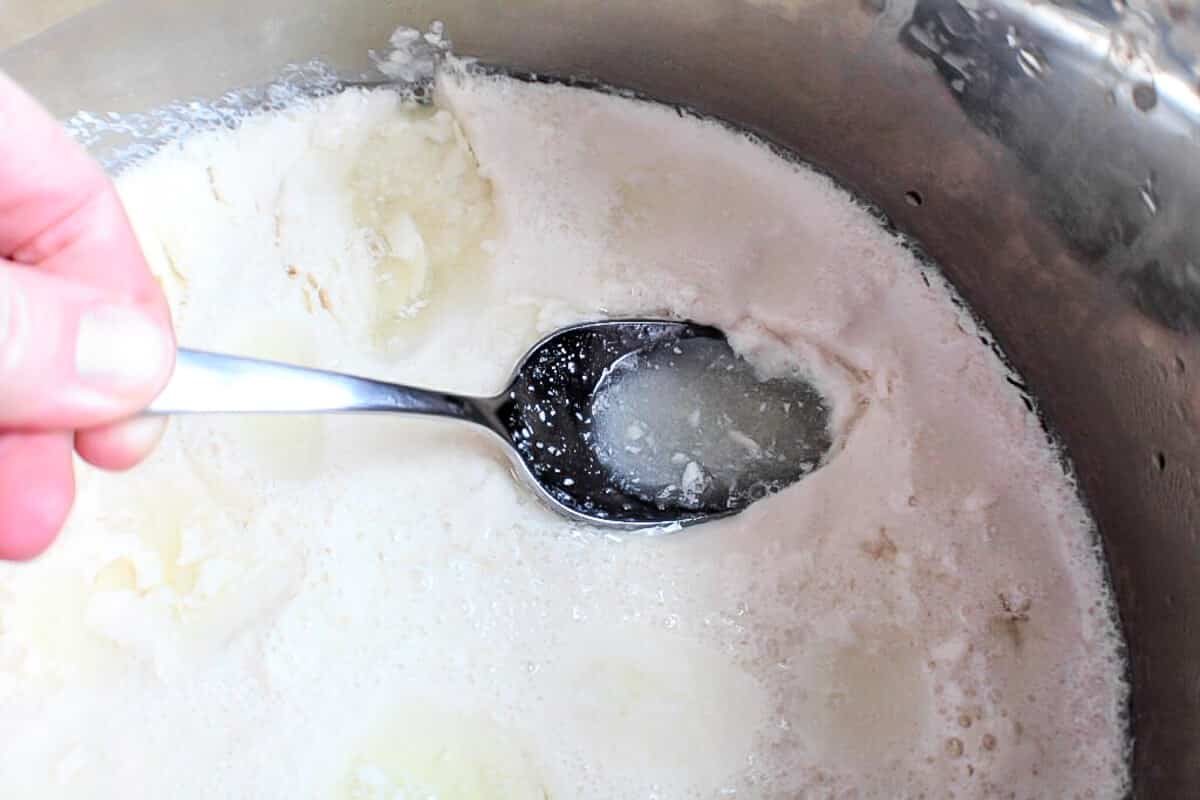
After your yogurt has finished, allow it to cool to room temperature and use a large flat spoon to remove any liquid that has formed at the top, then transfer it to containers with a good seal.
How should I store the starter?
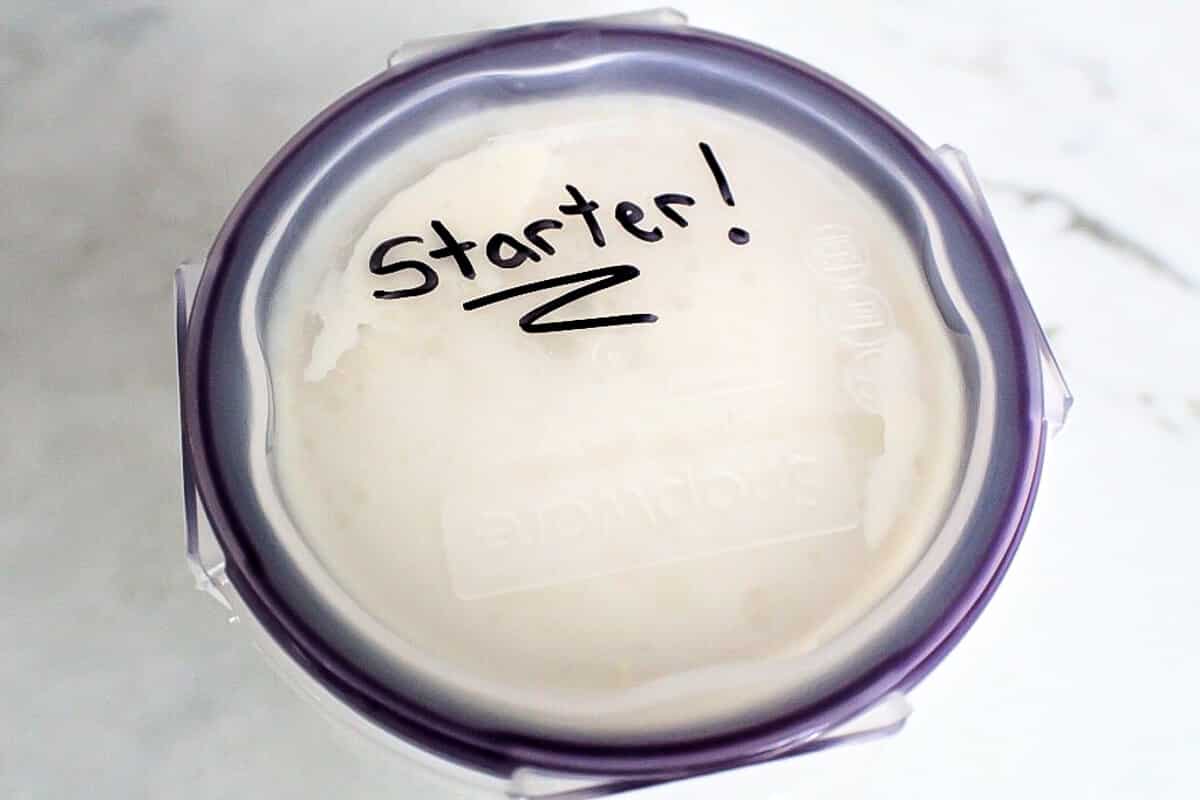
It’s hard to remember not to eat up the last ½ cup of yogurt, especially if you have other people in your house who may unknowingly gobble it down.
I store my yogurt in glass containers that have snap-on sealed lids to keep it airtight. Use the size that holds 4 cups to store the yogurt for the family to eat, and then store ½ cup of starter in the smallest container and write starter across the top, so that no one touches it.
How long is the starter good for?
Use the starter again within 10 days to make a fresh batch of soy yogurt. (Make sure your starter is stored in a clean and sealed container)!
How to make vanilla soy yogurt?
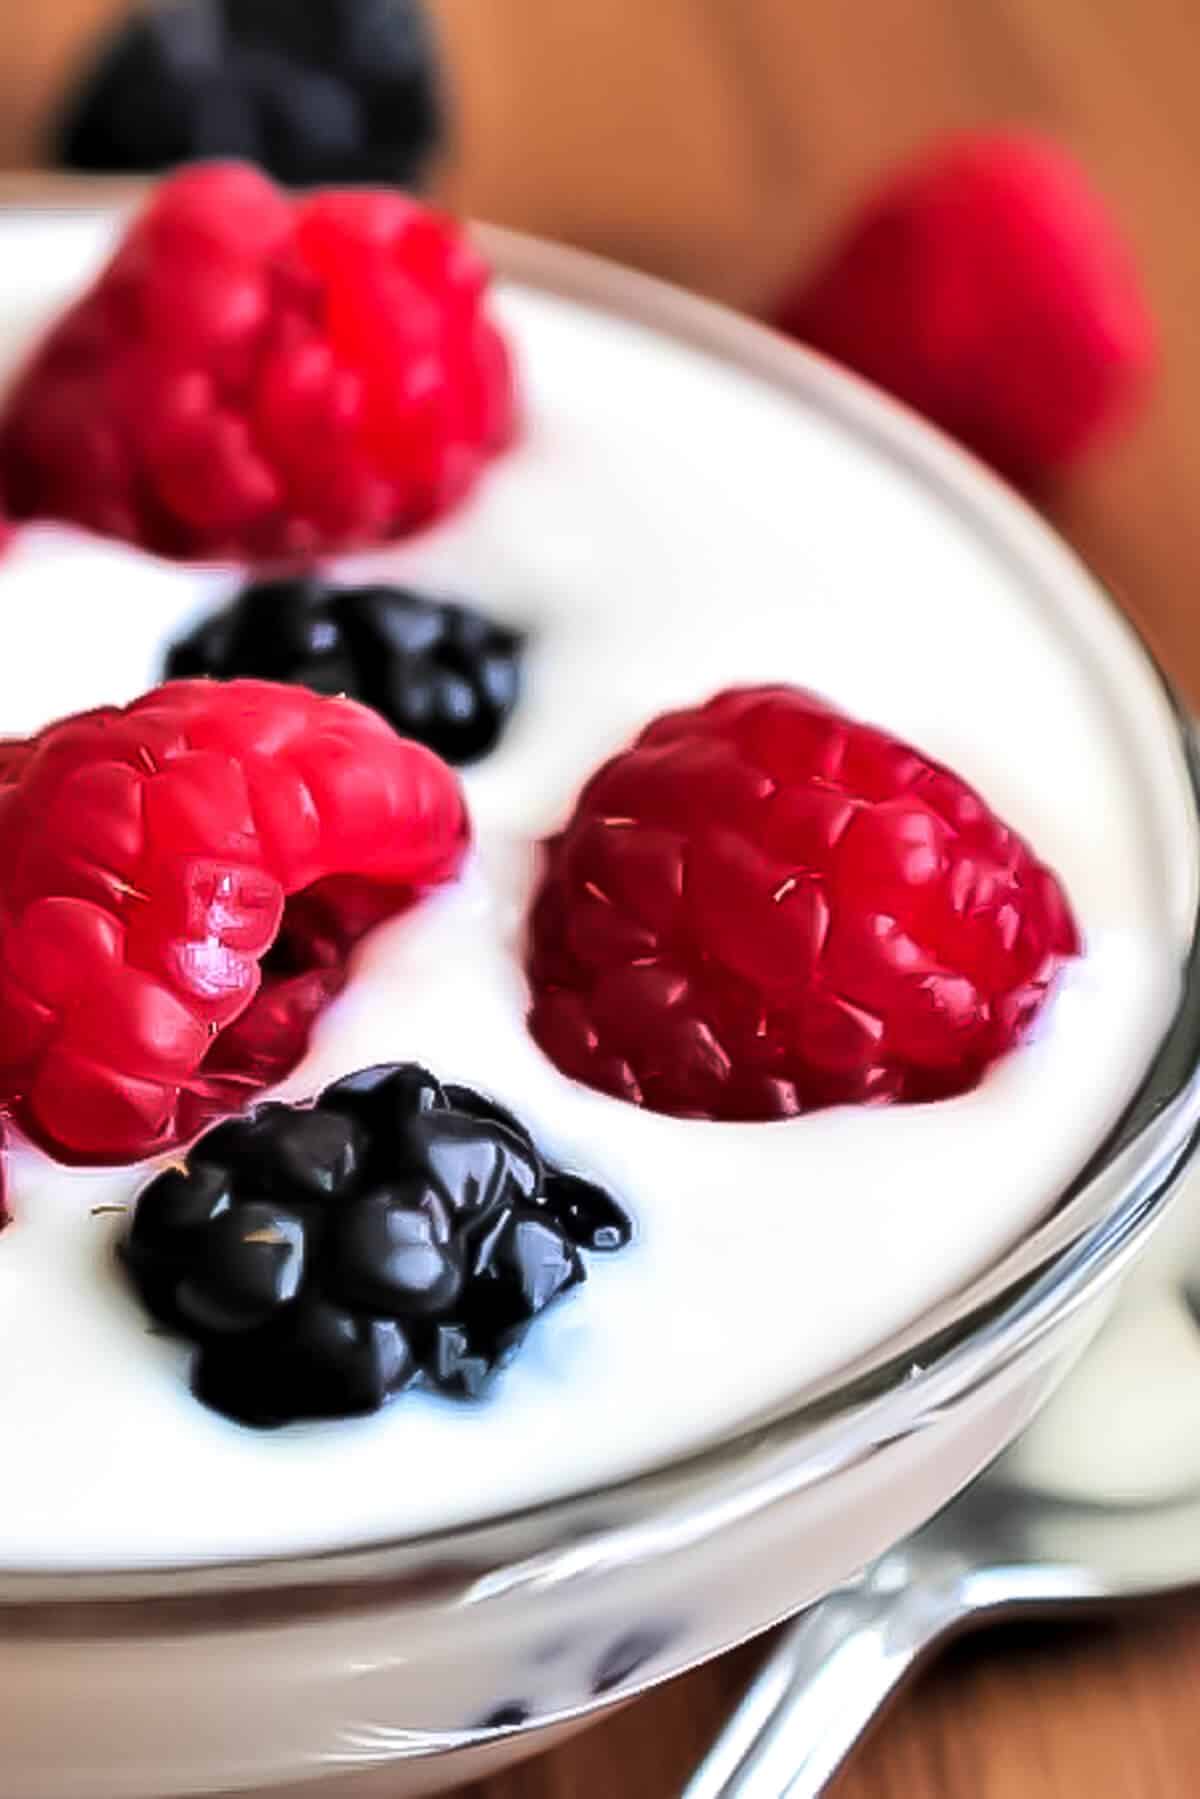
Plain yogurt has a sour tang to it and you may want to add a sweetener. You can keep it plain and let people add berries, sweeteners, or vanilla extract. If you know your family will want vanilla, add 1 tsp of vanilla extract and 2-3 tablespoons of sweetener of choice to 4 cups of yogurt for vanilla yogurt.
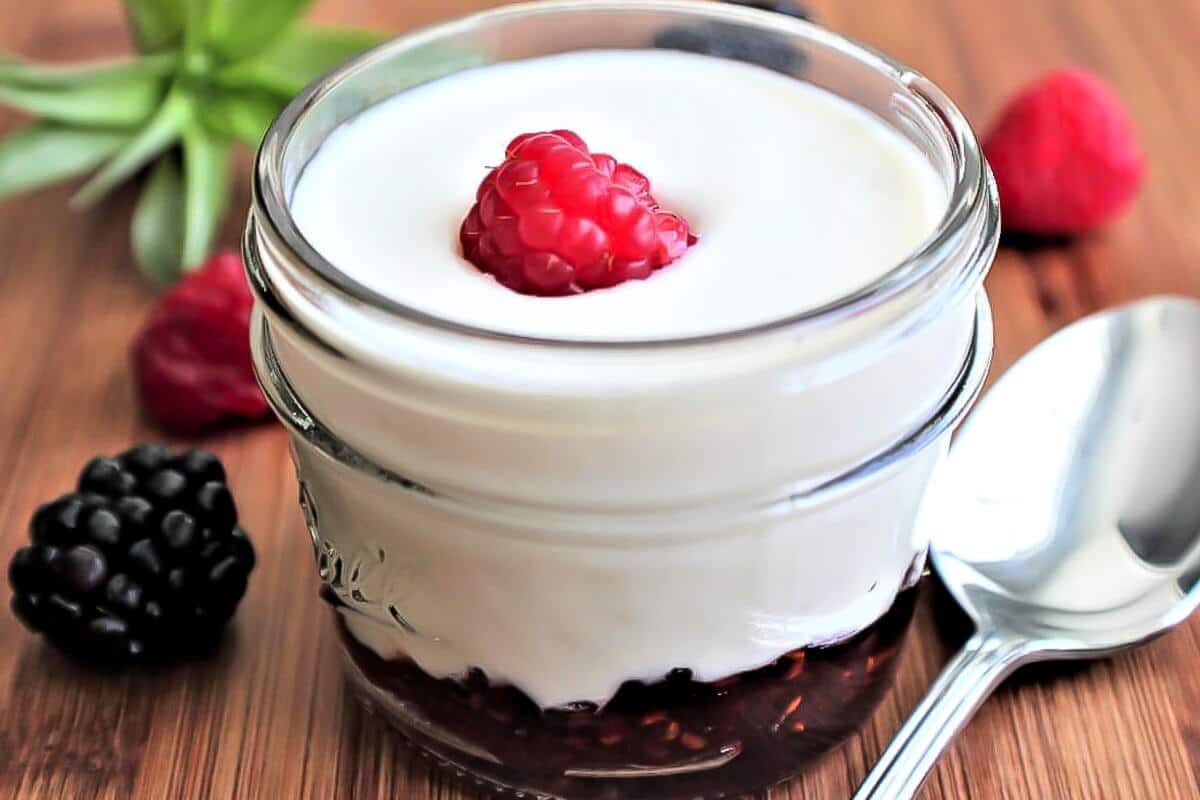
Another great trick that I love is to add 100% fruit preserves or jam to the bottom of a jar and layer the top with yogurt. One batch will make about 10 of these fruit on the bottom jars ready to grab and go! You can also make the yogurt in these jars! Check out this post from Little Blue Plates to see how.
How to make Greek-style yogurt
I frequently get asked how to make it thicker vegan Greek-style yogurt. You can drain the yogurt in a colander lined with a few layers of cheesecloth to drain off excess liquid. However, I have found that the best way to make it thicker is to blend the soy milk with silken tofu before adding the culture. Check out my full recipe for vegan Greek yogurt.
Troubleshooting your soy yogurt
- You must use unsweetened plain soy milk with the only indigents being soybeans and water. If there are any other ingredients in it, it will NOT come out!
- You don’t need to preheat the milk if you are making it from a new sealed container. If you make a smaller batch from milk that you already have open, you will need to heat it to 180 F first to kill any bacteria that may have formed.
- Open the lid of the Instant Pot and flip it over quickly to capture any condensation at the top of the lid.
- Drain off any liquid that has formed at the top of your yogurt.
- Use a large flat spoon to carefully remove the liquid at the top of the yogurt.
- Let it cool in the Instant Pot before transferring it to another container or stirring.
- Once you have made your first batch, don’t throw away your starter! It gets better with each batch!
- If not using an Instant Pot, make sure you have a way to keep your yogurt at a consistent temperature of about 112 degrees F for 12- 15 hours.
- Make sure to time the start of your yogurt at a time when you will be home 15 hours later to refrigerate it.
- Don’t stir your yogurt after you have mixed in your starter.
- Make it at least 3 times from the starter to get the best quality taste.
- Don’t make it from a probiotic and expect it to taste like store-bought yogurt after the first batch.
Why make your homemade soy yogurt?
- It has more beneficial bacteria! Many brands are pasteurized, killing most of the probiotics.
- You can control how long you ferment it to grow more beneficial bacteria and control the taste.
- You can store it in glass containers to avoid the BPA leaching into your yogurt.
- You can pick the probiotics that you like best to use as a starter.
- Soy yogurt is free of refined sugar and you can control the type and amount of sugar in your yogurt.
- The Instant Pot makes it easy!
- It’s fun! (It kind of freaked me out at first, but now I love it! It’s like magic to see your soy milk change to thick creamy yogurt, and I’m protective of my little starter army that makes this magic happen)!
More homemade vegan staples
Learn more about how to make more homemade vegan staples like vegan butter, mayo, cream cheese, and caramel sauce in my cookbook The Ultimate Guide to Vegan Staples!

Soy Yogurt- The Best Vegan Yogurt
Ingredients
- 1 32 oz. container of unsweetened plain soy milk, water and soybeans as the only ingredients
- 5 probiotic capsules with 2.4 billion CFUs, or any number of capsules totaling 12 billion CFU (first batch only). For all subsequent batches, use ½ cup of plain yogurt from your last batch as a starter.
Equipment
Instructions
- Add the contents of a new factory-sealed container of soy milk directly into a clean instant pot.
- Add the probiotic (or starter from your previous batch).
- Stir well with a whisk until completely blended.
- Push the yogurt button on the Instant pot and use the + sign to change the time to 15 hours.
- Place the lid on top and make sure the valve is turned to vent to allow humidity to escape.
- Wait 15 hours and come back when the yogurt timer beeps.
- Use a spoon to drain off any water that formed at the top of the yogurt.
- Let it cool to room temperature and transfer to sealed containers.
- Save ½ cup of yogurt with nothing added for your next batch.
Notes
- The yogurt will taste more like store-bought soy yogurt once the culture matures and you make the yogurt from the starter.
- Reduce cook time by an hour or two for less tangy yogurt.
- Increase cook time by an hour or two for more tangy yogurt.
 Did you make this recipe?Please leave a star rating and review below!
📌 Be sure to follow me on Pinterest for new vegan recipes!


I’m delighted this worked on my first try. I have been missing a good tangy plain yogurt since giving up dairy. I have found nothing comparable in US stores to compare to the tang of a Greek yogurt that was not also super sweet. Thank you!
You’re welcome! I’m so happy that it worked well for you, Carissa!
If you were using a yoghurt maker, how long would you leave it? Still 15 hours? I tried this and it’s nothing but liquid after 15 hours (and a couple of hours of refrigeration). When I made yoghurt with actual milk, it takes only six hours. I used homemade soy milk (just beans and water) – and the suggested number of acidophilus capsules. I saw Shoshi’s comment about it not working until she used dairy yoghurt as the starter, so I’ll try that. It could be the capsules are old (got them from Amazon, so … ya know).
I don’t recommend using homemade soy milk, especially for the initial batches. You may have started with more a more watery milk than the store bought versions. I have had many people report that it works well in a yogurt maker, but I only have and Instant Pot with a yogurt setting, so that is the only method that I use. If the probiotic is old, that can also greatly change the outcome.
Hi there! The first batch I made was shockingly good. I was expecting it to be runny and not all that tangy but it was pretty thick once I separated the water from the top and tasted great. So great that right away I saved a bit more than 1/2 cup of starter right there in the crock pot and dumped in a fresh new container to start a second batch. For some reason the second batch was runnier and no water separated off but still tasted sour enough that I think it’s OK. Any idea why this second batch wasn’t great? And should I be sterilizing the crock pot before use and utensils used to stir the probiotic in? Thanks for your help!!
Each batch comes out slightly different for me. Generally they get better with each batch. You do want to make sure everything is very clean to start with so you don’t introduce any unwanted bacteria. You also want to be sure that it has a way to vent the steam while incubating to cook off some of the excess water. Hope that helps.
What if the soy milk has a vitamin and mineral blend added to it? Will the yogurt not set?
Yes, I have tested it with many different types of soymilk, but it only works with the ones that contain only soybeans and water. Any other ingredients make it not set. Enjoy!
Later today – I got out my old yoghurt maker with its individual pots, and made another batch, this time using some Fage dairy yoghurt to start it, and it has worked a treat. I’ve just tasted the first pot after about 13 hours’ fermenting, and it’s pretty good – I ate it warm straight from the machine so I expect once it’s cold it will set up a bit more, and I think with subsequent batches, it will get thicker and more tangy. Anyway I am very happy to have made a successful batch! I shall continue with this method.
I appreciate your progress report – I had the same bad results first time – so I will try your method of using dairy yoghurt as starter. THANKS!!
I’ve just tried this and it didn’t set at all. I left it on for a few more hours and it still didn’t set. Just warm milk.
My instapot doesn’t have a yogurt setting. Would I use the slow cook setting?
No, it has to stay as close to 112°F as possible. You need a yogurt setting or a yogurt maker.
What is the best way to add protein and calcium to this?
To add more protein and calcium, you can add a box of silken tofu, there are instructions for this in my Greek yogurt recipe… https://thehiddenveggies.com/vegan-greek-yogurt/
I am not sure how much starter you add to each batch of yogurt? Do you use the 1/2 cup t.hen pull a new 1/2 cup from the new batch. This looks great and so healthy. I am anxious to try. Thank you for sharing
Yes, use 1/2 cup from the old batch to make it, then save another 1/2 cup from the batch for the next one. Enjoy!
I can’t wait to try this! My probioic capsules are 30 billion CFU do can I use just 1 or 2 of those?
You should be okay with one, but you can use 2 just to be sure that it comes out.
Hello, Monica, I just discovered your soy yogurt recipe this AM and can’t wait to try making my own soy yogurt! I have on hand an “ultra strength” probiotic that has 20 billion CFU. Do you think this would work OK?
It should work okay, it will get better with each batch, so even if it is a little watery with the first batch, the next batch will be better.
Hi! I tried your recipe twice and I had the same result happen twice. 😔 I use the Trader Joe’s soy milk and 5 capsules from your link. Each time after 12 hours it is still all liquid so I then leave it for the full 15 hours and it is thick chunky big yogurt piece on top floating above the liquid. I use an instant pot yogurt setting with the lid on and able to vent. I set it to normal mode and my soy milk comes straight from Trader Joe’s and into the instant pot. Do you have any suggestions as to why I have lots of liquid under my yogurt? I feel like I must me doing something wrong. 😔 Have any pointers for me? I’m so determined to make my own yogurt. I don’t want to give up!
Hi Athena, It sounds like you did everything right. The only other thing is to make sure that your IP is very clean before you start. I have mad hundreds of batches of this yogurt over the years and sometimes it randomly doesn’t work for me either. I think that it has something to do with the processing of the soy milk. When this happens, I buy another carton with a different batch number and it usually works. (I had a bad batch of it this summer from TJs milk too, so maybe just buy another carton with a new batch number.) You can still use the yogurt that hasn’t completely set for smoothies so it doesn’t go to waste.
I have made this a few times and it tastes good but it’s very very runny. I’m using the exact right soy milk and probiotics for 15 min . Am I removing it from the instant pot (into jars) too soon? I even tried straining it this time and I it ran clear through a nut milk bag.
Are you setting your IP to vent while it is fermenting? Allow it to cool with the lid off and strain off any excess liquid from the top before stirring it or putting into jars. It also gets better with each batch as your starter matures.
I have made this a few times now and so the yogurt is becoming thicker. The recipe is so easy and my yogurt is delicious. I make my own soy milk, so I strain the milk before putting it in the Instant Pot.
Thanks so much for sharing this great recipe!
I was so glad to come across your comment that you MADE your own soy milk and the recipe still worked. When I attempted this a few years ago, I was only successful using a store bought soy milk, which was unfortunate because it was pretty expensive. Did you do anything different when using the homemade milk? Thank you!
I have left a review after the first time I made it and gave 4 stars only because it was watery. But after the second time much less and each time after that even better! So I wanted to give the well deserved 5 stars. I have purchased lecithin, agar agar and tapioca flour to try making the butter and cheeses! Will comment on those after making!
I’m glad that it turned out better the second time! Enjoy!
My first batch actually came out quite tasty! I’m wondering though, if I make my own soy milk, I know I need to heat it up to 180°F. Do I then allow the milk to cool off to 112°F? I’m assuming any higher temperature would kill the bacteria from my starter.
Thanks for the great—and easy—recipe!
So glad that your first batch turned out well! Yes, if you use homemade soy milk or any container of soy milk that has already been opened, you have to bring it to 180°F first. Enjoy!
Do I have to allow it too cool below 180° before adding the starter?
Yes, it need to cool back down to below 112°F before adding the starter or it will kill it. Enjoy!
I just found this great recipe and article. Looking to make soy yogurt for the first time. Wondering for those of us that don’t want to buy an Insta pot, which would be the best type of yogurt maker to buy… Or does it really matter? anyone that heats And has a timer will do? Thanks so much.
You can use anything that will keep a consistent temperature of around 112°F for 15 hours. Enjoy!
I made my first and LOVED it! I would like to double the next recipe. Am I to assume the same amount of cooking time (15 hours), 64 ounces of Soy milk, and 1 cup of starter?
Great! I’m so happy that it turned out well for you. Yes, you are correct on the times and amounts. Enjoy! 🙂
Why is my yogurt pebbly? I started with an 8 oz container of store bought yogurt I hoped still had live cultures because finding straight acidophilus capsules are next to impossible in my city. The store bought yogurt did have live cultures and made a thin yogurt more like kefir in consistency- each time I’ve made it it lacks the nice creamy consistency I’m looking for and instead has little grainy like pebbles. I’m starting my 4th batch today. The yogurt has the annoying habit of separating the water at the middle of the jar instead of at the top after 3-4 days. It is getting thicker with each batch. The last couple of batches I’ve mixed the 1/2 cup of yogurt from the previous batch into the new quart of soy milk using a high speed blender. This has made it frothy and that may be the reason for the pebbly bits. This time I used a wooden spoon and a whisk. I’ll be iinterested in your take on my bits of pebbly curd. I do use Trader Joe’s organic soy milk. Thank you!
Hi Nancy, I’m not really sure, but it may be from blending it in the blender. I’ve noticed that if it gets foamy from over whisking, the bubbles tend to stay and gives it a funny texture. I stir it well, but not enough to make it foamy. Hope that helps.
I’ve been using your method for a couple of years now with great success. I’m only sorry it’s taken me so long to come back here to thank you. At first, the only soybean-only milk I could find here in Canada was Edensoy (imported from the US), and even that was hard to find. And very expensive! I actually had to order it online. However, I have found a Canadian made brand of organic unsweetened soy milk that works every time for me. It’s called Natura and is made in St-Hyacinthe, Quebec. It’s MUCH cheaper. It does have added vitamins and minerals, but it still works for making yogurt in the Instant Pot. I thought other Canadians might like to buy Canadian, too. In Ontario, where I live, it’s available in all the stores under the Loblaw banner, such as Real Canadian Super Store, No Frills, etc. Thank you again, Monica!
Made this, really liked it. One question: I wasn’t able to make my next batch in time to use my starter and had to use probiotic capsules again. Can one extend the life of the starter by freezing it?
Just tried this; it turned out really well! One comment on the technique: spooning off the water from on top of the yogurt is easier said than done. I ended up pouring the contents of my Instant Pot through a very fine strainer, and that got the job done much faster (even though I had to do it in multiple batches as it was a tea strainer)
I’m glad that the recipe worked well for you, Sam!
Hi Monica, because the instructions say to keep the instant pot lid on “vent,” can we just use a glass lid instead?
My Instant Pot will not turn on unless the lid is locked into place, so I’m not sure how you would do this.
I doubled the batch (64 oz) using the west life unsweetened soy milk and 10 of the probiotic capsules recommended in the post! After 15 hours it’s still totally runny/milk consistency 😭 can I put it back in longer or does it have to be tossed??
You can try stirring it well and giving it a few more hours to firm up. Sometimes if you don’t stir in the probiotic really well, this will happen on the first batch. I don’t recommended doubling the recipe until you have a good active starter yogurt. (After about 2-3 single batches.)
I actually made this for the first time in individual glass jars set in the Instant Pot and it turned out great! Since I am the only one who eats the yogurt in my house and I have to limit my serving size due to mild GOS and fructan intolerances, do you know how long this will last in the fridge stored in glass jars?
It will last about 5 to 7 days in the fridge. Be sure to use a very clean spoon to scoop it out so you don’t contaminate it and it will last longer.
I scanned thru comments and see you also noted Ripple (pea protein, not soy) as an option, but I am wondering if another high protein nondairy will work. Good Karma Flaxmilk+Protein is my favorite for drinking/eating etc, and I do have to limit soy for health reasons. I could see almond or oat not working d/t protein level, but have you any idea? Thanks.
I’ve been making soy yogurt for several years, but I have never been able to find out exactly what nutrients are in the whey. I asked on google and the answer I got was “If it’s not dairy it’s not whey”. I’m going to start watering my plants with it. What else?
Works like a charm every time! I’ve made it 3 times already and the yogurt is getting better and better. I strain the yogurt for a few hours in the fridge to make it even thicker. I use Eden Soy – unsweetened in Canada.
I’m glad that the recipe is working well for you!
Is it possible to make this soy yogurt using store bought vegan cashew yogurt to replace the probiotic capsules? If yes, what quantity of the cashew yogurt is needed?
I have tested this many times and have never had it work for me. Probiotic capsules work best.
Thanks Monica!
Can I use coconut milk please?
I have tested it with coconut milk and it has not turned out well. The only thing that truly taste like real yogurt is soy milk.
I just bought an insta pot. The yogurt settings are low, medium, and high. Which do you suggest I use? For high, it does not allow you to set the timer for 15hrs, only low and medium. which would be my best option?
I have never seen this before, usually they just keep the temperature at 112°F for yogurt. I would set it to medium and assume that would be the normal yogurt temperature. Let me know how it works.
Thank you for this incredibly simple recipe. The first batch (with probiotics, could not find commercially sold soy yogurt without sugar or even PLAIN) came out great. Given you said not to have high expectations of the first few batches, I can’t wait to see how good the next few will be!
I’m so happy that it turned out well for you!
Hi, I see you have a recipe for greek style yogurt using silken tofu but have you tried straining the soy yogurt to make it thicker? I do this when using milk to make yogurt and strain out the whey so am hoping removing the water from the soy will give a similar result.
Yes, you can use a cheese cloth to strain excess water out of the yogurt, but I find that you are only left with a small amount of yogurt after you do this and it’s still not as thick as when you use silken tofu mixed with the soy milk.
I made this with 8 oz soy milk in a 16 oz Mason jar, using the suggested Trader Joe’s unsweetened soy milk (which is just soy beans and water), plus the contents of 1 capsule of “Now Foods Probiotic-10”, which has 10 different bacteria strains (including Lactobacillus Acidophilous – which seems to be the sole strain in the suggested “Country Life Dairy-Free Acidophilus with Pectin, 2.4 Billion CFUs” probiotic). After 12 hours overnight on the Yogurt setting in my InstantPot, it came out great! Thick and tangy.
My question is since I used a probiotic with 10 strains for the starter, how many of those strains end up in the final yogurt? I’m hoping it would be more than just Lactobacillus Acidophilous? Or does only one strain outcompete all the others for food and take over and wipe all the others out? I figure the more beneficial strains in the final yogurt, the better, right?
Thanks so much for the recipe!
I use a bit of soy yoghurt as the starter, and I top that with soy milk.
I’m curious to know what extra nutrients my soy yoghurt has, compared to the soy milk.
Also, once I add flavours (beetroot powder/ vanilla essence), the yoghurt tends to become more watery. Do you know how I can thicken it up again?
Thanks so much :))
You can use silken tofu to thicken up the yogurt. You can check out my vegan Greek style yogurt recipe to see how I do it. Here is the link… https://thehiddenveggies.com/vegan-greek-yogurt/
I’ve been making soy yougurt in an IP for quite sometime now, but I always like to check out other recipies. I wanted you to know that we use Kirkland brand Vanilla Organic Soy beverage which does have Sugar (6g) a bit of salt (95mg) and assorted vitamins and minerals. I use three quarts and I usually have 3-4 cups of whey left over after we filter it to our desired consistency. You can also use the whey as a starter without any loss of yogurt. We also use the whey for baking, oatmeal, plant fertilizer or simply put it into our compost, which loves it. The yogurt and the whey separate, but in our system the yogurt floats on top of the whey so we scoop it out with a sieve. We love it as do our visitors when they try it. When we need to start freshm instead of probiotic capsules we use Bella Bella non-dairy yougurt powder. It works very well. Thanks for what you do!
I did not take a 1/2 cup out after making the initial yogurt to save as my starter. I have been just taking a serving out of the original container that I made the yogurt in last weekend. Just been using a spoon to spoon out my breakfast portion out and then closed it back up. Nothing else added to it. Is it safe to pull 1/2 cup out and use to make yogurt today? Or should I start all over with the probiotic and soy milk?
Also, if I’m doubling, should I get use 1 cup to the quart of soy milk? Just checking!
Thank you for this wonderful recipe!!!
It should be fine as long as it has remained clean. If it gets cross contaminated with a dirty spoon or something, it can mess up the starter.
Have you tried using Silk unsweetened organic soy milk?
Yes, I have and it didn’t work. I have only had success when the ingredients were only soybeans and water.
My instant pot yogurt function goes to a boil first. Do I not need the boil setting and can go right to 10 hours? I have been using the boil function first and my yogurt is turning out very sour. Thoughts?
You don’t need to boil it if you are using a freshly opened sealed container of soy milk. I’m not sure if it would make it more sour by boiling it first. You don’t want to add the probiotic until is cools down though since boiling it would kill the probiotic.
Super easy and the best yogurt! Thank you for sharing it!
You’re welcome!
This is my second attempt. Both times it’s too runny. Tastes great. Any suggestions?
Make sure your IP is set to release steam. Also, you can take the lid off every once in a while and dump any condensation at the top of the lid, and spoon off any water at the top of the yogurt. You can also try my vegan Greek style yogurt recipe that is thicker. Here is the link. https://thehiddenveggies.com/vegan-greek-yogurt/
I cannot find soy milk in my country that has only soybeans and water. What is the reason that products with additives like thickeners won’t work?
I think that the additives inhibit the growth of the yogurt bacteria. I tested it many times, and it always failed with these types of soy milks.
Thank you for this awesome article. My yogurt maker instructions, told me to only use soy milk that had sweetener added, so I am so glad I read your article before I tried. It came out perfect my very first time, thanks to you! From my research and experience, here are my hints:
* Edensoy unsweetened soy milk works well.
* It helps to whisk in the culture so it gets evenly distributed through the soy milk, especially if you’re using the little cups.
* 17-1/2 hours made incredible yogurt!
Make it weekly. I love that I can use it in savory dishes or make it sweet with fruit. I even use it instead of sour cream with taco.
I’m so happy that you make this so often and have success with the recipe!
Hi Monica, can you use store bought Plain soy yogurt as a starter like in dairy homemade yogurts? And the vanilla and sweetener is added AFTER the batch is done yes? Thank you thank you!
Some people have reported that plain soy yogurt has worked as a starter for them, but I have tested in many times and it did not turn out for me. Most store bought yogurt doesn’t have enough live probiotics.
Monica, thank you for the recipe and website!
I accidentally discovered a recipe for myself that is very similar to yogurt. I was thinking about how to get something like a fatty dairy product. If you take soybeans, there is a lot of protein, but little fat. If you add coconut oil, you need to think about how to mix the fat with water. And in general, in the place where I live, soy, coconut and lecithin are not very common.
So I took peanuts, roasted them, get rid of the brown skin and blend peanuts with water.
Then we filter the peanut particles – they are very small and we have to stir the mass with a spoon so that the liquid can drain. We can beat this mass with new water several times, three times exactly.
But the milk is very tasty! I heated it with starch (4-7 grams of starch per 100 grams of milk), lemon juice and zest – and it turned out like yogurt! But at the same time very filling. It can also be frozen – it resembles ice cream (no ice crystals) – and its texture does not change.
Sunflower seeds are also found in some regions – in theory, they should also turn out well.
Wow! That sounds really interesting.
Mine is very watery, any suggestions? I strained the first batch and lost a lot. The second batch I did not strain and it was soooo watery!
Are you setting your IP to vent? Flip the top quickly after you open it and drain off any condensation. You can also spoon off any excess liquid from the top of it before stirring or removing it from the IP. You could also let it ferment for a few additional hours. It my be your probiotic.
Hi Monica, I am trying your soy yogourt recipe with Edensoy milk and probiotic capsules BioK in my Instant Pot; I hope it will turn out fine because I have had very inconsitent results in the past.
Will I be able afterwards to make new batches of yogourt with some of the yogourt I made precedently for ever or will the culture weakens with time?
Thanks,
Chantal
You will be able to make yogurt, by saving some from each previous batch for about 2-3 months as long as you are making a new batch about every 5 – 7 days. Then it seems to stop working as well.
Thanks!
My yogourt turned out very well; I used 3 capsules.
I am very glad; thanks for your recipe.
Chantal
So glad to hear it, Chantal! 🙂
We would love to start making this soymilk yogurt as soon as possible, but don’t have an Instant Pot. Can we make it with a Slow Cooker [like Crockpot] and just set it on LOW or WARM for 15 hours? Or is an Instant Pot absolutely necessary? Please let us know. Thanks so much!!!
Bren
An Instant Pot will give you a more accurate and consistent temperature, but you can put it in glass jars, then line the slow cooker with kitchen towels and set it to warm. You will need to check it with a thermometer occasionally to make sure the temperature is about 112°F.
Thanks so much for your input and your recipes, Monica. Maybe it’s time for me to just buy an Instant Pot and keep it simple! Can’t wait to start making vegan yogurt!
It makes it so much easier if you plan on making it a lot. You only need the small one to make yogurt if that helps.
I do plan on making yogurt often, but have one final question about the size of the Instant Pot.
What is the maximum amount of yogurt that can be made in the 3 QT mini pot VS the maximum in the 6 QT pot?
This would be SO helpful to know!
Thank you so much.
I’ve made this a couple times and it turned out great but the third time it curdled- not sure why. It tastes fine but just wondered if anyone knows what would cause the curdling. I followed the recipe exactly using my starter for the second batch.
Thank you!
Hi Monica, I’ve made multiple batches and they’ve been great! The problem is it doesn’t last long, we eat it too fast – LOL! I would like to 4x the recipe and I see where I can do that on your recipe but it still states I only need to add 1/2 cup of my previous batch for starter. Is this correct? Thanks!
I also double the amount of starter when I make a double batch, so I would use 2 cups of starter for 4X the recipe, just to be sure it comes out well.
Before going vegan, I used to make dairy yogurt in a cute little yogurt maker, but it was extremely fussy and messy. After going vegan, I made a few cashew/oat yogurt attempts, but they were equally fussy and messy, and never turned out right. I have a lot of confidence in your recipes, so when I decided to try this one I doubled it right off the bat. Monica, you are a genius! I cannot believe how easy it was. I snuck a little taste as I was transferring it to containers, and I am so thrilled. This is easily half the cost of store bought yogurt, plus less waste and no additives. Thank you so, so much!!
You’re welcome! I’m so happy that the recipe worked well for you.
This is my first time making yogurt and this recipe was very easy to follow except that my final product is very clumpy and not smooth. Does this mean it curdled? Is there any step I possibly did wrong? The only thing I can think is that I moved it into containers to cool to room temp instead of letting it stay in the pot to cool to room temp. Any advice is appreciated!
I’ve made multiple batches and they’ve been great! The problem is it doesn’t last long, we eat it too fast – LOL! I would like to 4x the recipe and I see where I can do that on your recipe but it still states I only need to add 1/2 cup of my previous batch for starter. Is this correct? Thanks!
I made this for the first time and it turned out great! Thank you for the recipe.
You’re welcome, so happy that it worked well for you.
I made this today with a stronger probiotic capsules and reduced time to 12 hours. Yum! It is a little globby. What is the best method for straining. No liquid on top just a little inconsistent throughout. Thank you!
You’re welcome! 🙂
I used Trader Joe’s Soy Milk and only had dairy yogurt for a starter (Fage 5%) and it turned out great! Strained it for 24 hrs – so only had about 20 oz of yogurt nuts it’s yummy!! I look forward to using my new yogurt as the starter next time. Thank you for such an easy recipe!! 🤩
I’m so happy that it worked well for you!
Hi Monica,
Thank you for the recipe. I’m excited to try it.
Do you know if I can use plain, organic DAIRY- BASED whole milk yogurt as a starter to make soy yogurt?
You’re welcome, Sash. I have never tested it with dairy based starter, but please let me know if you try it.
I just made my first soy yogurt and used Fage 5% dairy yogurt as the starter – it worked great! I also strained it for 24 hrs and it teeny and thick – yum!! 😉
I made soymilk yogurt with Seed probiotic pills, had to take out the prebiotic layer. Put soymilk in two glass pint jars, I didnt use the entire 32 oz Eden soy milk container, i needed space on top to prevent spillage. I used a dehydrator set it for 15 hrs @ 108 degrees. I noticed it firmed up quick with liquid on top, left it till around 11 hrs, the liquid had dehydrated to a light brown. Skimmed off tops put in frig. Trying it out 2 days later, it tastes like whole milk dairy yogurt. Noticed top half is slightly curdled.still eating it, it tastes amazing. Hopefully I don’t get sick. Anyways next time when I see the liquid on top, i’m stopping the dehydrator. Curious if I started making soy cottage cheese?
Sometimes the first batch will have a light brown film on the top due to the probiotics, your next batch that you make with starter will not have that. If it smells bad or is pink, throw it out and start again.
I am eager to try this, but curious. I had read on other recipes that yogurt cannot be made in a metal container, and you should stir in the starter with a plastic or wooden spoon — or it would not work. That apparently is not true. Have you had any experience with this? Thank you!
I have successfully made this yogurt in the metal IP hundreds of times with success. (I also use a metal whisk to stir it.)
Great recipe, very detailed, which I appreciate. After my yogurt is done I like to strain in with paper coffee filters in a sieve to thicken it up a bit. i don’t know why it’s so hard to find plain, unsweetened soy yogurt in the store. It’s higher in protein like the dairy kind which is what I need. Thanks again for the recipe!
I’m so happy that you like it!
Seems like an expensive way to do it…but I might try it again because my way is to buy some unsweetened soy yogurt and use that as a starter. Unfortunately, they only make it in a large container, so inevitably, I end up throwing away a bunch — also expensive. My current batch is 2nd generation from a small Silk soy vanilla. It worked perfectly, but it tastes like artichokes.
I use NewRhythm Probiotics 50 Billion CFU(for 2 capsules) 20 Strains, 60 Veggie Capsules which I order on Amazon. I use 1 capsule (25 Billion) per liter if I use EdenSoy unsweetened, not vanilla, soymilk, or even ½ and1/2 with a liter of Trader Joes (TJ is only $2.29, while EdenSoy is over $4). EdenSoy has been hard to find lately, so the last batch I used TJ’s with 2 capsules, 15 hours in the Instant Pot on Yogurt setting. It was set well and firmer than with just 1 capsule. Today I decided to use 2 capsules in each liter jar while making 2 liters of Eden mixed with TJs. We will see tomorrow how it turns out. Sometimes when the probiotics are too strong it gets a lot of bubbles and doesn’t set right. Still tastes fine, though.
This takes a lot of experimentation and it depends on your climate, altitude, method, milk, etc. Keep at it. It is so worth it! We recently were away for a week and missed our homemade soy yogurt every day on our oatmeal and fruit.
Help me please!!!
I’ve tried to make soy yogurt with homemade soy milk (1lt) and 6 capsules of probiotics. I’ve left the container in the oven at 45Celsius for 11 hours and the milk hasn’t turned to yogurt at all. Should I wait a couple more hours?
I don’t want to throw away all this ingredients and effort…
I usually incubate it for 15 hours. It may take even a little more than that if your temperature is too low or not consistent.
After 15 hours of waiting and with no signs of thickening, I took it from the oven and put it in the fridge!!
I’m thinking of making tofu with this milk. Is it too risky??
It could also be your probiotics. 🥺
I’m afraid that it’s possible too. It’s so hard to find soy yogurt in the city I live that the use of probiotics is the only way. I had to choose between two different probiotics. One with 3 types of lactobacilus and the other with 14. I chose the one with 3 types. Next time I’ll try with the other!
When I used to do my yogurt in the oven, I would heat my oven to the lowest possible degree. When it beeped, I would yurn it off and turn on the oven light.
In the meantime, heat the soy milk a bit. It needs to be warm enough for you to put your finger in without burning yourself. Then, remove from heat, stir in your probiotics and put into jars. Stick your jars in the over for minimum of 8 hours (I usually left them there for approximately 10 hours). Voilà!
I love Trader Joe’s soy beverage- it’s so clean! In fact, whenever my local store runs out I panic and drive to one further away and stock up on like 10 (did this yesterday). I make this soy yogurt about every 3 days and I just make 1 Liter of it in a lidless mason jar (no clean up) in the instant pot, it turns out great! This is probably too low maintenance, but since I just pour it out of the mason jar into a small bowl, I just reuse the same mason jar when it gets low and refill it with soy beverage. It is so much easier than I thought it would be to make and I love that I have my own sustainable probiotic producing factory in my own home. I even add different probiotics to it every few weeks to get different strains. So good!
I’m so glad that you like it, Taylor!
Hi! I’m excited to try this but wondered if I could use store bought unsweetened almond milk yogurt as my starter?
No, almond milk does not work. It must be soy or Ripple milk.
Would this same recipe work but using the yogurt maker with the 7 individual pots, I cant see why not but could you please advise x
Yes it will work great that way too. I just find an IP easier, but you can certainty use a traditional yogurt maker.
I don’t have an IP or a yogurt maker, is there something similar I can use??? I really want to learn to make my own yogurt. Thx
You can use anything that will keep the temperature between 100-112° F for 1-15 hours. I’ve seen people use a heating pad with a towel between it and a container to keep it at that temperature. You could also try lining a crock pot with a towel and setting it to warm to try to maintain that temp.
Hi there! I tried looking through most of the questions on this post to see if anyone else had the same question as myself. I currently have Silk, Plain yogurt. It does have cane sugar in the ingredients, which put it at 5 grams of sugar for a 3/4 cup serving. Could I use the Silk yogurt as a starter; or do you advise against it since it does have some sugar? Thank you!!
I have tested this many times with different brands and none of them work. The only thing that I can get to work are probiotic capsules.
Thank you for your prompt reply. Thank you!
It works perfectly. 1 rounded tablespoon in a 12oz mason jar filled to where it curves in — I think it’s about 13oz, maybe 14, filled with plain soy milk warmed (I do it in the jar in the microwave) to 90-100F. Stir well. Put the lid on and shake well. Take the lid off and put it in the IP or bread machine on the yogurt setting for 14 hours (check it at 12). If you leave it too long, it will split and look scary, but just drain it (if you like it thick) and stir it and it will be fine. Not your best batch, but fine.
If you forget to warm the milk before you put in the milk don’t microwave it! Just be prepared to leave it to ferment a little longer.
I will say that most recipes want you to heat the milk to a boil and let it cool after to kill any potential bad bacteria. I don’t do that, but I’m not telling you not to.
I should add that I use WestSoy. I have done it with my own homemade soy milk, but I don’t like homemade soy milk and I don’t think the yogurt is as good, either. It’s something I’ve been meaning to practice.
I tried this and it came out lumpy but tasted good. This was only 8 hours in the IP so maybe that was the problem. I’m also unclear if the syrup and vanilla get added to the IP before or after it’s done cooking? Thanks for such an easy recipe, it gave me the courage to try it and have fun seeing what happens.
It will work best if you allow it to incubate for 15 hours in the IP. You don’t want to add any flavoring or sweeteners to it until after it is done incubating and be sure to leave it out of the starter for the next batch.
When I make yogurt from tofu in the IP I use 1/2 tsp sugar or maple syrup before incubating in the IP to feed the probiotics. If I want it sweeter, I add sweetener like jam after incubating. I’ve not tried this particular recipe or know why you got lumps. Maybe you grew the wrong type of culture?
It’s best to avoid using metal with probiotics and ensure your vessel is sterilized before using the IP. I sterilize aMason jar on Steam setting with water in the bottom and the jar on a rack in the IP. Then I blend the tofu, sugar, and soymilk to thin with an immersion blender. Next, I blend in the probiotic capsule with a chopstick. I use probiotics that have thermophilus and acidophilus in them. You can also buy probiotics from Cultures for Health specifically formulated for vegan yogurt.
Quick question: I see the starter is good for 10 days in the fridge is a yogurt also good for 10 days? Thanks.
Yes, it should be, just be careful to not cross contaminate it with a dirty serving spoon or it will go bad faster.
Thank you for your recipes. It helped me to start my vegan Yogurt for the first time.
You’re welcome! I’m so happy that you found my site. 🙂
I have made this twice now, both times were wonderfully successful. I used a soy milk from a local company that actually adds sodium bicarbonate(baking soda) as a regulator. I wasn’t sure it would work but it did! I used a yogurt maker I’d purchased years ago at a second hand store for cheap.For the first batch I used Jamieson Probiotic 10 billion active cells with 14 unique strains. For the second batch I used 3/4c of the yogurt to 40 oz of the same soy milk. Both are VERY thick. I allowed it to ferment 14 hours. To my mind it has the perfect tang. My non-vegan brother loved it and plans to make his own in his ip. Lots of fun making this. Thank you.
I’m so glad that this recipe worked well for you, Joan. 🙂
Do you or anyone in the community have a suggestion if I don’t want to make soy milk ongoing and keep constant fresh batches on hand, but only want to make it intermittently/occasionally, so I wouldn’t have fresh starter from the previous batch, and wouldn’t have time for the 3 batch ramp up to best results? Thank you!
You can freeze the starter for up to 3 months, so as long as you make a batch every 3 months you should be good.
Thank you for this recipe! I’m about to make my third batch of yogurt and wonder if the yogurt starter should be at room temperature before it is added to the soy milk.
Thanks for your help and your wonderful recipes!
You’re welcome, I’m so happy that you like it. The starter can go in cold from the fridge. Enjoy! 🙂
Hi there,
So I’ve started mine with 1/2 gal of soy milk.
The capsule has 50 billion CFU, will that be ok?
Also, My Instant pot has a more & less setting for the “cooking ” process.
Which should I use? I’ll start it on low and wait for your response
TIA
The 50 billion CFU should be okay, but I’m worried about the “cooking” setting. Does your IP have a yogurt setting? It should be at 112°F, anything hotter than 115°F will kill the bacteria and it will not work.
It has a less and more setting for heat. I put it on the less.
When I make my husbands SCD yogurt it specifically says to use the “more” setting for the 24 hr fermentation, and I use a 1/2 cup of organic plain yogurt as the starter in place of probiotic, which is why I asked about the soy milk & probiotic temp. Thanks for helping me thru this.
.
and yes, I am using the yogurt setting. (it’s an instant pot duo nova)
I made this yogurt at the “less” setting for 15 hours.
It turned out firm and looked good.
When I went to transfer it, there was minimal liquid on the top & I skimmed it off, it just kinda turned into very soft yogurt.
I dripped my first cup and ate it, It tastes good!
I want to keep 1 cup of starter, (for another 2 quarts) can I drip it or should I leave the extra liquid in for the fermentation process?
I am eating my “dripped” yogurt as I go along.
Still curious about saving the starter with or without dripping.
TIA
I just put in 5 capsules and that will equal more than 25 billion, I’m not caffeinated yet this morning lol. Hope that’ll be ok!! When I make a double batch, do I need to double the starter or still use 1/2 cup?
I double the starter when I double the batch. Enjoy! 🙂
Thank you, Monica!! Makes sense. For the capsules, is it the number of organisms we are looking for? You used 5 capsules for your recipe to get the 2.4 billion, is 2.4 what we are looking to use? Does it hurt the recipe to use more?
Hi Monica,
You mean one can make soy youghurt from the probiotics pills one buys from the pharmacy?
I have tried it and the taste of the first batch is not good at all. Are you saying that this horrible first batch youghurt will get better with subsequent batches? I find it hard to believe.
Yes, I use the inside of the probiotic capsules. There are tons of brands, so maybe the brand you have doesn’t taste as good. The yogurt will taste better and get thicker with more batches. There are hundreds of people who have made this recipe and love it.
Can I use one capsule of 50 billion CFU’s?
Yes, that should work, but you may not need to incubate it as long. Test it after 12 hours.
Hi. I’ve been making dairy yogurt for a while now and have that down to a fine art. However my son is recently diagnosed dairy intolerant so I’m going to try make this milk!
Can I make it in my yogurt maker? It’s a little vessel that you plug in and it heats up. And you place the yogurt jar inside to ferment.
If I start it from probiotic powder it takes about a day or so to ferment. But if i use yogurt from a previous batch it takes half a day.
Can I apply this to soy yogurt making too? I don’t have an instant pot as I’ve only ever made yogurt this way.
Thanks!!
Yes, you can use a regular yogurt maker instead of an IP. As long as you use the soy milk that I suggest it will work. Enjoy! 🙂
I made this twice with westsoy and both times my yogurt came out watery. The first time I forgot to vent my instant pot, so I made sure to do it the second time. Both batches had the same amount of water in them. I also used half of my 30 billion probiotic capsule to make this yogurt. I aslo have the instant pot pro, so not sure if maybe the temp is different.
Were you able to scoop the excess water off the top of the yogurt? You can also allow it to cool in the pot with the lid off before stirring to allow some more liquid to evaporate. After you make a few batches with the starter it gets thicker and better.
Hi Monica,
Do you have a recipe for homemade soy milk? I’d love to get it straight whether the soybeans need to be soaked or if soymilk can be made without soaking the beans first. Or better yet, in an instant pot. I couldn’t find a recipe from you (who I trust) and the recipes online are contradictory, confusing and way too complicated! Thanks
I always do 3 cups of water to 1 cup of soy beans. blend it in the vitamix, then boil it in a pan and scoop the top layer of foam off! the macros are on myfitnesspal 🙂
Caroline, you really don’t need need to boil the soy milk in a pan after blending. Blend it in the Vitamix for 6 minutes using very hot water to start with and it will boil in the Vitamix. I have made it many times this way and it works. Here is a link to the recipe: https://www.blenderbabes.com/lifestyle-diet/soy-milk-recipe-quick-easy/
Quick question about technique — you mentioned adding vanilla to cut some of the tang. Does this get added before the probiotic (before cooking) or does it need to get blended in after the yogurt is already finished?
It needs to be stirred into the yogurt after it is finished. Anything added to the soymilk before fermenting will cause it not to set. Enjoy! 🙂
Thank you so very much. This solves my problems perfectly. Also, confirms I do need an Insta Pot!
This is just what I’ve been looking for. Again….thanks so much!
You’re welcome! I’m so happy that it helps! An IP is a great investment if you want to make a lot of yogurt! 🙂
Will it turn out in bigger batches do I use more starter?
Once you have a mature starter you can double the batch. You will need to double the amount of starter too. Enjoy! 🙂
TOFU GREEK STYLE YOGURT – Hi Everyone – I love Monica’s recipes and tried this one as well. It inspired me to try it with tofu as I was losing like half the volume to run off. I use 12 oz of shelf-stable Mori-Nu extra firm tofu. I put the tofu in a Mason jar with a little soymilk to thin, a little maple syrup to feed the probiotics/bacteria, and blend with an immersion blender. Then I add in the contents of a probiotic pill with a rubber spatula (I read metal is not good to introduce to the yogurt batch) and put the Mason jar in the Instant Pot for 13.5 hours.
The yogurt comes out tangy, thick, and maybe 1/4 tsp of run off. If you like your yogurt thinner, I’m pretty sure adding more soymilk prior to fermenting or after would achieve that. I do know you need specific bacteria for it to culture, I think Thermophilis and Bifidus are the main ones… I use NOW Probiotic-10, 25 billion and it works for me.
Thanks so much for sharing this method, Wendy! I can’t wait to try it.
I was disappointed to see everyone using commercial soy milk. I never buy soy milk. I always make my own, as well as my own tofu.. I really haven’t tried to make soy yogurt, but I may just give it a try.
Could you share your recipe for homemade soy mil. I bought some soy beans but lost the recipe I preferred x
I don’t have a recipe on my site for one at this time, but I share my recipe for homemade soy milk in my vegan staples cookbook.
Hi there! I much prefer al.ond milk over soy milk can I substitute almond milk?
No, the only two types of milk that work are soy milk and Ripple milk. I tested it many times, but it never comes out.
This works with Ripple? I assumed it wouldn’t because it has several ingredients, like gums and oil!
Yes, it surprisingly works really well and make the thickest yogurt, but the tastes is much more bland than the soy version.
Question before jumping in and going for it! Each, and every, time I make this – I should pull a new 1/2 cup starter out afterwards? Correct?
Yes, that is correct. You will need 1/2 cup of the yogurt to start your next batch.
Could I double the recipe? If so, do I double the amount of probiotic? Thanks and looking forward to trying this recipe!
Yes, I double it all of the time. Yes, you will need double the starter. I recommend not doubling the first batch, however, since it gets better as your starter matures.
hello, I’ve been making this recipe for several months now with perfect results and all of the sudden my yogurt has pink blotches of what I’m guessing is some kind of mold contamination. I use TJs soy milk and a combination of starter from a past batch and probiotic capsules. What do you think are the top three reasons this might be happening? Thanks so much!
I have gotten a few batches of TJ soy milk that turned pink as well. I think that they have a bad production run or something. You don’t want to eat it if it is pink, so throw it away and start again. Use soymilk from a different run and see if that’s better. Also be sure to clean your IP and all of the seals and everything very well before starting a new batch.
Hi Monica and Leigh, I don’t have the pink problem, but my last two batches of yogurt made with TJ soy milk and probiotic capsules (I no longer even try to save any for starter, as we eat it up so fast) have turned out runny. I am wondering if this has been an issue with others. My favorite soy milk is EdenSoy, but it is now over $4/qt, and increasingly hard to find. Usually, the TJ yogurt is slightly thinner, but not runny. I have been making yogurt successfully in the instant pot, thanks to you. Now it seems that I have to pour it all into my yogurt strainer, reducing it by half. Please do not throw out the whey! I use it for a smoothie or prepare oatmeal with it or soak muesli in it for the next day. My sister makes yogurt too and gives the whey to her dog.
Even though I have made this yogurt countless times over the years, it always comes out slightly different.
Never mind-sorry! Saw the details in the post
I’m glad that you found your answer! Enjoy! 🙂
We have that problem, too… Hard to save some for starter for the next batch! So, how many probiotics capsules do you use per qt container of soy milk? And how “strong” are they…. Parts per billion and all that? Thanks 🙂
Hi, I’ve tried different ones and have settled on this. The probiotic I am using now with just one capsule per liter/qt is NewRhythm Probiotics 50 Billion CFU 20 Strains, 60 Veggie Capsules, Targeted Release Technology, Stomach Acid Resistant, No Need for Refrigeration (but I decided to refrigerate)
I have another recipe that uses one with 5 billion and 4 capsules. I got confused and for a while I was using 4 of the 50Billion caps and my yogurt always curdled. Now I’m back to just one, and it works well. More tang than with the culture packet and cheaper, too.
The best soy milk is the Eden Soy unsweetened. Cheapest is Trader Joes, which unfortunately has less protein, which seems to make the yogurt thicker. The last 2 times with TJ, it turned out runny like buttermilk, not sure why. I’m back to ES and it is just so delicious. I cruise the internet looking for the best deals. Yesterday I bought a case from Vitacost. With the Memorial day discount and buying enough stuff to get free shipping, it was $2.99/qt.
Have fun with this! It is like a little miracle every time I do it.
Reply to Kate et al, FYI, I continue to have great success with Westsoy plain unsweetened—soybeans and water, the purest I’ve found. I like your recommendation for NR probiotic and will look for it!
Hi Carol, The probiotic says 50 billion, but that is for 2 capsules. Use just one and it is perfect. All the best!
Hi Monica, your recipe/instructions are absolutely are go-to when making soy yogurt. And we’ve made it successfully many times! However, recently, we have been hitting a wall despite not changing: our yogurt is either too runny (at 12 hours in the Instant Pot, which used to work perfectly for us) or has a ricotta-cheese texture (at 15 hours). We use the Trader Joe’s soy & water-only soy milk + the Country Life – Natural Dairy-Free Acidophilus with Pectin – 100 Vegan Capsules you mention. We even purchased a brand new instant pot thinking that maybe the heating element on our existing Instant Pot was not working consistently! Our question for you: do you store your Acidophilus capsules in the refrigerator after opening? We do not (or at least, we didn’t initially – we did put the bottle in the fridge now) so we’re wondering if that has affected the quality of the starter? The bottle says “Best if refrigerated” but also, perplexingly, says “Store in a dry place between 59-86 degrees” which is clearly warmer than a refrigerator.
Hi Mel, I do store the probiotic in the fridge. I would get a new bottle and try it again. Even if they get too old, they don’t work as well. I also wonder sometimes if the manifacturing process changes. Sometimes there is a month or two when it doesn’t work as well and I chance nothing about the process. It makes me thing Trader Joe’s manufacturing is different or something. Try fresh probiotics and let me know how it comes out. 🙂
Weird question for you…can you use plain silken tofu instead of soy milk?
I haven’t tested it, but I don’t think that it will work. If there are any other ingredients except for beans and water it does not work.
One last question before jumping in and going for it! Each, and every, time I make I make this – I should pull a new 1/2 cup starter out afterwards? Correct?
Thanks for the recipe! I made the first batch and it was fine, saved half a cup for the second one though, and that second batch was a total dud. Goopy on top and watery on the bottom after 15 hours. The starter was only a week old, and I used the same westsoy brand milk as before. Any ideas what might have gone wrong?
Maybe try making your 2nd batch within a few days of your first batch to get a really healthy starter going before waiting a week before batches.
I have begun to make soy yogurt with mostly great success. I have made it with The Coconut Cult plain unsweetened yogurt (quite pricey, but absolutely amazing) and it turned out perfectly. I tried with your recommended probiotic capsules, but only used one, and it was just OK. This last batch was made from starter from the previous batch, 14 hours, and did not set. My sister suggested mixing in some chia seeds, which makes it spoonable.
I use two 16 oz Weck jars set into the iPot, rather than pouring the soymilk into the pot. I have used TJ soymilk (just OK), Westsoy, no flavor, EdenSoy -usually terrific maybe because there is more protein?, except for this last time. I will try TJ again, as it is so economical. I bought some dried soymilk and might add a bit to increase the richness.
I’m glad that you are having success, Katherine. I don’t think 1 capsule of probiotic is enough, but it depends on how strong it is. Enjoy!
Thanks for your answer, Monica. I will try with 2 capsules for 1 qt container, and more if needed. It IS cheaper than the Coconut Cult yogurt.
Sorry to bother … I know this recipe was posted a while ago, but I’m late to the game.
I just so happen to live in an additive-free soymilk dead zone (no WestSoy, no Trader Joe’s) so I’ve been making my own soymilk for this recipe. I’ve made two batches of yogurt now, and both have been delicious … except … there’s been a TON of water (we’re talking 1-3 cups worth) in both of my batches. Is that normal?
I did one for 12 hours and one for 10 hours, hoping the amount of water would change if I cooked it less, but it did not. My valve is open fully when cooking it in the IP, and it seems most of the water comes from within the yogurt itself.
I’m wondering if the recipe I use for soymilk maybe has too high of a ratio of water to soy (3:1) … (though this last time I accidentally made it (3:2) and it added some extra ‘solid content’ to the yogurt). I know you say you haven’t experimented with making your own soy milk yet, but any thoughts or advice would be appreciated.
I have made my own soymilk before, but never used it to make yogurt because it’s so fussy. It sounds like your soymilk does have too high of a water to soy ratio. Most of the water should form on the top, so you can skim it off with a spoon. The longer you incubate it, the firmer your yogurt will get too. Try it for 15 hours. Hope that helps. 🙂
can i use this
https://sa.iherb.com/pr/california-gold-nutrition-lactobif-probiotics-5-billion-cfu-60-veggie-capsules/64006
or https://sa.iherb.com/pr/belle-bella-non-dairy-yogurt-starter-4-packets-5-g-each/63824?gclid=CjwKCAjwoP6LBhBlEiwAvCcthP-4YVGUu5m-2KDepAho5K1eYOZTfEcC_JcQZdiURCQxWMBEbaoFDBoC-t0QAvD_BwE&gclsrc=aw.ds
thanks
I think that either one of those will work for you. I have the best luck with basic probiotic capsules like in the first link. Enjoy! 🙂
2 questions again, Can i use my own home made soy milk (from soy beans and water only) and use the store bought alpro soy yogurt as my starter?
Thanks
I have not tested that brand of soy yogurt as a starter, but I tested a few different brands and non of them worked. I think you should be able to use your own soymilk, however, you should boil it before starting a new batch. The only reason I say you don’t have to do that step is because you are usually starting with a factory sealed container. Let me know if you try it.
Hi there. I didn’t rate this yet because my first batch didn’t turn out but I’m going to keep trying. I used Westsoy soy milk (beans and water only) and half a capsule of probiotics (about 12.5 billion). My pressure cooker has a yogurt setting but only allows me to set it for 12 hours. I let it go for 2 hours last night, then reset it for 12. However, it was just liquid when I opened it up. Could the amount of probiotic been off? I’m assuming I should not use a half cup of the liquid as a starter for the next batch, right? Thanks so much!
I would use more probiotics next time. Try a full capsule. Also, give it the full 15 hours at 112 degrees F. I’m not sure if the liquid would work as a starter or not. If you try it I would use at least 1 cup of it as a starter. Tiny little changes in anything make a big difference when making yogurt, so keep trying. 🙂
Hi, I’m wondering if you could give me any insight. I’ve made soy yogurt once and it turned out wonderful~ creamy and thick. As soon as I put it in the fridge it curdled and kept curdling. Was this because I didn’t cool to room temperature or because I didn’t drain the excess liquid?
I’m not sure, Susan. This has never happened to me, it usually gets a little thicker after it cools. You definitely want to drain off any excess liquid that forms on top. The yogurt seems to come out slightly different every time even if you do the exact same method, so try it again and use your existing yogurt as a starter and I think you will have good luck. 🙂
Thank you for this recipe. I am happy to report that my first batch is a success. I even took a picture in case I was able to upload a photo. The consistency was firm enough to keep a chopstick upright, yet creamy at the same time 🙂 I really didn’t know if it would be a success or failure, judging from others’ experiences. Because the only probiotic capsule I have is 50 CFU, I used 64 oz of Westsoy.
I’m so happy that the recipe worked for you, Arden! 🙂
Hi,
I made this yogurt last week for the first time and it came out perfect texture wise. I used my starter this week to make a second batch. However, the texture this time was different and was a bit grainy/lumpy.
I forgot to have the vent pushed down during the process. Could that be the reason? or it’s grainy because my starter is not good?
Thank you!
I’m glad it came out well for you. I don’t think that the vent would have been the issue, that would just make it more watery. Sometimes mine is grainy when I make it for the first time with probiotic, but not usually grainy when I make it with the premade starter so I’m not sure.
I see.
I just read your additional notes and I think it’s maybe because I stirred my starter a bit much when I added it to my milk. I wont stir next time and see if that fixes the issue.
Thanks Monica 🙂
Hello! I’ve made this yogurt so many times and always w success, but I recently started making my own soy milk and used a batch that also contained a little oat milk, and it turned out very liquid, unlike any other batch I’ve made. Any thoughts? Thanks!
thank you for the recipe! I have tried to make yogurt twice now in my instant pot on the yogurt setting and it comes out the same as it went in. this time I used 32 oz of pure soy milk no additives and one tube of 15B probiotics. still no luck in getting anything other than water consistency. any suggestions?
Do the ingredients on the soy milk say only “soybeans and water” If there is anything else it won’t work? This sounds like what happened to me when I tested it with regular plain soy milk with added ingredients. Other than that, I would say something is wrong with your probiotics. Hope that helps. 🙂
Hi- my upon the first try, i used Eden soy milk and 2 capsules of Nature’s Bounty Probiotic 10 because it was on sale at Costco. However each capsule has 20 billion cfus. It looked great in the instant pot and smooth, then when I got into a container it looks more like cottage cheese- and is pretty tangy. Did I use too much Probiotic? Is that risky to my gut or it just maybe makes the yogurt more sour? Is the texture normal for a first go? I know you said it takes a few times before getting store bought consistency. Thank you!
I think that you may have used too much probiotic. One capsule may work better next time. You can just stir it well and see if it becomes creamy. It should be okay to eat, but if it smells bad or turns pink, throw it away.
It worked! I used the Eden soy milk that is fortified with vitamins but ingredients are water and soy plus one packet of Cultures For Health Vegan Yogurt starter. 15 hours later in the Instant Pot and it looks perfect and smells just like yogurt. My first try!!
I’m so happy that the recipe worked well for you! It’s good to know that Eden soy milk worked too! 🙂
Dear Monica,
Once you’ve made the first batch of yogurt, you talked about saving the starter. Can I assume that you keep the starter in the fridge and use it again in two weeks when you make the next batch?
Is there anyway to just put in a starter from a few spoonful of store bought yogurt and just leave the homemade batch of yogurt in room temperature and the yogurt will still be good? Or you must leave in a consistent heated temperature for it to form properly?
Hi Cecilia, store-bought yogurt usually doesn’t contain enough live probiotics to work well as a starter. Yogurt should be about 112° F to incubate and grow the culture. You can incubate it at a lower temperature, but if you get much hotter, you will kill the probiotic. I have heard of some people just leaving it out at room temperature for 23-48 hours and letting it ferment, but I haven’t tested that. I hope that helps. 🙂
How long does this keep?
It will keep for about 1 week in the fridge. Be sure to put it in a clean sealed container. Enjoy! 🙂
I have an Instant Pot that does not have the yogurt setting. Do you think I could still make yogurt in it using the slow cooker setting or would that be a disaster? Other than purchasing another Instant Pot with a yogurt setting or an actual yogurt maker, can you suggest another way to make yogurt?
The slow cooker setting would be too hot and it wouldn’t work. I have made it in a slow cooker with towels lining the bottom and I checked it frequently turning it on and off to maintain 112°F, but it requires keeping an eye on it all day making sure that it doesn’t get above the 112 F. I have also heard of people making it in the oven by keeping the oven light to heat the oven to about 100°F. You could try those methods.
Hi, Monica,
After reading your reply to my original message, I bought a 3.5 quart Instant Pot Duo with a yogurt setting. I have another question for you. I made my second batch of yogurt yesterday, this one made with “starter” reserved from my first batch.my first batch, as expected, wasn’t the smooth, thick-ish cream consistency you expect from yogurt, but the flavor was excellent. I froze my starter, which you stated in your book was okay, because I’m the only yogurt eater in my home. The starter’s liquids and solids separated when thawed, but I stirred them together and added the starter to the Westsoy organic soy milk. I processed the batch for 15 hours, turned off, then opened the instant pot to let the yogurt cool to room temperature. There wasn’t enough liquid on top of the yogurt to skim off. The yogurt appeared “loose” in texture but I figured it would thicken once it was refrigerated. When I finally transferred the yogurt to a glass jar for storage, I noticed the texture was even more thin than I thought when I opened the Instant Pot. I refrigerated the yogurt overnight and it did get thicker, but it still isn’t as thick as I would like. Do you have any suggestions to make the yogurt thicker?
a sous vide will also work. 🙂
Can you strain this yogurt after to make it thick like a greek style yogurt ?
You can strain it, but I feel like you lose a lot of yogurt when you do this.
I keep the whey from straining my yoghurt, and use it when I make bread, and also mix it with drinks. It has very little flavour but is full of protein and probiotics. Too good to throw away! You could use it for all sorts of purposes. It also keeps quite a long time in the fridge.
Yes! I use 2 boxes of soy milk in my InstaPot with 1/2c or a bit more of yogurt from previous batch. Air. Set for 15 hours. I cool the whole batch in the fridge a few hours then put it in Greek yogurt maker (amazon) for another several hours. Yes, it reduces by half but man oh man is it delish!
I agree, Joanie! I purchased a Greek yogurt strainer on Amazon because of your suggestion. Just finished my very first batch of soy yogurt using Monica’s ingredients suggestions and direction. It was so creamy and delicious. I’m going to make a double batch tonight for the morning. This may all cost a bit more but it is so worth it to me to know what is going into my yogurt and body!
Thank you, Monica for the recipe and Joanie for your suggestions.
~ Jean
You’re welcome, Jean. 🙂
Hi,
Thanks for the recipe. I made this for the first time the other day using 2 tablespoons of commercial plain soy yogurt as the starter, rather than the probiotic tablets. It turned out fine. When I make this subsequently with the saved yogurt as starter, do I still need to use a full 1/2 cup of the yogurt, or will 2 tablespoons be OK?
Also, I have seen SOME recipes — both for dairy and vegan IP yogurts — that call for boiling the mixture to 180 degrees first to make sure no bad bacteria develops. Just wanted to check on when it might be necessary to do that?
Hi Ed, I have the best luck using a 1/2 cup of starter. I’ve found that 2 tbsp is not enough. What brand of yogurt did you use? Most store-bought yogurt doesn’t contain enough living probiotic to work. You can heat it first if you want, but if you start with a very clean Instant Pot and a new sealed container of soy milk, it’s not nessary.
Thanks. I used a plain soy yogurt; I think it was Silk brand but I’m not positive.
Hi Monica. In your additional recipe notes you mentioned to reduce the cook time by an hour or two for less tangy yogurt and to increase by an hour or two for more tangy yogurt. Is that an hour or two from the fifteen hours? I assume so but wanted to ask since my family doesn’t like it too tangy.
Yes Ralph, for less tangy yogurt, you will only need to incubate it for about 13-14 hours. Enjoy! 🙂
Hi, I’m in the UK and have purchased a yoghurt maker which is identical to yours in the picture. I just woke up and excitedly checked the yogurt make after 14 hours at the recommended 42 degrees to find I still have soy milk with a yoghurt consistency at the bottom (I had assumed this was just my starter yogurt which had sunk to the bottom). I’ve just stirred the mixture and raised the temp to 45 degrees and started another cycle in the hope of resurrecting it but I’m so disappointed! I used an organic soy milk which is just water and soy beans. I bought a starter yogurt with the cleanest ingredients I could find with live cultures but it is a coconut yogurt because there wasn’t much choice and all the soy ones had horrible ingredients which I thought would defeat the object of making my own! Could this be the problem that I’m using soy milk with a coconut starter yoghurt? Any help would be much appreciated thanks
Hi Holly, the coconut starter is your problem. Soy yogurt is very fussy and anything other than soybean, water, and probiotics makes it fail. Try it again and just use a probiotic powder equal to 12 billion CFUs, and it should work. Also, it should incubate at 44.4° C. I hope that you can get it to work for you. 🙂
Hi! So I used eden soy milk and my probiotic had 50 billion CFU! I left it in my instant pot for 15 hours. It looks like cottage cheese and is very sour is that right? I’m a little afraid to eat it. I took off the top liquid but it literally looks like cottage cheese. Help!
I have never had mine come out like cottage cheese. I have read that the cottage cheese look can happen when you incubate it too hot. Did you use an Instant Pot? You can try to get it creamy by stirring it with a whisk. If it’s still lumpy, throw it away and start again. Also, the probiotic may be too strong. I usually use about 12 billion CFU total. Good luck. 🙂
Hi there. I know this is an older post but I’m hoping you are still monitoring comments. I’ve been making soy yogurt in my instant pot since I purchased it a couple of weeks ago. The yogurt comes out perfect every time. It’s thick, creamy, and yummy. My only issue is that every time I make it there is a very thin layer on top that is very slightly pink. It looks very much like the slightly pink layer on the picture you shared of the yogurt in the instant pot where you are removing any water that has separated on top. I make my yogurt directly in sanitized canning jars. Honestly, I’ve been removing it, capping, refrigerating, and eating the yogurt. It doesn’t “grow” like mold. Once it remove it it doesn’t return and it tastes normal. Any thoughts?
A pink color usually indicates mold. If it’s super light, it may just be a slight discoloration from the probiotic powder floating to the top. I think that is what you see in my picture, or I may have been wearing a pink shirt the day that I took the picture. It is hard to know without seeing it. You may want to throw it out and start from scratch sanitizing your IP and using sanitized utensils. 🙂
I second Monica’s comment, my probiotic (by Now Foods) is a light pink powder right off the bat & some always seems to float on the top. I stir it in after the 14 hours and have had excellent yogurt every time! If it smells like nice sour “clean” fresh yogurt I think you’re good. Trust your nose & gut though!
Hi! I’m excited to try it. Do you know if it can be made in a Thermomix? If it’s slowly mixed during the 15 hrs, would it work?
Thanks!
I’m not familiar with a Thermomix, but if it stirs it, I don’t think that it would work. I believe that the culture must stay still to form the bacteria colony.
Turns out great! My first try with soy milk. I used to make my own dairy yogurt at home in a pan with a fleece blanket around it (after heating the milk up to around 40 degrees Celsius of course). This way, with the instapot, has made life so much easier for me :-). I used Westsoy and it thickens up beautifully. Thank you! I am excited to try it out, but I leave it in the fridge for the first hours. Patience is key with yogurt.
You’re welcome, Jeanette! I’m so happy that the recipe worked well for you! 🙂
I’m amazed u have a thick yogurt. The only recipes I’ve seen so far for any soy or plant milk yogurt involve lots of thickeners or gum. Ive tried without and get a separated but liquid result with sour flavour. I make my own soya milk with a soyabella. Just beans and water, could i try this with the warm fresh milk?
I think that it should work but I’ve never tried it. Let me know if you try it. 🙂
I used to have the same problem. I also make my soya milk with the Soyabella. I was getting liquid, separated yoghurt and didn’t want to add agar or anything like that because it gives a really unrealistic yoghurt consistency. I discovered sunflower lecithin, a natural, vegan-safe emulsifier which I add to my almond milk to prevent separation in coffee etc., and I wondered if it would work to prevent the soya yoghurt separating. It worked! It’s brilliant. I pour the freshly-made soya milk into my blender with a teaspoon of lecithin and whizz it for a few seconds to incorporate the powder into the milk, and then make the yoghurt as normal. No separation. It is slightly thinner yoghurt than I like, so I strain it (which does, of course, reduce the quantity somewhat but that’s OK). I save the resulting whey and put it in a bottle in the fridge. This is full of protein and probiotics and I use it in other recipes. I did comment about the sunflower lecithin elsewhere on this thread but have had no responses.I am very pleased with the results. You can get sunflower lecithin on Amazon, and I’m sure elsewhere as well. It’s worth a try. I hope this helps.
How much sunflower lecithin did you use?
You can also add a box of puréed silken tofu to your mixture & you’ll get a thicker yogurt! I could taste the tofu on the first day but not at all after a day in the fridge!
Thanks for the recipe. In the recipe’s for coconut milk yoghurt they add gelatine or agar-agar to thicken it. Would that work here as well?
I think that agar agar would work, however, I have never tried it? Let me know how it works if you try it.
Hello! I’ve tried making this for the first time and it turned out very well! I loved it. I can’t wait to make my 2nd and 3rd batch and see it get even better. I was wondering about doubling the recipe – could I use two 32oz containers of soy milk? In this case would I need 1 cup starter? Thanks.
Hi Kary, I’m happy that it worked well for you. Yes, if you double the batch, you will need to use double the amount of starter.
Hi Monica,
I’ve continued to make yogurt all this time using the starter from each batch for the next batch and its always turned out okay. This last time, I’m not sure what went wrong but it came out extra watery. When I first opened the instant pot lid it looked and smelled different. I didn’t think too much of it thinking it’ll thicken up like it usually does after I chill it, but no. You can even see a layer of the water that’s separated and sitting on top. It is also super duper sour. I have no idea what happened. I did the same thing I always did. 15hrs. Any thoughts?
Hi Kary, The yogurt seems to come out a little different every time. If you don’t have good luck with a batch, I would throw it out, sanitize your equipment including the lid and rubber seal on your IP and start again. I think slight changes in bacteria have a big effect on the final outcome. Hope that helps. 🙂
I ended up making it too tangy for my liking but can I put the starter in to make another batch same day or should i wait a few days? Also at room temp it got really watery will it thicken up in the fridge?
Thank you for the great recipe!
Hi Rita, you can do either. It should thicken up in the fridge. Remember to spoon off any extra liquid on the top before stirring your yogurt.
Monica, I’m LOVING making my own soy yogurt, it’s a regular now at our house. I’m wondering, have you ever tried adding soy milk powder to your milk beforehand for a thicker end result? I don’t like to strain it because I end up with less yogurt, so I’m looking into easy thickening options that don’t incorporate too many extra ingredients. Thank you as always!!
I was wondering about this, too. I used to add powdered milk to my yoghurt to thicken it when I was still using dairy. However, soya milk powder is very expensive. I have been straining my soya yoghurt for the past few batches and it’s great. Yes, you end up with less yoghurt, but save the whey as it’s full of goodness. I use this in my home-made bread, in my electrolyte drink and anything else that needs water in the recipe. If you’ve left the yoghurt to strain for too long and it has come out too thick, just stir a bit of the whey back in. I always mix the strained yoghurt well with a balloon whisk and it comes out really smooth and creamy. See my comment on adding sunflower lecithin (a natural, vegan emulsifier) that really does the trick to prevent the yoghurt separating when you have made it. I’m getting fabulous yoghurt now, batch after batch.
Hello. I have not tried this yet, but I have been trying to determine from the recipe and the comments if you are using the full 1/2 cup reserved yogurt for each new batch and saving 1/2 cup from the new batch to use in the next or if you are only using a small amount of the 1/2 cup reserved allowing you to not have to reserve a 1/2 cup each time. (Sorry…that was confusing even as I typed it.) If you’re only using a small amount, then I could see how it could possibly die if not used up quick enough, but if you’re using the full 1/2 cup each batch and reserving one for each the next batches, how would it die off? Seems that the probiotics would continue to proliferate from each subsequent round.
You need to use the full 1/2 cup of reserved yogurt from your previous batch. The starter seems to die if it’s left too long in the fridge without being activated to grow again. Maybe it runs out of sugars to live on?
Questions: 1)I wonder if a half cup of refrigerated, reserved yoghurt/starter could be regularly reduced and fed the way sourdough starter is maintained? Too temperature sensitive? 2)Can this yoghurt be frozen? I do freeze dairy, store bought yoghurt (in an ice cube tray), but only use it in recipes or icy blender treats since it does lose it’s yoghurt-y texture, but the taste is still fine. 3)What happens to the yoghurt once it’s more than 10 days old? Does it merely separate (in which case, I’d still use it in recipes) or does it go bad?
Comments: I didn’t rate your recipe because I haven’t tried it yet. I was excited to find it. It looks so easy! Will have to think about an instant pot. And, I was jazzed that you use TJoe’s brand, my fav. I’ll hafta figure out a way to make smaller batches. No big family here! I was glad to read that you use the excess liquid in bread, soups, etc. My favorite bread recipe uses sourdough starter, no prepared yeast. Will soymilk yoghurt whey work in sourdough? I was intrigued by sunflower lecithin. Never heard of it before!
Thank you for creating & testing these recipes. I’m looking forward to trying a number of them. For about a year, I had stopped bringing raw meat home or cooking with meat, but was still eating meat at restaurants. Then Covid hit, and I became an accidental vegetarian for fear of eating out. This, in turn, has sparked an interest in veganism. Not sure I could pull it off, but never expected to like soymilk, either, let alone to give up meat.
I’m not sure if the starter could be fed like a sourdough starter. It makes sense that it would work, but I have never tested it. You can freeze the starter, which I find to be the easiest to keep it from going bad. If it’s left in the fridge too long it will start to smell funny or turn a light shade of pink. If this happens, throw it out and start again. Hope that helps. Enjoy! 🙂
You’re welcome. Keep trying it. Each batch comes out slightly differently, and the more mature your starter gets, the better your results. Just don’t let your starter die. 🙂
for me the pro-tip was discovering that it is better done when the milk is in the fridge, together with the starter…
I’m using a bread machine, which has a yogurt program which just keeps it at ~40C and beeps at the end. In my first attempts it was not working reliably, until I discovered that if the starter was refrigerated but the soy milk brick was outside, the results were worse and unreliable. I guess the mix of summer ambient milk with cool starter was killing or inactivating it sometimes. So, keeping the milk at fridge temperature, even if it is not needed, will give a smooth mix with the starter and a good process.
My main problem is that it sours a bit in the couple of days after done. Any good solution for this?
Great tip about using cold milk. I haven’t tried that. I’m not sure why it is souring after a few days, mine usually keep for about 5-7 days.
Hi, im also here trying to use bread machine too cuz i dont have an instant pot😭 do you mind if i ask what bread machine you use? I use bellahouseware which has the 8hr yogurt setting. Did ur yogurt turn out successful after following the recipe?
I’m using an old “Princess” that I got via Lidl. I can choose between 8h by default and 6h. I use as starter a plain soya yogurt (no sugar, no additives), plus 1l of soya beverage (again no sugar, no additives) and it mostly always works well. I do it again using the remains of the previous one and it usually works, but from time to time it sours and I need to use another yogurt as seed.
So i definitely want to have the vent knob in vent position? I never read that step until the last time i made this and it came out bad when i did.
Yes, you want to let the humidity out of it. The more steam that is allowed to escape the thicker your yogurt will be. 🙂
Hi Monica,
I just tried making this in my instant pot. I used soy milk with only soybeans and water and dumped in 5 probiotic capsules. I left it for about 12.5 hrs and it came out tasting great, it’s just a little clumpy. Almost like cottage cheese. Do you have any tips on making my yogurt more creamy?
Thanks!
I would let it incubate a little longer, then skim off any excess water. Once it cools you can stir it and it should be fairly creamy.
Hi Monica, I apologize if this has already been asked. I followed the recipe to the letter and my yogurt will not firm up. It’s thin enough that my husband drinks it and it tastes fine. I used the probiotic you recommended and I’ve been using West soy which is just soybeans and water and in the instapot on the yogurt setting 15 hours. The second and third times I used 1/2 cup stater and the third time I set it for 16 hours. I can’t figure out what’s wrong. I do live at 2000 ft. Any ideas?
I’m not really sure. Yogurt can be fussy and it never comes out the same way twice. Are you setting the Instant Pot to vent? Are you skimming off the excess water that forms on the top of the yogurt? You can also try putting the whole pot in the fridge and letting it set up before you put it into another container. I have found that it’s firmer if it cools and sets up before putting it into a smaller container. I hope that helps. 🙂
Thanks. I’ll try the refrigeration afterwards. The flavor is great. Looking forward to trying some more of your recipes. Thank you.
You’re welcome! Enjoy, Cheryl! 🙂
Another update. I was having absolutely no success with my home-made soya milk – every time it was coming out separated and runny. Yesterday I had a brainwave, and wondered whether the addition of sunflower lecithin would help. I bought this a while back to add to my almond milk to stop it separating in hot drinks, especially coffee, and it worked a treat. This is a natural substance and safe for vegans, non-GMO etc. You need 1 teaspoon of the powder per litre of liquid and it needs to be mixed into the liquid with a blender. I made up a litre of soya yoghurt with the lecithin blended into the warm milk and this morning – SUCCESS! Set yoghurt all the way through, with just a little liquid on the surface. I had left it in my Easiyo yoghurt maker for 24 hours to be sure. When I spooned some out, it did start to separate a bit, producing liquid, but this used to happen with my dairy yogurt too, and stirring it well resulted in a nice creamy texture. This is definitely the way to go. I have made another batch this evening and hope it will be as successful.
When making diary yogurt which Inused to do very often the directions always stressed leaving the yogurt in the pot overnight in the refrigerator to cool or it would not set properly. So anyone having trouble give that a try before spooning it into a container. Good luck! I plan on making my first batch of Soy yogurt soon!
I’m always interested in all the comments and results people are getting. I’ve been making this recipe a lot and have made about six or seven batches, They consistently come out loose, some more so that others, but it hasn’t been a deal breaker because they make good smoothies. Ive tried altering the recipe by adding several probiotic capsules. The last batch I used five capsules (because it’s getting close to expiration date) plus a quarter cup of leftover from previous batch. The results are mostly the same no matter how I’ve altered–usually on the thin side and slightly tangy. I set for 15 hours. I use WestSoy Unsweetened Plain and Multi-Flora probiotic (8 billion active cells).
I’m going to make another batch tonight and will use about six capsules because it’s after the best-by date.
But now I’m wondering: has anyone left in for a longer time? If so, what kind of results did you get? i.e. does leaving it “brew” longer make a thicker or thinner yogurt? more tangy or less tangy?
Looking forward to hearing.
Try these to see if it helps. Try about one table spoon of starter for one litre milk. More starter may not be better. Heat the soy milk gradually to over 80 degrees or almost boiling. Let the heated milk cool down before adding starter. Heated milk usually yields firmer yogurt than unheated.
Hi there!
I made this last night, and 14 hours later it is still very liquidy, like perhaps I didn’t use enough probiotic capsules. I purchased them new. Am I able to add more capsules at this point and cook for longer time in order to save this batch?
Thank you!
You can try to add more probiotics, and you can continue to incubate the batch for 24 hours. Make sure the steam vent is open to allow humidity to escape. Hope that helps! 🙂
Hello! Your recipe has been my go-to since eliminating dairy about a year ago (and finding store-bought yogurts to be too darn expensive)! So, thank you! Most times, it does come out a bit too liquidy and I tried thickeners but don’t like the texture they add. What I’ve been doing is tossing a cup or so of rolled oats, 2 tbsp vanilla and about 1/2 cup ground chia seeds into it at the end of the cooking time and is so darn good!
I did want to ask you opinion about something, and I did see above that you recommended another poster cook for an additional 24 hrs when it didn’t seem to change… that happened to me twice now. The probiotics are fairly new and it just worked well last week. Then this morning, I opened my instant pot to see no change at all so I reset it for an additional 14 hours to see what would happen. Now it seems perfect but there was a strange looking film at the top, which I just mixed in. It seems to smell fine and there’s no color to it, but I’m a little nervous to eat it! Is it safe, you think??
I’m glad that my recipe has been working for you! As long as everything was very clean when you started and there is no color or funny smell, I would think that it’s safe to eat, but I can not make that call for you. I can’t promise you that it’s okay. If you are doubting it, you should throw it away and start again.
Very clear instructions!! I made this last night with Westsoy but the probiotics I had were 10bi CFUs so I used two. It seems to be the expected consistency but the smell is…sort of fermented? Lots of little bubbles in it. I haven’t tasted it yet but the smell was….well, not great but I don’t know if yogurt every smells great? Could the extra probiotics have been an issue? Thanks so much!
Hi Reenie, Yogurt does have a fermented smell. It should be okay. If it’s pink or slimy throw it away.
Thank you!! Unfortunately it tastes kind of terrible and it’s also quite grainy. I wonder if it was too much probiotic or some other variable. It’s been in the fridge most of the day but it’s just not edible. I have a ton of soy milk so I’ll try again! I love your blog. Thanks for being so responsive and stay safe!
It’s still coming out too runny. I am using home-made soya milk made with just soya beans and water, using my Soyabella soya milk maker which makes brilliant milk. I just want thick yoghurt!!
Hi there! Can this be done in an instantpot that doesnt have a yogurt setting? I have the 6qt IP-LUX and would love to try this if I can. Thanks 🙂
I don’t think so. You need a way to keep the yogurt at a constant temperature between 110 -115 degrees F.
Update since my last comment – in June we went 100 percent vegan and no more dairy. I was making some pretty good soya yoghurt using my original heirloom culture that made such gorgeous dairy yoghurt. It was all going very well until about a week ago when suddenly it stopped working, and I think that for some reason the culture has died. I bought some probiotic capsules with about 16 different cultures in them, and the first batch came out liquid, the second slightly thicker, and the third really quite nice and thick – a slightly different flavour from my original culture. However, the fourth batch was runny again, and curdled, and this has happened on 2 subsequent occasions. I am continuing to persevere with it, and adding a bit more probiotic from a couple of capsules each time, along with a good spoonful or two of the runny culture, but so far it’s showing no sign of thickening up. Shaking the curdled yoghurt will mix it all together again, and I can drink it, but it’s just not set at all.
I no longer make the kefir because it really doesn’t work properly with soya milk. The grains were getting smaller, and the flavour was too bland. I didn’t want to have to buy dairy milk just to get the grains going again, when I can make yoghurt and kombucha as sources of probiotics.
My main concern now is how to get that soya yoghurt back on track again!!
Shoshi, I’m so glad that you had success. The yogurt culture always seems to die after about 3-4 months and you just have to start again. I’m not sure why, but some batches are better than others. Even when I do the exact same thing and use the same probiotic, it comes out a little different each time. If you have made a couple of batches and you’re not happy with the result, I would start again with a completely new batch.
So good! Thank you! I do wish it was a bit thicker but I am sure on the next batches they will be great! I did notice my yogurt curdled the next day. Is this normal?
I’m glad that you liked it. The yogurt sometimes settles a little the next day, but I haven’t noticed it ever curdling. If it is pink at all or if it has a funny smell, throw it out and start again.
Hiya,
SOS please help!
I might be doing this wrong but I’ve tried a few times doing exactly what you said but the yogurt comes out super liquid, like there has been no change to the soy milk. I am using a soy milk that is just soy and water as well as the acidophilus. The only difference is that I am using a yogurt maker. Can you advice? I’d love it to work as yours is the only recipe that doesn’t require me to boil the milk prior to putting it in the pot.
Thank you so much
I’m not sure what could be going wrong. What brand of soy milk are you using? Your probiotic may be old, it doesn’t sound like it’s activating. You can also check and make sure your yogurt maker is keeping it at 112 degrees F for the full 15 hours. Hope that helps!
Hi. I have tried to do this but with homemade soy milk and probiotics. I get yogurt… But it’s “drinkable yogurt”, it’s very fluid… The yogurt you get is different? Thanks for sharing!
Most of my batches are fairly thick and you can eat them with a spoon. 🙂
This post is an interesting read, including all the comments! Thank you for sharing. I have had my Soyabella soya milk making machine for about a week now, and it’s making brilliant milk. I have an EasyYo yoghurt maker (not electric – it has a large insulated pot that you half-fill with boiling water and put the yoghurt pot in, and leave it overnight) and I have been using that to make dairy yoghurt very successfully. I have been using an heirloom lactobacillus bulgarica culture for several years, each time retaining some yoghurt as a starter for the next batch. The flavour is superb and the culture just goes on and on. I have decided to try it with soya milk, and so far so good! It is setting beautifully, and making yoghurt quite quickly. The flavour takes a bit of getting used to – it’s quite pleasant but it doesn’t have the sharpness of the dairy version. I have heard that the flavour improves as you make more batches and I hope it will sharpen up a bit
I am also making kefir with soya milk, using my milk kefir grains. I have read that they need to be fed regularly with dairy milk or they will eventually die, but I would quite like to transition away from dairy altogether. The only thing I am buying dairy milk for nowadays is for fermenting/culturing. The flavour of the soya kefir is very bland indeed – the only indication that it has turned into kefir is that it is quite thick. I don’t know how to make it taste sharp. Also, after decanting it into a bottle to store in the fridge, it does not give off the characteristic “pfssst!” that the dairy kefir does as the CO2 escapes, which rather implies that it’s not really fermenting. I have tried leaving it longer, but it doesn’t seem to make any difference. Is it possible to use water kefir grains with soya milk, and if so, do you have to add sugar? This is also something I am keen to avoid if possible, but if the grains are consuming the sugar I suppose that’s not so bad – the only thing I use sugar for nowadays is to make kombucha.
I would be grateful to hear any thoughts on these subjects.
Im.giving it 5 star because im sure it would have worked if my instant pot would not have shut off early. Im notnsure when it shit off but its the consistency of kefur now. Can instill use half of a cup a starter for my next batch?
Since it shut off early, the bacteria didn’t have enough time to grow and multiply, so 1/2 cup would have fewer bacteria in it. You may want to double it and add 1 cup of starter. 🙂
Thanks for the tip on using the starter on subsequent batches. It really works… like magic! 🙂 The second batch (using the starter from the first batch) was so much better, more tangy, and definitely thicker than the first batch. Can’t wait to see if the third batch is even thicker.
I’m so happy that it worked well for you!
Hi there, Monica! Thanks for this great information and recipe. Since the first batch out the gate will not be the best, can we just make a small amount … for example, 16 oz of soymilk and 2.5 probiotic capsules? Basically we’d like to make the smallest batch that will work. We are excited to try it!
I haven’t tried that, but I think that it would work. If my first batch is a little runny, I usually use it in smoothies or something.
This turned out great for my first time! I have a question though. For my first batch I used one 32 ounce of soy milk and saved half a cup for my next batch. However for my next batch I would like to double the recipe so would it be OK to still only use the half cup starter or would I need a full cup? and for triple the recipe would I need 1.5 cups starter?! Thanks so much!
I always use 1/2 cup of starter for each 32 oz container of soymilk that I add. So if I double the batch, I use 1 cup of starter. Enjoy! 🙂
I accidentally messed up my email on my previous post! I’m sorry. I love the Taste but my batch is very liquidy. I used Homemade soy milk with water and soybeans only. Is this normal for the first batch to be so liquidy? I also used 40 billion For the probiotic
It was probably liquidy because your homemade soy milk has a different protein content than the store-bought version. Maybe try adding less water when you make your soymilk and that will help thicken up the yogurt as well.
Dear Monica,
Thank you so much for sharing this lovely, easy recipe.
Last night was my first time attempt at homemade yogurt, and it was so exciting to wake up to a successful batch! For my family, being in quarantine has meant skipping trips to specialty stores, meaning no store-bought vegan yogurt now. I follow a mostly plant-based diet, and discovering this recipe has helped me stay on track. What’s more, I just discovered an amazing vegan lemon bread recipe that includes vegan yogurt, and now I can use vegan yogurt instead of a dairy-based one. Here is the recipe in case you are interested: https://chocolatecoveredkatie.com/2019/04/04/vegan-lemon-bread-recipe/ (not my recipe. love it, though)
I will be subscribing to your blog.
Sending you love from California!
I’m so happy that you liked it, Victoria! The lemon bread sounds delicious! 🙂
I love your recipes but need to clarify something. Hopefully you can help!
I made my first batch a month ago and saved 1/2 cups a starter but consumed all the rest. A week later, I made a second batch by putting my 1/2 cup starter into the instant pot with my container of tj’s soymilk. We at each all of the second batch except 1/2 cup that i used to make my third batch. But now after reading the recipe again I’m wondering if I should have saved ALL of that first batch as a big container of starter instead of 1/2 cup that gets used each subsequent time. I would be super grateful for your guidance here!! Thank you!
Hi Julie, It sounds like you did it correctly. You just need 1/2 cup of starter on the 2nd batch and all of the batches after that. Enjoy! 🙂
It could be the result of using soy milk that has other additives in it.
I’ve been using the original recipe for a few weeks. How long can we continue to use the original starter before needing to replace with a fresh batch?
My starter usually lasts between 6 and 10 weeks. Just be sure to put it in a very clean container and it should be good for about 2 months. I’m so happy that you like it! 🙂
It’s entirely possible to make your own soymilk by taking 1 C organic beans, soak overnight with a 1/4t baking soda, to help disperse the oligosaccharides [the sugars from beans that can create gas at both ports] rinse, then steam in the InstantPot on high for 11 minutes using a fine SS vegetable steamer. Blend with 5C H20, then put in a high-speed blender for 1 minute.
Add this to the Instant Pot with a starter and set the timer for 15 hrs on the Normal setting. The advantage of the whole bean yoghurt is that it is far healthier, than any store-bought milk for those urbanites, while being a tad textured, due to the solid fibre, which, is crucial to the proper absorption of the nutrition from the juice alone. My Duo only goes to 95 degrees F using a Taylor Instruments candy thermometer, so I need to strain some of the water away. Et voilà!
Thanks for that homemade soymilk recipe, John. It’s super helpful for people who can’t find the store-bought versions. 🙂
Thanks John, This looks like a super recipe for those of us that prefer a healthier soy milk than what is available commercially. Looking forward to trying this.
Have you made soy yogurt with this soy beverage? If so, what starter amount do you use?
John, thank you for posting your process from whole soy beans. Cannot wait to try that in the instant pot.
Monica, thank you for the simple recipe. I used to make my own yogurt years ago, from whole milk, before I started eating plant based. Since then I had not tried making my own. Your recipe may motivate me to try it again.
You’re welcome, Marta. I hope that you have success with it. 🙂
I’ve been using Trader Joe’s soy milk, but they just discontinued it! Does anyone have any other suggestions? (Not Westsoy, as that is 3 times the price!) Thanks!
Trader Joe’s and Westsoy are the only 2 brands that I’ve seen with those simple ingredients of only soybeans and water. It was at my Trader Joe’s a few weeks ago. Hopefully, they will get it back soon. I will let you know if I find an alternative anywhere.
edensoy unsweetened soy milk. Reverse osmosis water and soy
Hi Nadine! I know your question was months ago, but I wanted to add that Trader Joe’s does currently have their “soy beverage” with only soybeans & water and I’ve also had success finding Westsoy unsweetened soy milk (also just soybeans & water) at Walmart for about $4 per half gallon shelf-stable container tucked away in odd parts of the store lol so that’s comparable to the price of TJ’s. I’ve made excellent yogurt with both! Good luck!
TJoe discontinued it at my store, too, about two years ago. This wasn’t just me not finding it on the shelf. A TJoe employee went and looked on their computer. Discontinued. But, within a few weeks, suddenly they had plenty again.
Hi there!
I am wondering: do you think this method would work using blended tofu instead of soy milk? As tofu is almost always just soybean and water, I find is so much easier to find!
That’s an interesting idea. I have never tried it, so I don’t know. If you try it, please let us know. 🙂
Dumb question time! But can I freeze the starter? Not sure I will always be able to make every week or so, and would prefer to not have to start over every time to get the “third times the charm” taste!
Hi Jennifer, yes, you can freeze the starter. I’m not convinced that it works as well as just making a batch again a few days later, but it does work. Enjoy! 🙂
I’m on my 4th batch using previous batch, 1/2 – 3/4 cup amounts, as starter for the next batch. We love the flavor. It’s especially awesome when used to replace sour cream in vegan recipes. Tastes just like it if you ask me. My yogurt is somewhat watery, but I put it through a mesh strainer after it cools and what’s left (4-5 or so cups) is pretty thick. Great recipe! Thanks so much!!
I’m so happy that it’s working for you, Aricka! 🙂
hi! I have tried this recipe, and the first batch came out absolutely delicious! thick, not too sour, creamy, genuinely delicious! but then I tried (woth the same milk and procedure) to make another batch (using the first one as a starter) and it turned out as a complete fail, there was a lot of water floating above the “yoghurt” and the yoghurt itself was much thinner and kind of sticky and runny when eating it (not st all thick and creamy), I thought maybe the problem is that I added to much of the last mix (around 4 tbsp) or maybe I didn’t mix the 4 tbsp with the doy milk well enough.. any tips? and should I continue using this as a started (since opening a new capsule is slightly expensive) (currently doing the next batch but seems to have the same problem).
Also thank you so much for the recipe snd tips, eternally gratefully for all the help, very much enjoyed the first batch!!!
It sounds like you didn’t add enough starter to the 2nd batch. 4 tbsp is equivalent to 1/4 cup. I always use 1/2 cup of starter for the next batch. Try increasing the amount of starter and let me know how it goes. Enjoy! 🙂
Something similar happened to me with this method. I have used this method numerous times with great success. I am so thankful to’ve found this easy way to do it! The last two times I attempted, though, I was surprised to find results that sound identical to yours (watery, thin, runny), but mine was also slightly smelly. I can’t figure out where I went wrong with these last two batches, as I used the same method that was so successful in the past. I’m nervous to make another attempt and waste more ingredients. I did notice that my probiotics are set to expire in six months, so I’ve ordered more with high hopes, just in case that may be the problem.
It sounds like it worked! Any bacteria that shouldn’t be in there would come from the inside of your pot or your utensils. Make sure to clean everything really well before you start a batch. Even take the rubber seal out from around the top of your Instant Pot and wash it well.
Apologies if you’ve already answered this. I’ve made five batches, first with starter and each batch after with leftover from the previous batch. I’m resolved that it won’t be as thick as commercial, but that’s fine with me and insn’t a “deal breaker” and I really love the taste. I’m getting ready to start batch number 6 and my question is: do I keep using leftover from previous batch or at what point should I use the starter again? Will the original batch eventually “wear out”? Thanks for any direction.
I tried your recipe and the yoghurt turned out with the right consistency. But I think it fermented too much, the yoghurt is too acid and has a strong taste similar to lemon.
Do you think even if the yoghurt is too fermented, I can use a bit as starter for the next batch? Or will again turn my yoghurt acid?
Thanks!
It should be fine to use it as a starter. I think soy yogurt my be a little tarter than dairy yogurt. Does it taste okay if you add a little sugar?
Part of my family is soy intolerant so I want to make yogurt out of oat milk. Have you used it? Ant tips?
I’ve tried it with oat milk a few times with no success. Ripple brand milk does work, but my family didn’t like the taste.
I have tried making oat milk yogurt in the Instant Pot MANY times with MANY methods, and no success. If anyone can come up with a sure-fire way to do it, I would be thrilled!
My first batch was just as expected, and we loved it! I made my second batch from a half of container of remaining Westsoy. I heated it up to your recommend 180° and added my 1/2 cup starter from my first batch. I mixed it in and closed the IP and set for 15 hours as before. After the IP finished I found a soup not yogurt. Do you have any further instructions when using leftover container of soy milk? Or how to double for 64 fl oz container of Westsoy?
I wonder if the milk didn’t cool off enough before you added the starter and it killed the bacteria. (You need to let it cool back down to 112 F before adding the starter). You can double the recipe and use a 64 oz container of Westsoy by simply doubling the probiotic and then everything else is the same. I’m so happy that you enjoyed it! 🙂
It doesn’t say anything about heating the milk and then letting it cool before adding starter. Could you please clarify?
If you open a new factory sealed container of soy milk and use it immediately, then you don’t need to heat it before incubating. If you use a container that has been opened, then you will have to boil it and let it cool again before adding the probiotic. I highly recommend just using a new sealed container of soy milk.
So I’ve tried this recipe a couple of times, but have run into the same issue others have had with a pink film forming on top of the yogurt. I’ve been using the West Soy brand, are you still having trouble with the Trader Joe’s brand? What would you recommend to try? Thank you!
I’ve had good luck with Trader Joe’s brand recently. Clean your Instant Pot and all of your utensils very well before your next batch. Take the rubber seal out of the lid of your Instant Pot and scrub it in hot water too! I hope that helps! 🙂
I’m really having trouble with this recipe. I got the probiotics you suggested and am using Trader Joe’s Soy Milk shelf stable, but my yogurt is super watery. It’s not thickening at all. What am I doing wrong??
I’m not sure what it could be. Is your Instant Pot keeping the correct temperature for 15 hours? Do you have your vent on the IP set to open to let out steam? Are you getting a lot of water on the top? Sometimes the first batch is runnier. If you think you did everything right, you can use the first batch as starter and try again. It does get thicker after a few batches. I have a video of me making it on my Instagram stories if that helps. 🙂
Don’t give up. I find making yogurt is like making bread and pie crust. It takes a few times before it comes out right despite following directions. It takes a “feel” and perhaps practice. Seems like yogurt would be more exact than bread but I remember when I first began making it (with dairy) 55 years ago, it took a few tries to get the taste and texture perfect. I made it by the gallon, wrapped the jar in towels and put it in the oven and let the pilot light keep it warm. (Before electronic starters)
Hello
I’m having difficulty finding soy milk with no additives. I did find Silk soy milk however it lists vitamin/mineral blend, sea salt and gellan gum as ingredients. Can I use Silk soy milk to make yogurt? Thank you !
Gail S
Hi Gail, No, the Silk or any other with any added ingredients besides soybeans and water will not work. I tested a bunch and they all failed except for Westsoy and the Trader Joe’s brand that I mention in the post. They are both shelf stable, so you may be able to order them from Amazon, or stock up when you go to a larger city.
I use it successfully in my IP. I use the unsweetened one in the green/blue carton. In the refrigerated section. Not shelf stable. I use silk almond milk yogurt 4 a starter. My store only carries the vanilla and it works.
I noticed in your instructions above the recipe you said not to stir when adding starter and in recipe instructions you say to stir thoroughly with whisk. If the seal is removed on IP lid condensation doesn’t build up as much. If people have a hard time finding active probiotics (which aren’t shelf stable so only buy refrigerated unless states shelf stable) they can use regular plain yogurt made with any plant milk. Although I’ve used vanilla and it worked fine. Also straining yogurt through a fine mesh bag makes Greek style yogurt.
Hi, I was hoping there would be an answer to the first paragraph about whether we should stir / whisk or not when using the starter after the first batch, as I also noticed the discrepancy between the explanation and the instructions, so I’m confused. I need to make my second batch today and would be very grateful for a reply. The first batch was delicious, thank you! Greetings from Spain 🙂
Yes, you should add the starter then stir or whisk it for about 30 seconds. I’m glad the first batch worked well for you the second batch should be even better. 🙂
I’m new to using an instapot and mine does not have a yogurt setting. Is it possible to use a different setting to make this?
I’m not aware of any other setting. You need the yogurt to stay about 112 F for about 15 hours. You could try the warm setting, but if it gets over about 115 F you will kill the culture.
Used the West Soy and half a 50 billion probiotic capsule. First batch was incredible! I found westsoy discounted but in a 64 ounce container at Walmart so want to do this again but doubling the recipe.
Any idea how long the yogurt will stay good for in the fridge? It’s just me and I’d probably eat 1/2 cup a day. So that new milk would be 16 days of yogurt…
I’m so happy that you liked it! It stays good for about 5-7 days. Be sure to use a clean spoon to scoop it out. If unwanted bacteria gets in it, it won’t last as long. You can also freeze the unused portion and your starter if you need to. Enjoy! 🙂
I’m getting ready to make my first batch, but am somewhat intimidated by the starter capsules. Mine do not give in CFU increments, but say “8 Billion Active Cells”. On the Supplement Facts list it gives a breakdown, but still completely different increments. It is a name-brand product with “five beneficial strains” labeled “Multi-Flora Probiotic. Would this be okay to use and would using two capsules (16 billion active cells) be too much? I guess what I’m asking is: do I have the right product and how accurate does the measure have to be? Thanks for any direction. I’m so anxious to make this–it’s impossible to find in the stores around here, unless you want sugar and tons of fillers.
I haven’t used that specific probiotic, but I think that it should work fine. Two capsules should be enough. Make sure to let it incubate for 15 hours. If it doesn’t look done at that time you can let it incubate for another hour or two. Let me know how it comes out! 🙂
Thank you for your response and recommendations! This first batch did turn out well, a little on the thin side, but am hoping for the thicker version on the second batch using the half cup of starter. The taste is good–at 1430 hours, it’s a little tangy, but not a deal breaker. I’m very pleased with the results.
My question now is: does it matter how much of the original starter capsules are added? In other words, does more or less make a difference? Would it be thicker if I used more capsules or does it not matter? I’m wondering what causes thickness.
I’m going to make another batch tomorrow night and it would be nice to know. I eat a lot of yogurt!!
A concern I had–and was not able to find an answer online–is how much energy will the instant pot use over 15 hours? I noticed when I used my slow cooker a lot, my electric bill went up considerably and I was surprised because I didn’t think of a slow cooker as being that much of an energy drain. Any ideas about that? It’s an added plus though to let it “ferment” overnight during non-peak hours.
Hi,
I have been looking for an answer to that very question. Have you found out already? How much does using the instant pot on yoghurt setting for 15 hours cost?
Anybody?????
My first batch turned out great, a little thin, but good. Second batch I made using Silk Soy didn’t turn out well and I’m going to make another batch, batch 3, tonight using the original WestSoy with starter from my first batch.
Two questions:
1. the second batch is really watery and lumpy, but tastes like ok, kind of like buttermilk or kefir :); is there any harm in using this batch, i.e. smoothies etc.?
2. Do you have a recommendation for thickening as in adding extra starter or different processing time? Just wondering.
I followed directions. Used Trader Joe’s brand soy milk and country life probiotic 2.4 billion CFU that I purchased new with expiration 06/21 it not only is liquid it has a pink slimy layer on top and smells a bit funky. I did use yogurt setting for 13 hours to make it less tangy as per the directions. Any thoughts??
I would throw it out and start again. Pink and slimy are never good. Make sure your instant pot is very clean and you are using a new unopened container of soy milk. Any unwanted bacteria will ruin your yogurt. I hope that helps. 🙂
I made this recipe using the exact Westsoy soymilk and probiotic linked to in the recipe, and it’s totally liquid. I’m wondering if I messed up on step #5 on the instructions? “Place the lid on top and make sure the valve is turned to vent to allow humidity to escape.” My instant pot vent was all the way open — should it have been partially sealed? Thanks!
You should have the vent all the way open, but if it’s totally watery, my guess is that your probiotic was bad or you didn’t have enough. You need enough bacteria to turn it into yogurt. Hope that helps. 🙂
How long can the starter last in the fridge before it goes bad? Thanks!
Hi Tom, It usually lasts about a week.
I followed the directions exactly, but my batch came out very watery. It tastes pretty good though. The liquid isn’t quite sitting on top though, so I wasn’t able to remove the water. Do you have any suggestions as to what I can use it for? I really hate to throw it out.
Also, if I use some of this as a starter batch, how much should I use, and should I even be using it for the next batch?
Thanks. I made it a couple of days ago, so it’s sitting in the fridge now.
If it was really watery, I think you may have had bad probiotics and you should probably just start over. Were they old? If it just was yogurt consistency, but just a little runny, I would say that you could use it as the starter for your next batch, but increase it to 1 cup of starter. Either way, you could definitely use it in a smoothie. Hope that helps. 🙂
This was a total fail for me
After buying organic West Soy soymilk on line for $2.50 per 32 oz. I discovered the 64 oz. organic, plain, unsweetened soymilk from Westsoy, with only soybeans and filtered water for $3.98 at Walmart. I could have saved some money. Thought I would let your readers know.
By the way, this one does not have sea salt and brown rice syrup but I had pretty good results from the one I bought online. I am trying a new batch at this moment with the correct soymilk, one half a capsule from a 30 billion cfu probiotic and about a teaspoon of pectin.
Thanks for letting us know. I haven’t had any batches come out if they have anything in the milk, but soybeans and water, but I’m excited to try it.
Hello! I couldn’t read through all the comments but do you have probiotics you recommend? Thank you!
Hi Sebastiaan, I have a link to the probiotic that I use to make mine above in the post. It comes in vegan gel caps that are easy to pull apart. I find it at Whole Foods, but you can get it from Amazon too. I have heard from my readers that many varieties of probiotics will work. Let me know how it goes! Enjoy! 🙂
Hi! I made your amazing yogurt this weekend, did 3 batches back to back! I tried a couple of things I read elsewhere and wanted to share. I found this site where this person tested how much starter to use and how low to let it incubate. My last batch, I only used 1 teaspoon of my starter and left it in the Instant Pot for 8hrs, and it came out wonderful. The other thing I tried with the second batch was too put it in a cheesecloth and let it drain for ~ 1hr, like they do for Greek yogurt. That also came out fantastic. I puréed some left over mangos I had and mixed it all together… I am never going back to store bought! Thank you!!!
Hi MJ, I’m so happy that it worked well for you! I’ve never tried using so little starter, but I’m glad to hear that you had success with it. I’ve made Greek style with a cheese cloth too, but I felt like I lost half my yogurt that way. I have to come up with something to do with all the liquid that I drain off, maybe put it in my smoothies or use it for homemade vegan cheese. I’ll have to test it out some more! So happy that you liked it! Thanks for leaving a review! 🙂
Ooh. I like the idea of making a vegan cheese with the liquid but I’ve just been drinking mine. Lol
Hello! You recommended Trader Joe’s Unsweetened Soy Milk which is what we always have, you also mentioned only soy and water as ingredients but TJs ingredients are: filtered water, organic whole soybeans, calcium carbonate, sea salt, natural flavors, carrageenan, vitamin a palmitate, ergocalciferol (vitamin d2), riboflavin (vitamin b2), cobalamin (vitamin b12).
Is this ok? Thanks! Can’t wait to try this!
Hi Alice, I’m sorry, but that is not the one that will work for this yogurt. It has to be the shelf-stable one that they sell on the shelf near the cereal. This one only has water and whole organic soy beans. (It’s in the picture above being poured into my instant pot). I just tried Ripple last night and it worked GREAT! So, that is another choice for you too. Hope you enjoy it! 🙂
Anxiously awaiting you to do this with oat milk !!
I just tried it with my homemade oat milk last week and it did not work. I’m going to try it tonight with Ripple (pea milk). I’ve heard from many others that it works well. I’ll let you know! 🙂
Hi there. I used Westsoy. 64 oz. I used a probiotic that has 100 billion per capsule, 34 strains. I only cooked it for 11 hours because I needed to go to bed and I didn’t time it out well. After spooning off the water, the yogurt had some clumps and was thin in some spots and think in others. I used an emulsion blender to smooth it all out. It was more of a Kiefer consistency than yogurt. I put it in the refrigerator. In the morning it separated. Liquid was on the bottom and the thick yogurt was floating on top. I scooped all the yogurt off the top and dumped the liquid. It was lot of liquid, 1.5 cups. Now I’m left with perfect yogurt. I added agave, vanilla and strawberry jam. It fantastic. I’ve never made yogurt. First try and I came out great. Thank you for sharing the recipe. I read many recipes before choosing this one. I wanted a more economical way to give my family of 4 the benifts of probiotics. Success! Thanks again for sharing the recipe and all your tips.
Nicole, I’m so happy that it worked out well for you! I think that you will have even more success if you can time it to leave it in for the full 15 hours. I’ve never been able to get that much liquid off of mine, but I’m so happy that it worked well for you!
I used 1 tablespoon of store bought Silk unsweetened soy yogurt as my starter, set the instant pot to yogurt for 14.5 hours, the result is super sour and tofu pudding in texture, not yogurt. I did eat out of the Silk yogurt for two days so maybe bad bacteria got in? Is the half hour extra too much? I would appreciate it if you could give me some pointers.
I usually use probiotic for a starter. I can’t find the plain unsweetened soy yogurt where I live, so I don’t use that. I have a feeling that the yogurt itself had some bad bacteria in it if it had been opened and used for a few days before making the yogurt. I think that you would also need more than a tbsp of yogurt for a starter. I use 1/2 cup of yogurt as a starter and the store-bought type doesn’t have as much live culture. Hope that helps. 🙂
Hi Monica,
Thank you for this recipe! I bought the instant pot and can’t wait to start making my first yoghurt. Will your recipe also work with half of the amounts, 2 cups of soy milk?
Hans, It will work with half as well. Hope you enjoy it! 🙂
How come it’s only soy milk that seems to be the only plant milk to make thick yogurt? So far I’ve tried to use almond milk and cashew milk (the clean ones from Rude Health) in an instant pot 🙂
Hi Michael, Yogurt is a very specific scientific process. It has to be the right conditions for the culture to grow. Soy just seems to be better for that. I have heard that ripple (pea milk) and oat milk also work well. I’ll be testing them out soon and will let you know how those work. 🙂
Hi Monica! I use my 8 quart Instant Pot to make my own homemade soy milk (I start with 400 grams of beans, soak 24 hours, blend and mix with 12 cups water total, cook on high 5 minutes and natural release). I assume since I just cooked it, that all I need to do is let it cool down to proper temp, mix in probiotic and put in my other Instant Pot that has the yogurt feature? (I really need to get one of the bigger ones with yogurt feature also…)
Wow! I have never made it from soybeans before, but yes, I think that it will turn out the way you are describing. Let me know how it goes. 🙂
we are making yogurt but we didnt used instant pot. you said to keep it maintain 112°F while incubate. did you put the first batch with probiotic at 44°c? or higher than that?? need answer and so exicted to try.
Hi Bella. I add the probiotic to the soymilk before heating it. Then the Instant Pot slowly heats it to 112 F / 44 C and keeps it at that tempature for 15 hours. (I do this with every batch). Hope this answers your question. 🙂
This method of yogurt-making has yielded perfect yogurt in my 3Q mini. The first batch, made from cultures, was actually quite good. This time I used starter from the first batch and the results are amazing – thick, perfect-tasting yogurt. Thanks so much!
I’m so happy that it came out well for you! Enjoy! 🙂
I love this recipe. My first few batches have been great. I’ve even had good results using a frozen portion of yogurt for the starter (defrosted). My only questions is it’s a little grainy. The flavor is fantastic and the grainy texture doesn’t matter much, but is there a tip to to fix this? Thanks again! I had largely quit eating yogurt after becoming vegan because it was so hard to find anything that tasted right. This does the trick and is so easy!
Robin
I’m happy to read that freezing the starter works! I haven’t done that yet, so I’m not sure what to do about the grainy texture when you defrost it. Maybe try stirring it really well before adding it to the milk? 🙂
Anxious to try for my child with a milk allergy. Bought all the ingredients, but when I hit the yogurt button, it said “boil.” After about 5 mins it said “yogt.” I wasn’t then able to set the timer for 15 hours. The yogurt button is lit and the pressure level says low. Timer is counting up not down and lid is not locked. Not sure if I’m doing this right… 😐
I’m not sure what is going on with your Instant pot. Is it a different brand? Mine does not boil before going to the yogurt setting. Your yogurt should not be under pressure and you don’t want your probiotic to heat past about 115 degrees F. Do you have the vent open? If you think that your probiotic got overheated, throw it out and start again, otherwise wait 15 hours and see what happens. Good luck! 🙂
For anyone experiencing this issue, press the Yogurt button a second time to change it to the incubation setting [press once to boil, press twice to incubate].
Hello,
Thank you for sharing your recipe! I just tried this recipe with the organic plain soymilk and one probiotic capsule with 60 billion. The consistency was watery and clumpy. The taste was the perfect yogurt tartness. Should it be clumpy? Or is that the wrong consistency?
It comes out slightly different each time that I make it. It’s not usually clumpy, but with fall apart easily. If you stirred it before you drained off the excess water, then it will have a clumpy texture. It also gets firmer once you make it a few times and the starter matures. Get all the liquid off of it that you can and use it for the starter for a second batch and I think you will have good luck. (Make sure it’s the soy milk with only soybeans and water too). 🙂
Hi,
So I’m on my fourth batch of yoghurt. The third batch, I didn’t have enough time to let it go the whole fifteen hours (just never enough time between shifts 🙁 ) so I turned it off around 13 H and put it in the fridge right away. It wasn’t as thick as previous batches, but it still was still a bit tangy and creamy. Since I knew there was less culture in that batch, for batch four I used twice as much starter as usual. I let it go for the full 15 H, cool for about half an hour, opened it up and found it looks like this – https://photos.app.goo.gl/R9bYDzL2TpmZ24yX8 – it seems to be floating somewhat in water. There’s water all around the sides and the yoghurt moves. Ever other time, the water has been on the top. Do you know what might be going on?
Also, regarding the issues other folks are having with mould, I haven’t had any thus far. I run the steam setting for 2 minutes, chuck out the water, careful not to touch the inner pot, use just-opened soy milk, and sterilize my whisk in boiling water first. When it’s done, I also dunk the jar I’m keeping the starter in in boiling water, along with the spoon I use to remove the water with.
Hi Alex, I’m glad that you are having some success with this recipe! The water is normal. Make sure your vent valve is open so some humidity has the chance to escape while incubating. You can also take the lid off a few times during the 15 hour process and spoon off excess water. If you have time, you also want to let the yogurt cool uncovered to allow the extra moisture to escape. Just make sure to spoon off any excess liquid before you stir the yogurt. Hope you enjoy it! 🙂
For subsequent batches, use 1/2 C starter… to how much soy milk? Still 4 C? Thanks!
Yes, follow the recipe the same way except for use 1/2 cup of starter instead of the probiotic capsules. Each batch with the starter will yield 4 1/2 cups of yogurt. (But save 1/2 cup for your next batch). 🙂
Hi Monica,
I have a quick questions – I have 50 billion probiotic, how many capsules should I use for this recipe?
Thank you!!!
Wow, that’s a powerful probiotic! You probably only need about 1/2 of the capsule. I have never used one that strong, so it’s hard to say. It also depends on how fresh they are and if you have kept them under the proper conditions. If you have had it a while, you may just want to put in a whole capsule. Good luck. Let me know how it turns out. 🙂
I can’t find unfortified soy milk ANYWHERE where I live. Soybeans, water, no vanilla or sugar, but lots of added vitamins for some reason. Will it work? 🙁
Linden, unfortunately, it will not work with anything but the plain soy milk with nothing added. Some people have reported that it has worked with Ripple pea milk. You could try that if you can find it.
My very first try turned out perfect. Thank you! Have you ever tried straining the yoghurt through a chesse cloth to achieve something close to Greek style yoghurt?
So happy to hear that it turned out so well for you! I have strained it to make a Greek style before, but I was only left with a small amount, so I don’t normally do that. I make sure to skim all the water I can off the top and let it cool uncovered to allow all the excess steam to evaporate. That helps to thicken it up. Also, it will get thicker as your yogurt culture matures. Enjoy! 🙂
When I took my lid off the entire top film was pink. Is that a sign of bad bacteria?
Yes! If it is pink you have to throw it away. Some bad bacteria got in it somehow. Wash all of your equipment very well in very hot or boiling water, dry it completely and start again. Make sure to start with a factory sealed container of soy milk too!
I just bought an Instant Pot and the very first thing I made was this vegan yogurt recipe. It came out perfect! I did have to add 1 tsp of vanilla and 2 tbls of agave because it tasted like sour cream (now I know how to make sour cream haha) but with the sweetener it was absolutely perfect. I’m a sweet over savory type person anyway. So thank you for this recipe. I saved my 1/2 cup of starter and look forward to the next batch. Maybe I will try 14 hours as I read here the less time the less sour/tangy. Thanks again!
If you are not used to homemade yogurt, it is very sour. I need to add a little sugar to mine as well. If you buy the store brands, they will have a lot of sugar.
I don’t have a machine. Soak 2 and 1/2 cups of high quality, organic soy beans over night. 10 hours. Boil a gallon of water in a soup kettle. I use a Victoria hand crank grinder to make a paste of the soaked beans and then put them in the boiling water and cook, covered, at low temp for 30 minutes. Watch carefully because it will foam up, push the lid and over flow. Keep a 1/2 cup of cold water at the ready in this case; pour in a stream of water down the middle and the foam will subside. but keep the lid on, or yuba will form, which is also very good, if that is what you want.
When this is done cooking, i put in two heaping table spoons of honey and a couple of teaspoons of vanilla, stir well, and then pour the milk thru cheese cloth lining a colander into another large pot and squeeze out all of the milk. boil two more cups of water, open the cheese cloth and pour it in, re-wrap the okara, and press it again for maximum yield.
at this point you make the yogurt, while the milk is still very fresh and hot. i buy a container of good dairy yogurt and put a dollop of it on the bottom of the jars, but will try out the 1/2 cup starter method soon. shake them up good. then I put these jars in a cardboard box lined with aluminum foil and use some small towels to fill the gaps; cover with foil and close the box lid. I then put a pot of boiled water, lid on, on top of the box, and then let this sit for 8 hours.
This yogurt turns out sweet, and not beany or sour at all. This is because of the high quality, fresh organic beans and minimum cooking time.
This will make a half gallon of yogurt and a 1/2 gallon of soy milk. you can also easily slip in some vinegar into the hot milk and then press the curds for fresh tofu.
most of this i learned on The Farm, from Louise Hagler and Barb Bloomfield.
Wow Mark! Thanks for all the details on how to make it this way! I’ll have to give it a try! I’ve always wanted to make my own tofu, but haven’t attempted it yet.
Wow! What a gift this recipe is. My husband and I used to love yogurt as a snack but gave it up when we gave up dairy a few years ago. I made yogurt often dairy and then tried non-dairy, and gave up. Lot’s of effort with little success. I refuse to pay the high prices for non dairy yogurt. I got an instant pot a few months ago and came across this recipe. I have made several batches and it comes out perfect every time. Thank you, thank you, thank you.
I’m so happy that this recipe has helped you guys be able to enjoy yogurt again! 🙂
Hi Monica, I haven’t tried this yet, but would this work with soy milk that has added calcium? I buy unsweetened non-dairy milk, but I like to get versions higher in calcium as that is one of our major sources of that nutrient. Thanks!
I don’t think that it will work. I tried it with countless types and it only worked when there were only soybeans and water. Enjoy! 🙂
Mine was watery and not sour. I am unsure what I did wrong. Followed the instructions!:(
I have been making this for years without any problems, but my last batch didn’t turn out well either and a few people have reported the same thing lately. I feel that there must have been a change in manufacturing. I hope that it was just a bad batch of soy milk. Maybe wait a few weeks and try it again. I will try to contact the company and see if there was a change.
Hi there! Quick question:
I’ve attempted this yogurt recipe twice now. The first attempt was with soy milk that had added vitamins and minerals. It turned out to be too liquidy and had a bunch of pink coloration on top.
In the second attempt, I used the Westsoy brand of milk, sanitized my instantpot, and success! Well…sort of. I noticed that the top of my yogurt has a pretty thick skin on top and I noticed two very small, faint areas that were slightly pink. Is this normal? If I scrape the skin off the top, is this safe to consume? There doesn’t seem to be any pink areas throughout the rest of the yogurt.
I have been making this for years without any problems, but my last batch didn’t turn out well either and a few people have reported the same thing lately. I feel that there must have been a change in manufacturing. I hope that it was just a bad batch of soy milk. Maybe wait a few weeks and try it again. I will try to contact the company and see if there was a change. (I’m not sure about the skin on the top, that has never happened to mine). It should be fine to consume, but if you don’t think it smells right, throw it away and try again.
I followed this recipe exactly, used West Soy, plain unsweetened (only 2 ingredients, water and soy), and followed the instructions exactly, 15 hours, and 12 billion CFUs. When it went off after 15 hours the mixture inside was pretty much completely liquid still. Any idea why this might be?
I used Kroger brand probiotic, that is stored in the cupboard, not the fridge. Would that make a difference? The final mixture does have a slightly sour taste, and at the very bottom there’s a residue that formed, that makes me think it was kind of thickening up, but again, it’s mostly liquid. What could I try next?
Also, at the end of the 15 hours my Instant pot was warm to the touch, but not ‘hot’. How hot is the Instant Pot supposed to be after using the yogurt function? Too hot to handle? I could handle mine with no problem, at the temperature it was at. Again, warm, but not hot. Is that right?
Your Instant Pot should be warm but not hot. The ideal temperature is 112° F for incubating the yogurt. You could get a thermometer and check it if you don’t think it’s right. Good Luck! 🙂
Hi Natalie, I suspect that your probiotic was old. It should be kept in the fridge to stay the freshest. I would buy a new probiotic and give that a try. It’s not super thick yogurt, but it should not be watery. Hope that works for you!
I’ve been making cows milk yogurt for a while and always use the whey as my starter. (I always strain my yogurt with cheesecloth)
I’ve recently switched to soy using 50billion probiotic as my starter. My question is have you ever used the soy “whey” as the starter?
Hi Jay, I’m sorry, but I’ve never tried the soy whey. Let me know how it goes if you try it.
It went well!!
Now if I could only get used to the taste. Any suggestions if your to ease the sour taste?
I gave this a shot, using fresh Trader Joe’s soy milk, the same brand of probiotics as you, and a 15 hour yogurt setting on my instant pot. My yogurt looks nice and thick but there are spots of pink mold on it. I’m guessing the cause would be my instant pot not being clean enough. How do you recommend sanitizing it before I try again? Boiling water? Would it work to pressure-cook some water?
The only other culprit that I can identify is that my instant pot is an Ultra, and there are various possible settings for “yogurt”: Low (91 F)/Med (107 F)/High (181 F)/Custom (104-176 F). I didn’t see the custom setting at first, so I went with medium. Next time I’ll try Custom and aim for 112 F.
The pink spots are probably from your pot not being clean enough. Wash it well and rinse it in very hot water. You may also want to try the West Soy brand instead.
So sorry that this happened, Jennifer! I have a suspicion that It could be Trader Joe’s soy milk batch at the moment. They were out of stock for a while and I just made it with the newly stocked soy milk and the same thing just happened to me. I’ve made this 100 times with it working every time. I think that they may have had a bad batch. Switch to West Soy or try again with another batch number.
Hi
Is it normal if my soy yogurt tastes slightly sour
I removed it from the fridge 7 hours ago
Made it yesterday and refrigerated it instead of eating right away
Normally i ate right away after making and did not taste sour at all
This time it is slightly sour….smells ok…looks ok
Based on your experience does it turn sour if you leave it longer
My soy yogurt usually tastes a little sour to me. The longer you incubate it, the sourer it will taste. If this batch is too sour for your taste, you could reduce the time you leave it in the Instant Pot. Maybe try 13-14 hours of incubation next time. (Also, if you didn’t start out with a very clean pot, other bacteria could start growing and change the taste). Hope that helps. 🙂
Hello! I’m just curious on how precise the CFUs must be? If there’s more or a bit less is that alright? Thanks!
I have just found that 12 billion CFUs works well. I would use a little more rather than a little less if I had to choose.
Any update on freezing the starter?
Not yet. My local Trader Joe’s has been out of the soy milk lately, but I’ll try it as soon as it’s back in stock and let you know.
Any suggestions to use coconut or almond milk? I avoid dairy and soy….thank you.
Hi Cindy, It won’t work with coconut or almond milk, but I have heard people having success with Ripple which is a pea based milk. I hope to try Ripple soon and I’ll report back on how it works.
This worked out so well for me, thank you 🙂 I use an actual yogurt maker that keeps it at a constant safe temperature and you’re right, definitely after the first few batches it turns out even better. I made my first batch in October 18 and all of my subsequent batches have worked great as a starter. I get through it so quickly that it’s definitely saving me some money!
I’m so happy to hear that it’s working for you! It does save a ton of money if you buy a lot of soy yogurt! Enjoy! 🙂
My insta pot does not have a yogurt setting. Can I use a different setting or can you tell me to make it in my crockpot?
I don’t think that there is another setting on the Instant pot that you can use. The warm button will keep it about 150° F which will be too hot. You need to find a way to keep the soy milk close to 112°F for 15 hours. Some people do it in the oven with the oven light on. The heat from the light is enough to keep the oven warm. You can also put it inside another container then put it in your crockpot and turn it to warm for a few minutes. Then turn off the crockpot and wrap a towel around it to keep the heat in. Check it every few hours and if it starts to cool off, then turn it back on for a few minutes. (It is hard to regulate the temperature with the crockpot or oven though.
It worked well for me in my Excalibur dehydrator.
Wow Ruby! That’s great to know! Thanks for commenting and letting us all know that there is another way if you don’t have an instant pot.
My multi cooker does not have a yogurt setting either. If I use a yogurt maker how long does it cook for? The manufactures recommendation or follow the recipe?
Thanks!
If you are using a yogurt maker, set it to incubate for 15 hours. You just need the soy milk to stay warm (112 F) for 15 hours.
I made the first batch and was so excited that I forgot to save the starter! So…I went back and made a second batch with probiotic and pulled out my starter first thing! It turned out great, but I really love Greek yogurt (I’m dairy free while nursing) so I did decide to strain it for a few hours to make it thicker- I was super happy with the outcome! I’m wondering if it’s ok to freeze the starter and then thaw it in the fridge before using it in my next batch? Thanks for the recipe!
Hi Amalia. I’m so happy that the yogurt turned out well for you! Great idea to strain it and get a thicker Greek yogurt! I’m not sure if it will work if you freeze your starter. I have never done that. I know that you can with dairy starter if you only freeze it for a few weeks, but the soy yogurt is very sensitive, so I can’t say for sure. I will try it out soon and let you know. Your yogurt will taste better and be thicker with each batch you make as long as you save and use the starter. Enjoy! 🙂
I am anxious to try your recipe.
Can I use store bought soy yogurt for my starter?
Hi Barbara, no, sorry you can’t use the store bought soy yogurt for the starter. They just don’t have enough live culture in them to work. I find that a strong probiotic works the best.
Hi, thank you so much for this, I followed this recipe. I got the trader joe brand soy milk. I also got the probiotic tablets, instead of capsules. I crushed the tablets in powder and mixed it. I press the yogurt button for 10hours. However , I left the yogurt for maybe 19hours before removing it off the instant pot- it tasted sour and almost spoiled . Do you have any idea what happened? Also, can you give me a description of how your first batch should taste?
Thank you, trying to avoid dairy products
I’m not sure about cooking it for 10 hours and then leaving it for another 9. That should have been fine, but it could have had some unwanted bacteria in it and caused it to spoil. It will taste sour almost like there is lemon juice in it, but not rotten. If you have only had store-bought yogurt before, you may have never tasted a true plain yogurt. I would say to make it again being sure that all of your equipment if clean and you are starting with an unopened container of soy milk (Don’t use some that you have opened previously and kept in the fridge for a few days) and heat it for 15 hours on the yogurt setting. Save a 1/2 cup as your starter and add some vanilla and sugar to the rest of it. The taste will get better with each subsequent batch. Hope that helps! 🙂
Hi there!
I’m not sure if i understood this correctly. Is it right to say that the first batch made is saved as the ‘starter’ in subsequent batches? And since they are used as the ‘starter’ there is no need for probiotic capsules added to subsequent batches?
Thanks for clarifying 🙂
Hi Cheryl, You can eat part of the first batch, but you need to save 1/2 cup of it for your starter on your next batch. The first batch comes out okay with the probiotic, but the next batch will taste even better when you use the starter. You will only need 1/2 cup of starter for your subsequent batches as long as you make the yogurt about once a week. Hope that helps. Enjoy! 🙂
Thanks for the recipe! Just to clarify, does the starter last 10 days or 6-8 weeks? In the original post, it says use within 10 days, but in response to one of the comments, you wrote it lasts 6-8 weeks. Do you use the full 1/2 cup of starter for the next batch? Thanks for the help!
Hi Joanna, You have to use any starter that you have in your fridge within 7-10 days or it will start to go bad. As long as you keep making more yogurt about once a week, you can continue to save 1/2 cup of starter each time and do this for about 6-8 weeks. After about 2 months of doing this, I find that my starter dies (gets a pink color and a funny smell) and I have to throw it out and start fresh with probiotic again. Keeping your starter in a very clean and sealed container will help it live longer. You need to use all of the 1/2 cup starter that you saved for your next batch. You will then save another 1/2 cup of starter from each subsequent batch. Let me know if you have any more questions. 🙂
How often do you have to add more probiotics to the yogurt? I understand that you save 1/2 cup each time, but when does that need to be changed?
I have found that as long as you keep the starter clean (sealed in a very clean container) and in the fridge and use it at least once a week, it lasts for about 6-8 weeks before it goes bad. If it starts to turn an orange color or smell funny, throw it out and start with probiotics again. I never add more probiotics to the starter though. I hope that answers your question. Hope you enjoy it! 🙂
I looked everywhere for a soy milk that was only soy beans and water. Closest I came was Natura unsweetened, plain. It contains vitamin A and a scant few such vitamins but I was do excited to try it, I went ahead despite your warnings that it prob wont work out. I happened to have vegan probiotics in my fridge, prob too old now, but at peak strength were 15 billion in 1 capsule. I added 1 and hoped for the best! 15 hours later, it looked and had the consistancy of slightly thickened milk. I’ve put it in glass containers overnight in the fridge and am hoping the cooling process will help it into a thicker mixture. Worst case scenario I will add China seeds to thicken it naturally and boost the vegan protein. I’ll keep looking for the brands you mentioned and persevere though. I’m totally pumped about eating yogurt again, but this time,dairy-free!
Hi Mandy, I’m happy to hear that you tried it. It is so weird how it will not work with any ingredients other than soybeans and water, but I’ve tried it with a bunch of brands too, and it only works if those are the only 2 ingredients. I hope that you are able to find one of those brands soon! Good idea to thicken it with chia seeds though! 🙂
I bought an instant pot specifically for yogurt and I decided to give this recipe a try. I used West Soy organic plain unsweetened soy milk and my own probiotic 40 billion cfu’s. When I came back 15 hours later it was like nothing had happened! My hopes were dashed! My instant pot never feels warm on the yogurt setting and I was wondering if you use the boil setting at all. I even tried using a Kite Hill yogurt as a starter and saw a little thinkening after 24 hours. But that’s 24 hours with little to no progress. I’ve been reading and watching videos to determine what I’ve done wrong but I just can’t figure it out. I’m starting to wonder if I have a defective instant pot.
Hi Lea, I’m sorry to hear this. It sounds like something is wrong with your instant pot. It will feel warm on the yogurt setting. It is warm enough that there should be condensation on the top of the instant pot lid after a few hours. I’ve made this many times and have heard from many people that it has worked for them.
Exciting update: I returned the defective instant pot and have made a couple of successful batches now! The last one was the best and was a big hit with everyone. I added a little vanilla extract and stevia to the yogurt before putting it in the fridge. 🙂
So happy to hear this Lea! I knew that there had to be something wrong with your Instant Pot! Glad you’re able to enjoy it now! 🙂
Does it change the yogurt at all if there are more than 12b cfu’s? Like 15 or 40
It may work a little faster. You may want to check it after about 12 hours to see if you think it’s done. It should work fine though. Enjoy! 🙂
If I make this in a quart-sized jar (in the instant pot), should I put a lid (loosely) on the jar or not use a lid at all? Thanks!
Lisa – Don’t put the lid on at all. You want some the liquid to evaporate to make it thicker. 🙂
I had to give up all dairy for health reasons and was so sad to lose my morning yogurt…until I found this recipe! THANK YOU! Now, even if dairy was an option, I would rather have this yogurt, made exactly as you’ve so well described. Now I want to double the recipe so I don’t have to make it as often, and I see where I should use more starter…but do I also have to let it ‘cook’ longer? I can’t seem to find any advice about that one…
It’s an art to strain it to just the right thickness for ME, but oooo chilled and topped with my homemade granola! Starts the day just right!
You’re welcome Stacy! I’m so happy that it works well for you. It took me a lot of trial and error to get it right, but now that I have, we love it too! Enjoy! 🙂
Do I have to cook it longer if I double the recipe?
Hi Stacy – No, you don’t have to let it incubate any longer with a double batch. 15 hours always seems to work well no matter how much I make. 🙂
I tried this and it failed. The yogurt was way too thin. Aren’t different brands of probiotics different? Which brand did you use? I also kept the vent open. Then I tried it again, but this time I used cashew yogurt as a starter, and it was still not right. Tried one more time using almond milk yogurt as the starter with the vent closed, and it came out great. Many recipes online say to close the vent. I have been trying to make yogurt for a while now, even before these, and this last one was the only one that had a thicker consistency. I also doubled the amount of starter. I used 4 TB of almond yogurt for 32 oz. soy milk.
June, I only use probiotic the first time that I make this and then save the plain soy yogurt that I make as starter. Make sure that you use a new probiotic that has been kept in the fridge. Old ones will not be as strong. Also, make sure to use enough probiotic to total of 12 billion CFU. You can also try to incubate it a little longer. 15 hours is usually a good amount of time for my taste, but you can go up to 24 hours. The link in the post is the exact probiotic that I use for it. I hope that helps! Here is the probiotic.
Hey! My husband and I made your yogurt overnight and it turned out fantastic! Thank you!
I have one question:
When you double the recipe by using a 64oz container of soymilk, do you need to also increase the amount of yogurt you use as a starter? We held out 1/2 cup to use next time. But we would definitely like to double the recipe of finished yogurt. Thank you in advance! 🙂
Hi Robin, So glad that it came out well for you! Yes, I double the starter when I double the recipe. You could use half starter and more probiotic too if you want to try that. Enjoy! 🙂
Does the Instant Pot soy yogurt pick up the smell/flavor of anything you’ve previously cooked in it? I’ve done salmon and chili in my IP and the ring has an odor no matter how much I clean it. Also, after being in the IP for 15 hours, does it need refrigerating before it thickens enough to eat it or is it ready straight out of the IP? Thanks so much!
I have not noticed that it picks up the smell of anything that I’ve made before. Make sure you clean it as well as possible before you make the yogurt, any bacteria that shouldn’t be there can effect it negatively.
I made shawarma in mine and the ringsmelled soooooo strong I just decided to buy another from the instant pot website so I now have a ring for strong smelling foods and one other foods for yogurt and steel cut oats so the smells don’t mix. It’s free shipping on your first order and only like $8. Definitely worth it!!
Thanks for the tip Emily! That’s a great idea to just have 2 rings and switch them! 🙂
Hi,
I was just wondering about this being sugar free (love the sound of it). My question is: Doesn’t the Bactria need sugar? I might be misinformation.
Thanks 🙂
You’re welcome! 🙂 There are some natural sugars in the soy beans that the bacteria live off of, but there is no added sugar unless you choose to add it once it done.
I have the same question – why soy milk with added sugar (I made my own soy milk and added sugar) won’t turn out to yogurt? bacteria can either “eat” the soy sugars or the white sugar?
thanks!
I don’t know the answer to this Emanuel. I had the same thinking. I just know that I have tried it many times and it doesn’t work.
Question about the Vanilla variant of the recipe… Does the vanilla extract and the sweetener added to the initial batch create issues when creating subsequent batches from starter? The admonitions in the text of the article about using soymilk with only water and soybeans give me pause about adding flavor and sweetener. Thanks!
Take the starter out before adding any sugar or vanilla! The starter needs to be only the soy milk and probiotic.
Hi, I am used to making dairy yogurt and like to use as a starter a purchased plain yogurt that has five different kinds of bacteria. I’m okay for now with using that for the starter, even though it’s not vegan. I might try to find different kinds of starters in capsules and experiment with using one of each later, but I’d rather not do that experiment until I get used to culturing with soy milk, Have you ever used a combination of bacteria types to make this yogurt? What have your experiences been? Andrea
Hi Andrea, I haven’t played around with the probiotic much. I found one that worked well and I still have 1/2 a bottle of it, so I didn’t try others yet since that works so well. Wish I could be more help. Let me know how your experiments turn out. 🙂
Hi, I am excited to try this recipe. I have everything but my Probiotic capsules are 50 billion cfu’s. Would you recommend using these or should I wait?
Wow! That’s a strong probiotic! You could try it with about 1/2 of a capsule of that probiotic since it is so strong. I never used that strength, so it is hard to know. If you try it, let me know!
My probiotic capsules are 30 billion cfu’s and I used the whole capsule for the recipe. My yogurt turned out great.
Great to know! Glad that it turned out well for you!
I need a little help troubleshooting this recipe. I made a first, initial batch using the same ingredients and cooking method with the Instant Pot. It turned out great. However, I realized that I only used 5 capsules for the 64 oz container rather than the 10 capsules (since the batch was doubled). On my second, and third attempt, I did everything the same but added the 5 additional capsules to the recipe (expecting it thicken the batch a little more than the first batch) but each time the recipe failed: the mixture smelled funny and was separated with the soy on the surface of the pot and the liquid below. Any suggestions as to what may be causing this? Am I doing something wrong… or is there something different I can do to get consistent, successful results? Any tips and advice are much appreciated.
Sean, I’m glad that it turned out well the first time. I’m not sure what you may have done wrong in the next batches. Make sure your pot is very clean and you are using a fresh factory sealed soy milk. (Make sure the soy milk is the kind with only soy beans and water). I would also just make a single batch and then when that works use the existing yogurt to make more batches. It does come out better when you use the yogurt as starter. Hope that helps!
I have tried and failed so so so many times to make soy yogurt. Even though I’ve made dairy yogurt many times with success, for some reason using the same process to make soy yogurt was an unqualified failure. Until this recipe. I followed it to the letter and give it A+! I’m so excited to finally be able to make vegan yogurt at home!!!! Instant Pot yogurt making for life. I think the keys are instant pot (maintains stable temperature) and particularly the vegan milk without any additives whatsoever.
Hi Tara, I’m so happy that it worked for you! It was life changing for my family to have a way to make yogurt easily and consistently. Don’t forget to save that starter and use it each time. It gets better and better! 🙂
I just made my first batch today, but I was just wondering how it was supposed to smell. Everything looked normal and the consistency was great, the smell was just really strong. Love the recipe,Thanks!
I suppose what I make would be considered kefir, but both are essentially fermented soymilk so I’m not sure there is any real difference. I skip the heating process. All I do is empty a probiotic capsule into a carton of Trader Joe’s soy milk, shake it up, and let it stand at room temperature for 12-48 hours depending on how tangy I want it. It is much thicker than the original milk, though still liquid. Tastes the same as yogurt.
Wow! That’s a neat way to do it! I am guessing that heating it in an instant pot or yogurt maker makes it a little firmer, but I will have to try the “kefir” method that you describe! Thanks for sharing!
This was really easy and is saving me so much money on store bought yogurt!
So glad you are enjoying it!
The best homemade soy yogurt ever!
I made soy milk in my soybella. Just soaked non-gmo soybeans and water. Can I use the hot milk right after it’s done to make the yogurt in the instapot or would you suggest I let it cook down first?