How to Make Vegan Cheese
Have you ever wondered how to make vegan cheese? After over 2 decades of being vegan, I have been on a quest to make the perfect vegan cheese! I have finally done it and want to share it with you! This vegan cheese recipe made with coconut milk will blow you away!
It may seem overwhelming to make your own dairy-free cheese, but I promise that it is very easy and worth every bit of your time!
I am so thrilled you have no idea. I have attempted vegan cheese making about 6 times in the past, all ended up in the garbage. After watching your video on making Provolone I figured I would give it one more try and boy am I glad I did. It turned out absolutely perfect! Now I can make all the other types of cheese. So Happy!!!
—Michele
Thank you so much.
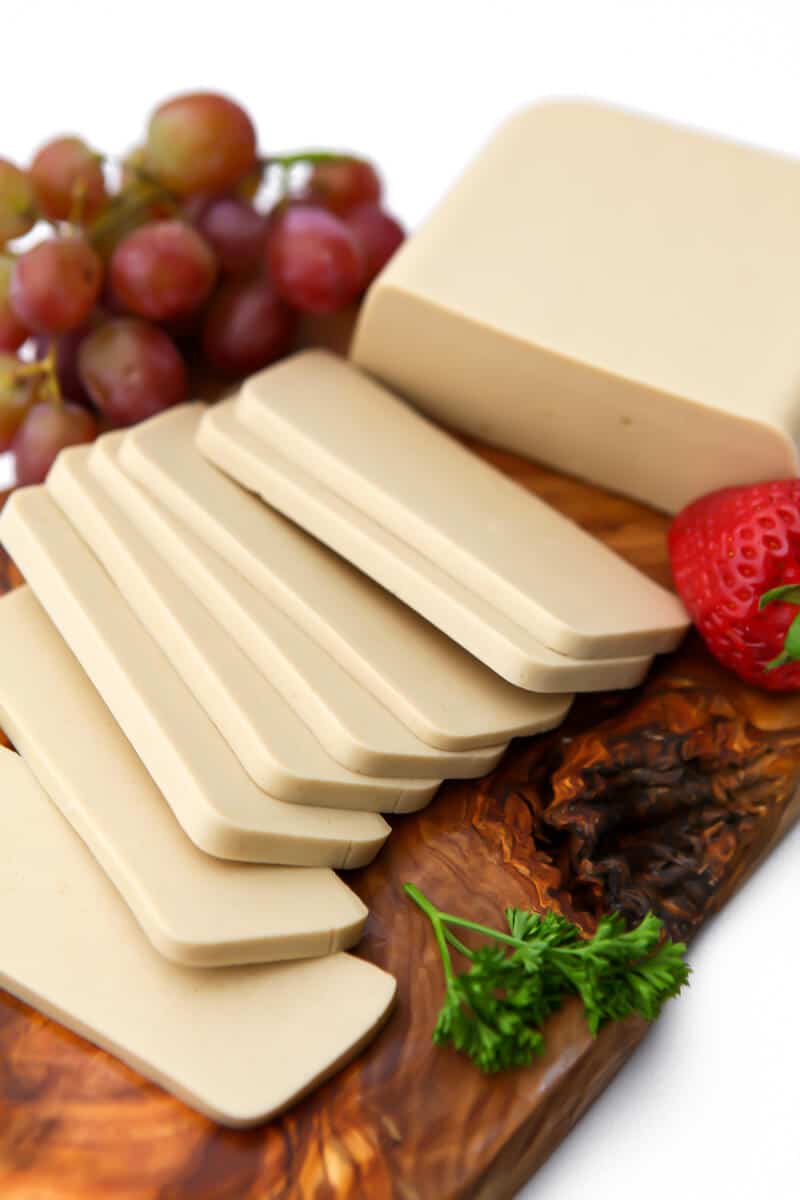
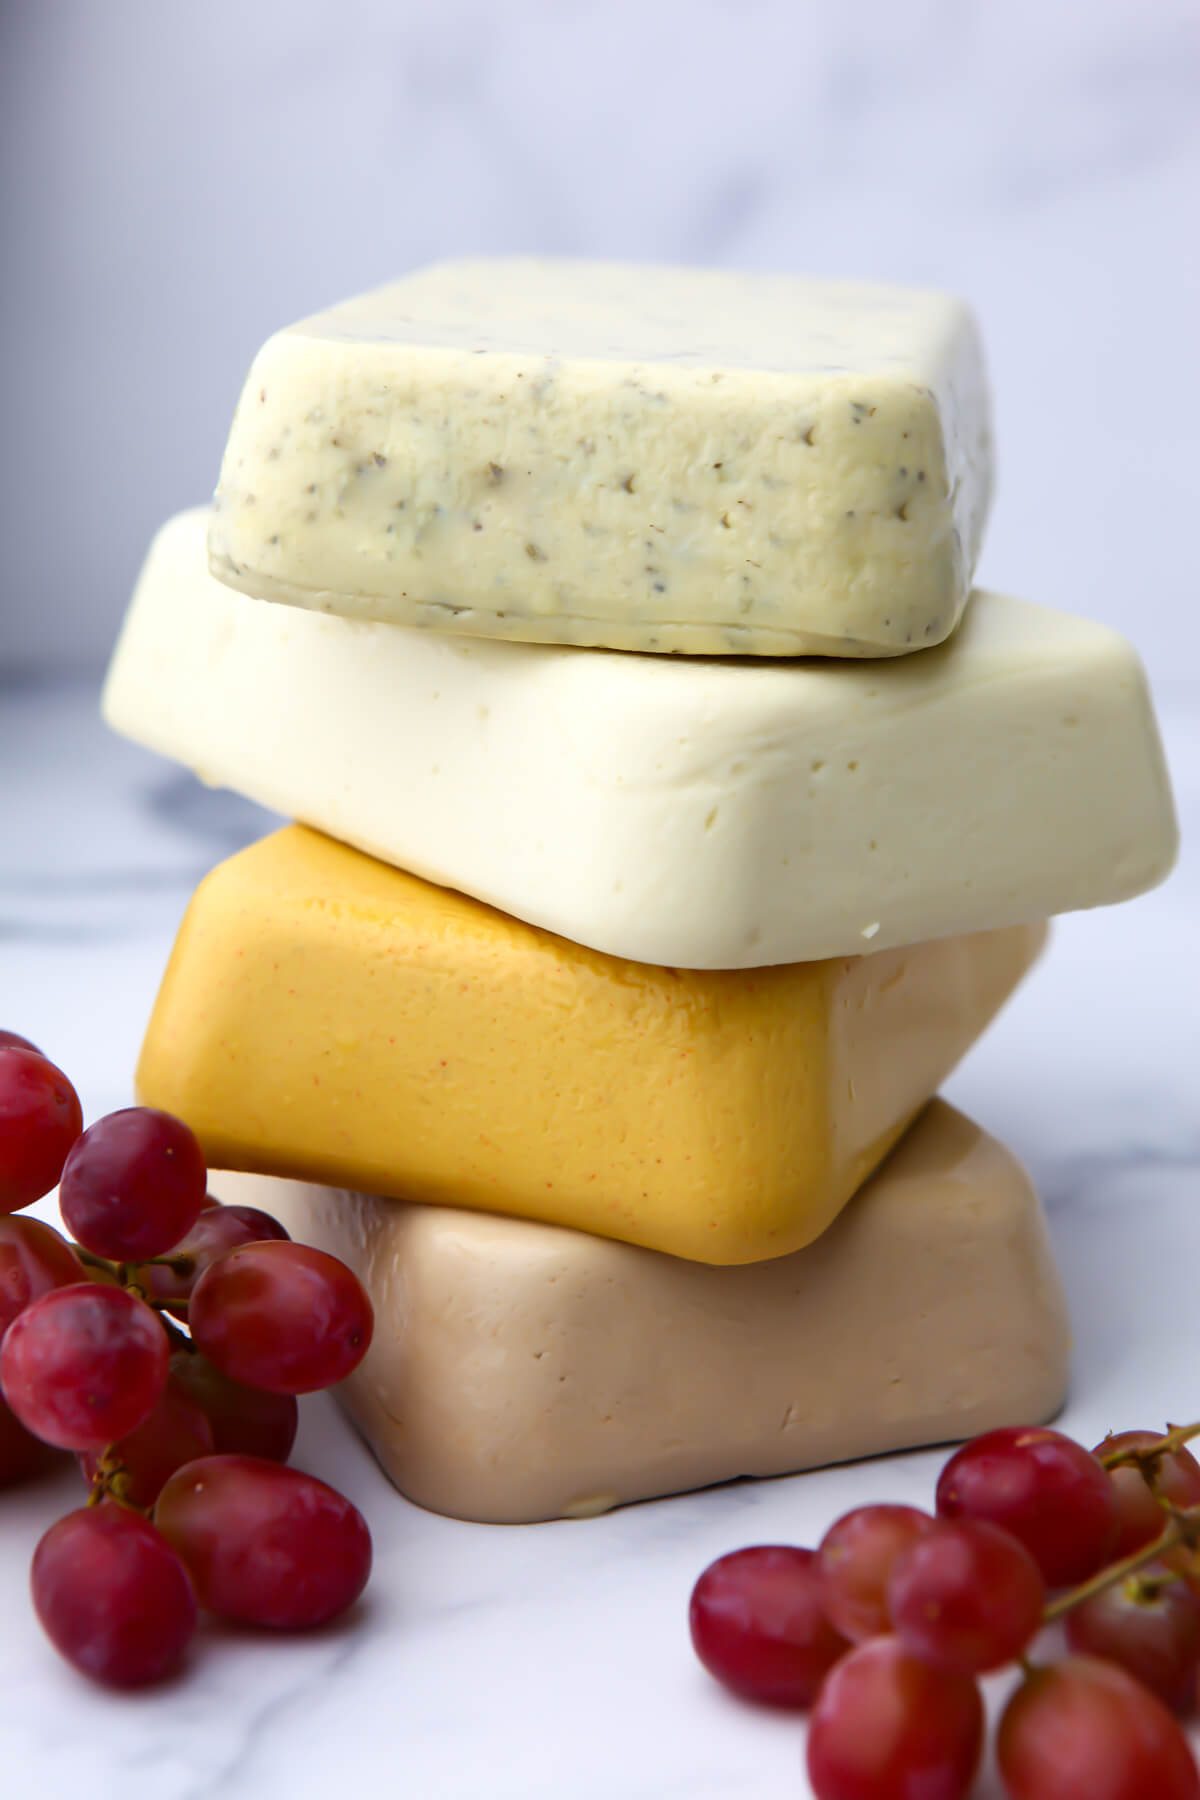
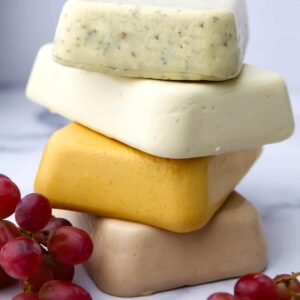
This recipe makes firm vegan cheese that slices perfectly for crackers or sandwiches and shreds well for pasta, pizzas, tortilla chips, or dips.
Why make your own vegan cheese?
- The cheeses you buy at the store have sat on the shelf for a few weeks. They’re wrapped in plastic and contain preservatives that change the flavor.
- You will not be able to buy plant-based cheese that tastes this good in a store!
- It will save you a ton of money to make your own.
- It’s gluten-free, soy-free, plus free of tree nuts like cashews and almonds.
- And… once you make it, you will see how simple it is to make your own!
Does vegan cheese taste good?
If you have been vegan for a while, like more than 2 days, you probably miss the taste of cheese. The store-bought brands probably aren’t what you had hoped they would be, but this vegan cheese will amaze you! Even non-vegans love this stuff!
Vegan cheeses just don’t cut it for most people, but this recipe is as close as it comes to satisfying those cheese cravings! I’ve put out a cheese platter at many parties and family get-togethers, and I’m always shocked by all the dairy eaters who are devouring my coconut cheese. (By the way, it’s rude to eat up all the vegan cheese at a party, leaving the vegans hungry.)
Ingredients and substitutions
- Coconut Milk – There are many different methods of making vegan cheeses, but I have found the richest and creamiest vegan cheese is made from a can of full-fat coconut milk. You could use other plant-based milk instead, or even cashew cream, but I find that the coconut milk gives it the rich, creamy texture that I crave in cheese. (Coconut cream also works well.) Note – do not use cream of coconut. It is a different product from coconut cream, contains sugar, and will not taste like cheese.
- Water – to add the correct amount of moisture.
- Agar Agar Powder – to make the cheese firm. This is a vegan gelatine that comes in the form of a powder. I get mine for a good price at my local Asian market, or they also sell it at many natural foods stores. (If you can not find the powder, you can use agar agar flakes, but you will need to triple the amount of flakes and use 6 tbsp in total.) You can also use Kappa carrageenan instead of agar agar powder in equal amounts.
- Nutritional Yeast – for a cheesy flavor. This is a flaky yellow powder that has an umami flavor. This is what will make it taste like cheese, so don’t skip it.
- Salt – for flavor.
- Lemon Juice – for flavor and acidity. You can also use apple cider vinegar instead. This gives your cheese just a little bite.
- Tapioca Starch – aka tapioca flour – to make the cheese able to melt and stretch. (Only use for the meltable variation). I have tested and retested the amount of tapioca starch needed. Anything less than the recommended amount will need high heat to melt, while anything more will be too soft to grate or slice. *You can’t use any other starch to get the same stretchy effect as tapioca starch. Only tapioca starch (like corn starch or potato starch) will let your cheese melt and stretch similarly to real cheese.
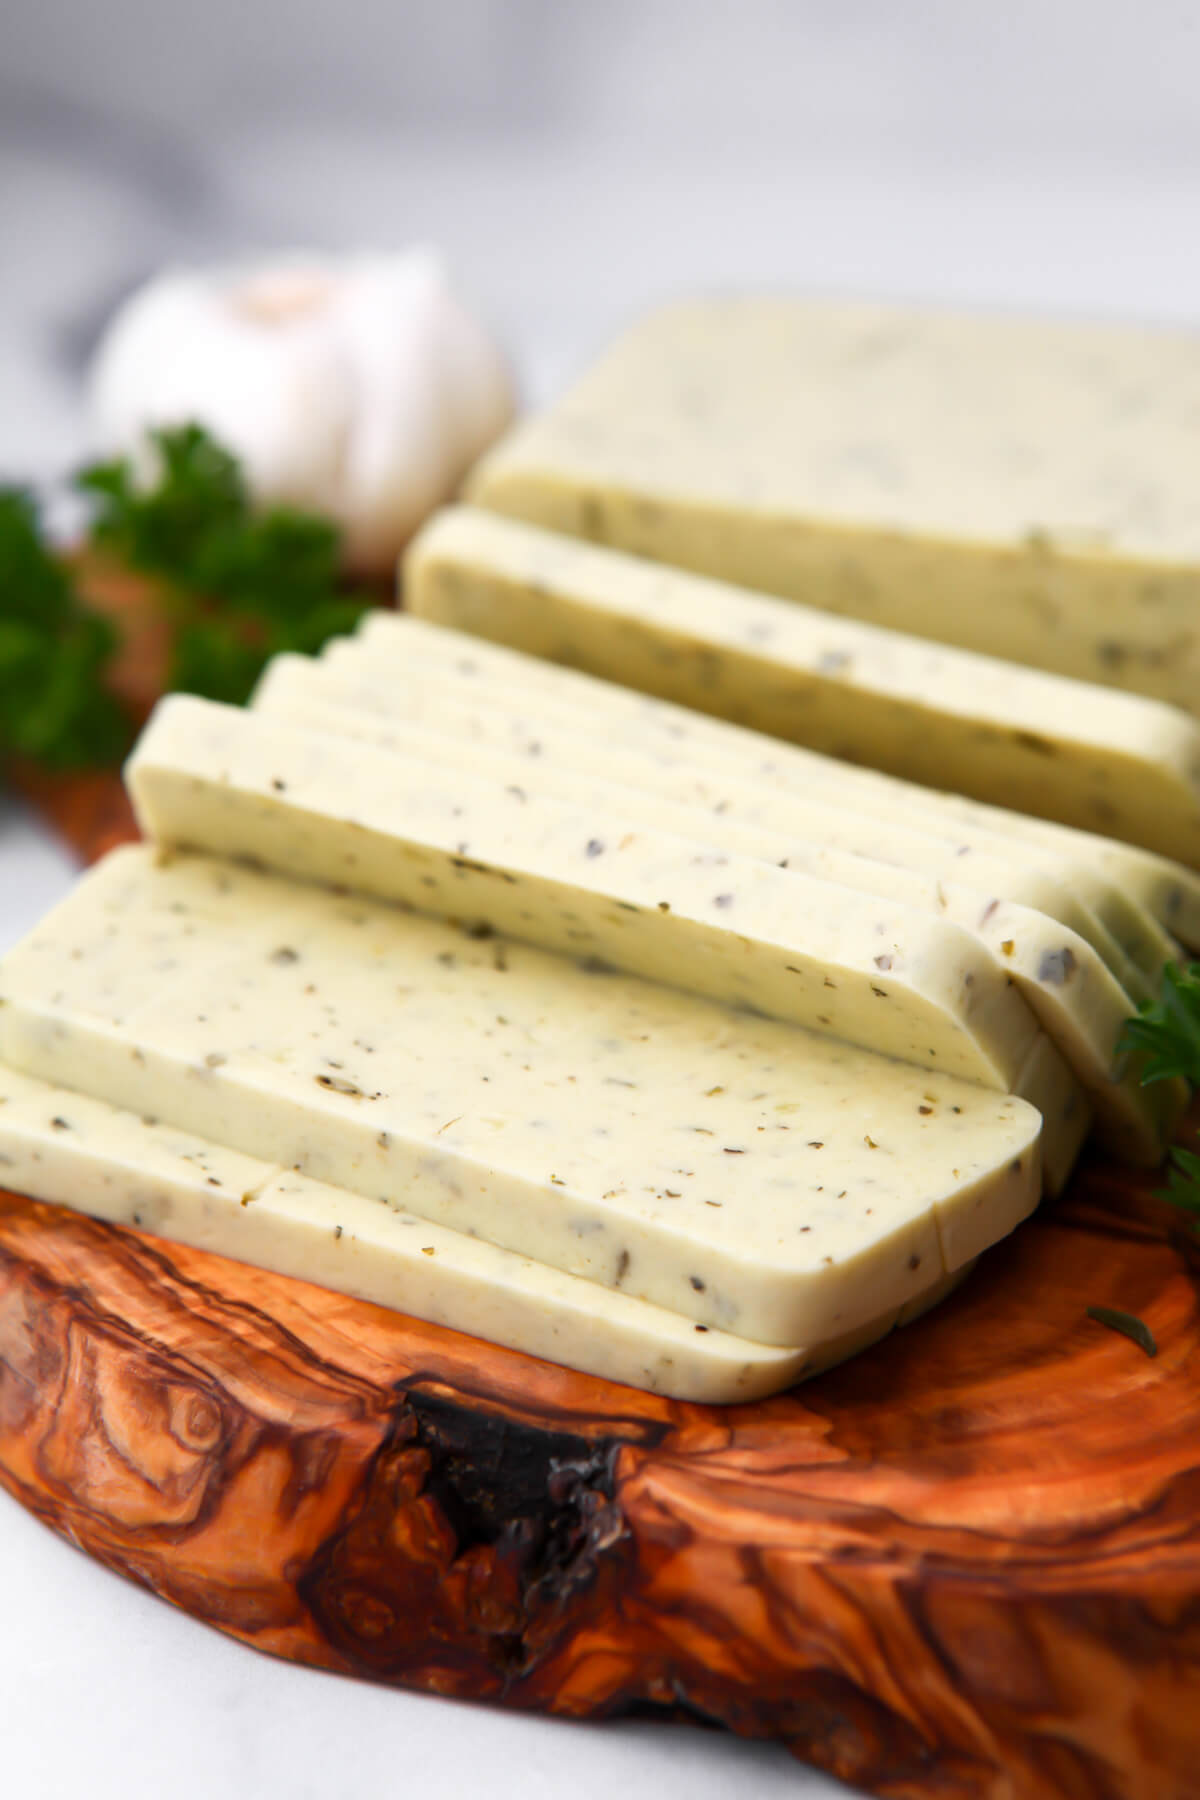
Flavored Cheeses – you can also add garlic powder, onion powder, liquid smoke, or fresh herbs to achieve different flavors.
Firm or meltable cheese?
First, you will also need to decide if you want a firm sliceable cheese or a softer cheese that will melt and stretch when heated. (You can’t have both; you must choose one or the other.)
- The firm version is best for slicing for eating plain or on crackers.
- The meltable version is best for cheese that you can melt on pizza, and use in grilled cheese sandwiches, or quesadillas. The only difference between the two versions is the addition of tapioca starch and the reduction of agar agar to allow it to melt and stretch better.
How to make sliceable vegan cheese
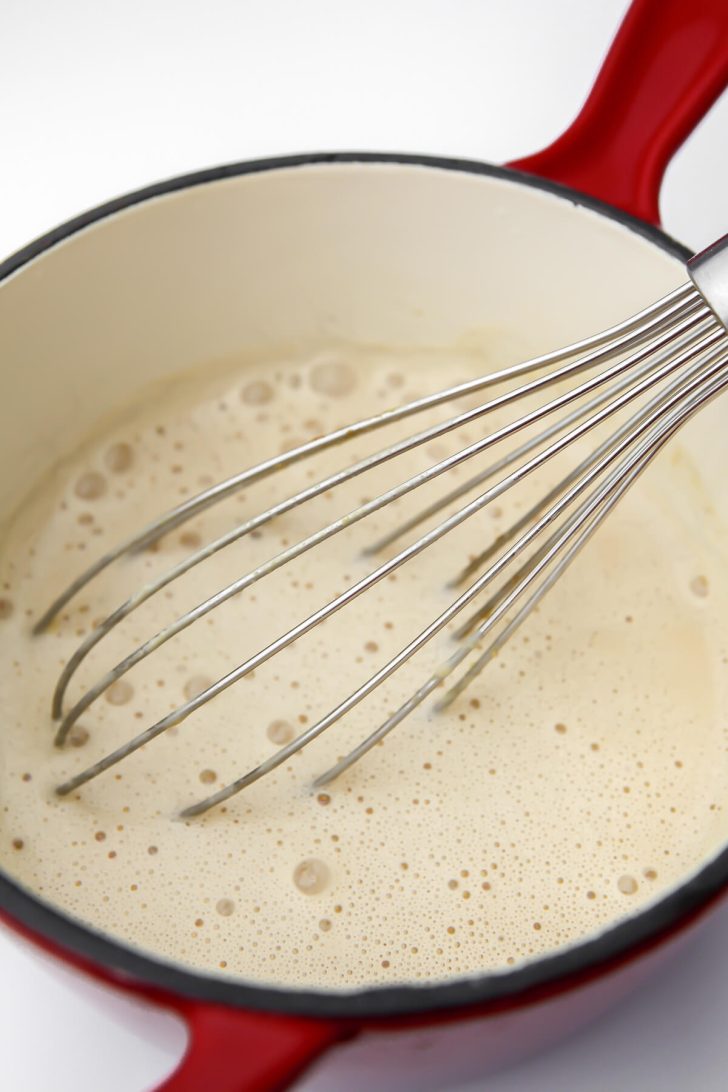
Step 1 – Simply put all the ingredients into a saucepan and stir with a whisk.
Step 2 – Heat to a slow boil, stirring constantly for 6 minutes. This allows the agar-agar to melt completely and set properly. (It may seem ready after 3-4 minutes, but keep it at a low boil for 6 minutes to make sure that it is completely smooth).

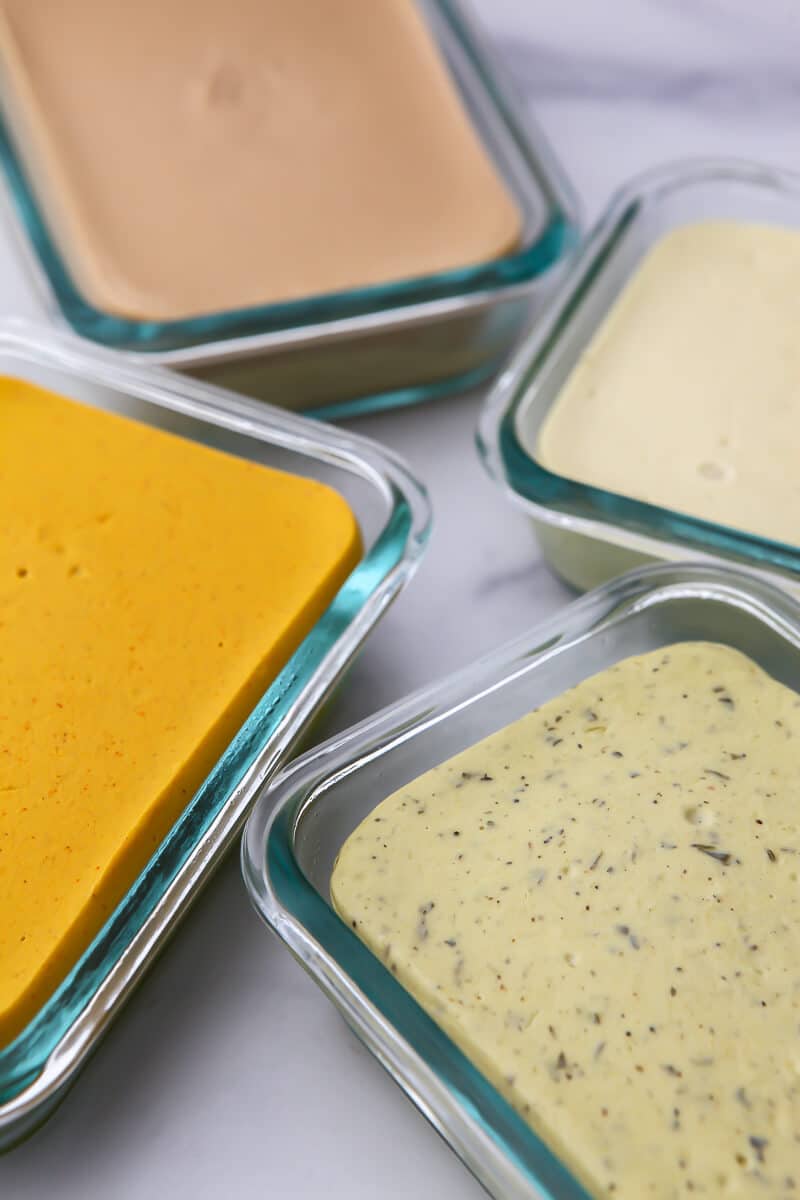
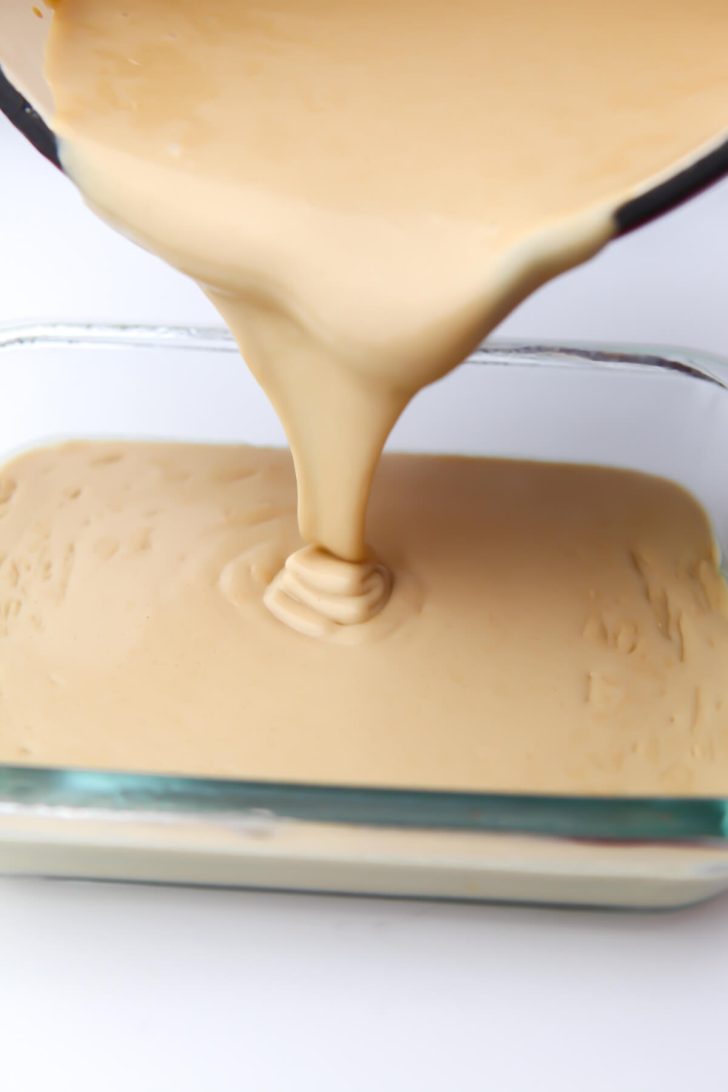
Step 3 – Then pour into any shape container that you wish. (One batch makes almost 2 cups of cheese.)
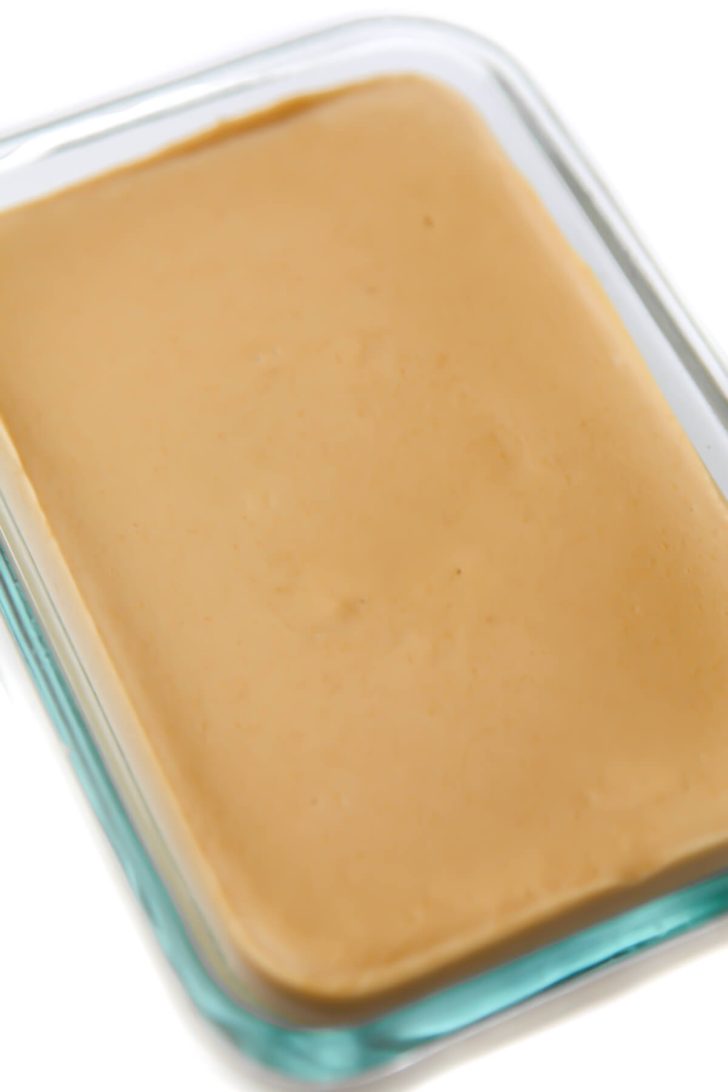
Step 4 – Allow the cheese to cool for about 15 minutes without a lid.
Step 5 – Then seal with a lid or cover with plastic wrap and put in the fridge to set for at least 2 hours to set.
How to make meltable vegan cheese
- Add all of the ingredients to a saucepan, but use only 1/4 cup of water instead of 1/2 cup, and only 4 teaspoons of agar agar instead of 2 tablespoons.
- Heat the cheese sauce over medium heat until it begins to boil.
- Turn down the heat until it is just barely bubbling and allow it to boil for 5 minutes while stirring frequently.
- Add 2 tablespoons plus 1 teaspoon of tapioca starch (equivalent to 7 teaspoons) to 1/4 cup of cold water and stir until it dissolves.
- Add the starch and water mixture to the boiling cheese sauce, whisking continuously, and then cook for an additional minute. (Your cheese will become very thick and stretchy.)
- Pour into a glass container and allow to cool uncovered in the refrigerator for at least 3 hours before shredding.
*This will make the cheese softer so it melts and stretches when heated, but it is not as good for slicing since it is not as firm when cold.

Pro Tips
- Stir the cheese sauce very frequently. Please do not walk away from it while cooking.
- Keep in an airtight container in the fridge for up to 5 days or in the freezer for up to 3 months.
- Make sure to measure the ingredients carefully! Slight changes in the amount of liquid, agar agar, or tapioca starch can significantly affect the texture of your cheese!
- For a cheesier flavor, add an additional tbsp of nutritional yeast.
- If you want to grate the meltable version, pop it in the freezer for about 30 minutes after it has been set to make it firmer and easier to grate.
- Use whatever shape you wish for a cheese mold – glass or ceramic works best. (Some people use a silicone mold, but I think that it changes the taste of the cheese.)
- Use a small amount of spray oil to keep it from sticking to the cheese mold.
Troubleshooting
I have had absolutely amazing feedback on my cheese recipes, and they work great for almost everyone. Getting the cheese firm enough seems to be the only issue people ever have trouble with. Occasionally, people will say that their cheese didn’t set correctly or it’s like Jell-O. These are my tips if this happens to you:
- Use agar agar powder, not flakes, if you can, and measure carefully. Make sure to use 2 full tablespoons, not 2 teaspoons!
- I use the Telephone brand agar agar, since I can easily find it at my local Asian market. It comes in small packs so that it won’t go bad, and I know that it sets well every time. There are many other brands, and there seem to be different strengths of agar agar, especially in Europe.
- If your cheese is too soft or jello-like, your agar agar is not strong enough. Increase the agar agar next time you make it. If it is very soft, you can add a tiny bit of water, remelt it, and then add more agar agar, boiling it for an additional 6 minutes.
- If your agar agar is not working, swap it out in equal parts for Kapa carrageenan.
Storage
Store the cheese in a sealed container in the fridge for up to 5 days or in the freezer for 3 months. I like to use these Snapware containers because they are made of glass, won’t affect the flavor, and have a good airtight lid to keep the cheese fresh longer.
Frequently asked questions
This cheese freezes well. Just be sure to wrap it in an airtight container. It will keep well for at least 3 months. If you plan on shredding it, I like to do so before freezing it to make it thaw faster.
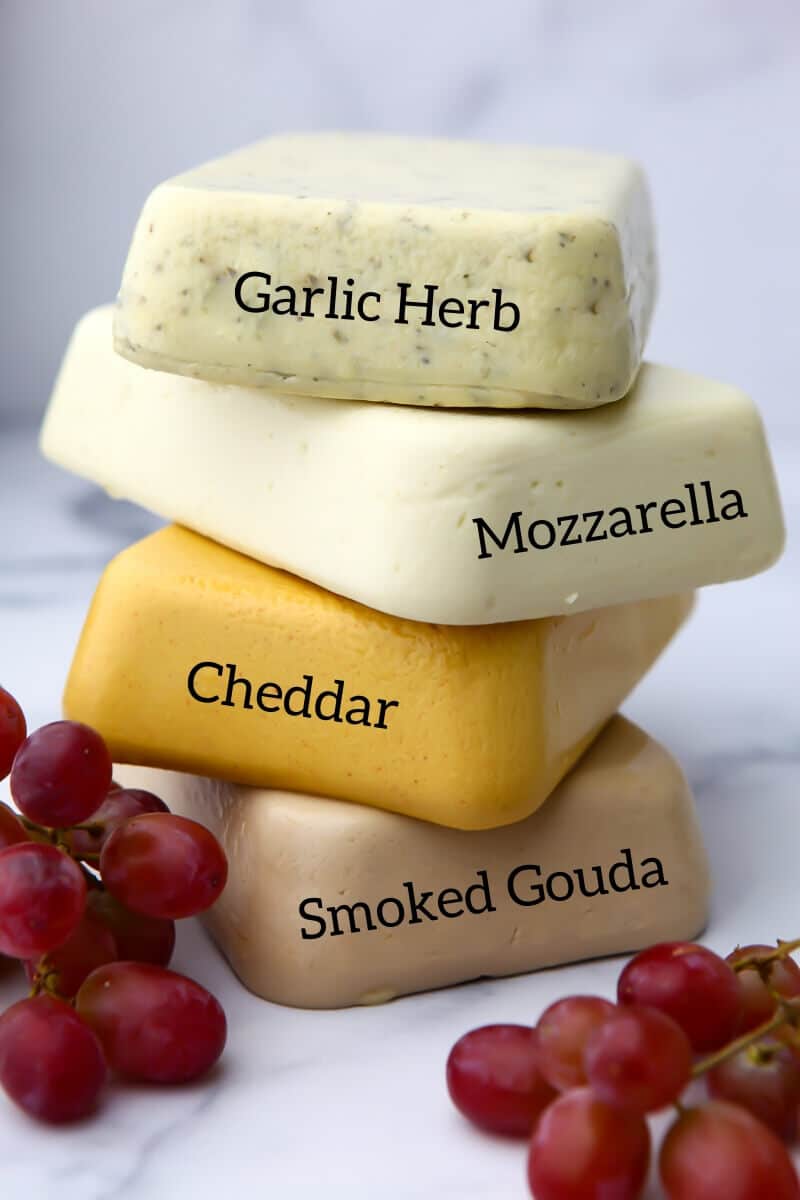
Surprisingly, this cheese doesn’t have as much of a coconut flavor as you may think. There is a slight coconut taste in the plain cheese, but it’s almost undetectable in the smoked Gouda or garlic herb versions. I also find that organic coconut milk has a stronger coconut flavor, so you may want to use regular coconut milk. If you really hate the flavor of coconut, you may choose to use a different type of plant-based milk, but your cheese will not be as rich and creamy as the coconut cheese.
You can swap out the agar agar for equal amounts of kappa carrageenan, but this will give you a very similar result. I have also developed a method using chickpea flour, which I explain in detail in my cookbook and my free vegan cheesemaking eBook.
Flavor variations
The recipe that I give you here is a general cheese recipe, similar to a Provolone. Just like there are numerous types of dairy cheese out there, there are just as many flavor variations of vegan cheese, too. This is a base recipe for making a great-tasting vegan cheese substitute that fits your taste and needs.
You can make simple changes to this cheese recipe to suit your tastes and needs. These are a few of our favorite flavor variations.
Classic vegan cheese flavors

Tofu-based cheeses
The first time that you make these delicious vegan cheeses, it may feel intimidating, but I promise it’s incredibly easy. I love making vegan cheese so much that I wrote a whole cookbook about it.
If you are interested in learning how to make more homemade vegan cheeses, I share my complete collection of vegan cheese recipes in my cookbook, “The Ultimate Guide to Easy Vegan Cheesemaking!
Vegan cheese recipe
How to Make Vegan Cheese – Vegan Provolone
Ingredients
- 1 (13.5 oz) can coconut milk, full-fat
- 1/2 cup hot water
- 2 tablespoons agar agar, powder (or 6 tablespoons of flakes if you can't find powdered agar agar)
- 2 tablespoons nutritional yeast
- 1 1/4 teaspoon salt
- 1/2 teaspoon lemon juice
- 1/4 teaspoon garlic powder
Equipment
Instructions
- Prepare cheese molds by spraying a glass bowl or container with spray oil or rubbing any neutral-flavored oil on the molds to prevent sticking. (Recipe will make about 2 cups of cheese).
- Pour the can of coconut milk into a saucepan.
- Put 1/2 cup of hot water into the empty coconut milk can to melt all the remaining coconut milk, and add the water to the pan.
- Add all remaining ingredients (2 tbsp agar agar, 2 tbsp nutritional yeast, 1 1/4 tsp salt, 1/2 tsp lemon juice, and 1/4 tsp garlic powder) to the saucepan and stir with a whisk.
- Cook over medium heat, stirring frequently until it boils.
- Turn down the heat until the cheese sauce is just barely boiling and stir constantly for 6 minutes until it is very smooth. (It must boil for 6 minutes to activate the agar agar and set the cheese correctly.)
- Immediately pour into the prepared cheese molds.
- Let it cool with the lid off for about 15 minutes at room temperature, then cover and transfer to the refrigerator for at least 2 hours to set firmly.
Notes
How to make meltable vegan cheese
- Add all of the ingredients to a saucepan, but use only 1/4 cup of water instead of 1/2 cup, and only 4 tsp of agar agar instead of 2 tbsp.
- Heat the cheese sauce over medium heat until it begins to boil.
- Turn down the heat until it is just barely bubbling and allow to boil for 5 minutes while stirring frequently.
- Add 2 tbsp plus 1 tsp of tapioca starch (7 tsp) to 1/4 cup of cold water and stir until it dissolves.
- Add the starch and water mixture to the boiling cheese sauce, stirring with a whisk, and then cook for an additional minute. (Your cheese will become very thick and stretchy.)
- Pour into a glass container and allow to cool uncovered in the refrigerator for at least 3 hours before shredding.
Pro tips for perfect vegan cheese
- Stir the cheese sauce very frequently. Do not walk away from it while cooking.
- Keep in an airtight container in the fridge for up to 5 days or in the freezer for up to 3 months.
- Make sure to measure the ingredients carefully! Slight changes in the amount of liquid, agar agar, or tapioca starch can significantly affect the texture of your cheese!
- For a cheesier flavor, add an extra tbsp of nutritional yeast.
- If you want to grate the meltable version, pop it in the freezer for about 30 minutes after it has been set to make it firmer and easier to grate.
- Use whatever shape you wish for a cheese mold – glass or ceramic works best. (Some people use a silicone mold, but I think that it changes the taste of the cheese.)
- Use a small amount of spray oil to keep it from sticking to the cheese mold.
Troubleshooting
- Use agar agar powder, not flakes, if you can, and measure carefully. Make sure to use 2 full tablespoons, not 2 teaspoons!
- I use the Telephone brand agar agar since I can easily find it at my local Asian market. It comes in small packs, so it won’t go bad, and I know that it sets well every time. There are many other brands, and there seem to be different strengths of agar agar, especially in Europe.
- If your cheese is too soft or jello-like, your agar agar is not strong enough. Increase the agar agar next time you make it. If it is very soft, you can add a tiny bit of water and remelt it, and add more agar agar and boil it for an additional 6 minutes.
- If your agar agar is not working, swap it out in equal parts for Kappa carrageenan.
 Did you make this recipe?Please leave a star rating and review below!
📌 Be sure to follow me on Pinterest for new vegan recipes!
*This recipe was originally published on May 4, 2018. It was updated on May 16, 2020, to include new images, more detailed recipe instructions, and answers to frequently asked questions.


This looks excellent, and I shall be trying it ASAP.
I’ll obviously start with the recipes you suggest, but I’m also keen to experiment.
For example, have you any tips on making blue cheeses such as Stilton? Or camembert-style cheeses?
Like many vegans, cheese is the one thing I miss from my pre-vegan diet, and none of the shop-bought vegan cheeses fill that gap.
I have a blue cheese recipe on my site. I also have about 40 cheese varieties in my vegan cheesemaking cookbook. 🙂
I made this today and it is amazing. I didn’t think I could find a vegan cheese that is so creamy and similar to dairy cheese. Bonus points for being able to pronounce every ingredient in it. Thank you so much for this recipe.
I’m so glad that you liked the recipe! I love the creaminess that you get from coconut milk! Cashew and other plant-based cheeses never get this creamy.
This was so easy! I made the smoked cheese, but found it too mild and added more liquid smoke and more nutritional yeast. It is fabulous! And it was so fast to make! Texture is perfect! Thank you! I will definitely be making more flavours. Buying half this amount in the grocery store would probably set me back $10. Thank you so much for figuring this out and posting it.
You’re welcome, Pat! I’m so glad that you like the recipe! 🙂
Have you tried making any fermented vegan cheeses? I would be interested. I love your soy yogurt. Thank you
I have made some fermented vegan cheeses, but I don’t share any of those recipes on my blog at this time. Glad that you like the soy yogurt recipe!
Cheese is my #2 reason for not starting to move in the veg/vegan direction. I love cheese. And cheese loves me. CHEESE! CHEESE! CHEESE! This is exciting.
Cheese is one of the hardest things to give up when going vegan. Nothing out there is exactly like dairy cheese, but this recipe will defiantly satisfy your cravings for cheese. I hope that you enjoy it! 🙂
Where is the tapioca starch amount or when to add ir?
It is in the instructions of how to make melty cheese. If you want a firm sliceable cheese, you don’t want to add the tapioca starch.
I haven’t tried these recipes yet but want to thank you for creating such a great website and resource. You’ve created a masterpiece in more ways than one!
I look forward to trying your recipes.
Thank you so much! I hope that you get a chance to make so of the recipes! 🙂
Can you freeze this?
Yes, it freezes well. Enjoy!
I made this, with Telephone brand, followed the recipe exactly, tasted before refrigerating and flavor was/is good. But texture is too “rubbery “
What did I do wrong? Could I have stirred it too much?
Am planning to try the meltable version before giving up!
Are you sure that you used 2 tablespoons not teaspoons? I have made this recipe countless times and it always sets up firm for me. The agar agar has a naturally rubber texture, but it is also firm. The meltable version is a little softer, so I’m not sure if that will be what you are looking for either. I hope that you find a version that you like.
These look so goo. Is there a good yeast free alternative for the cheesy flavor?
Sorry, there really isn’t anything else that give it that cheesy flavor. Soy sauce or mushroom powder will give it an umami flavor, but nothing is as cheesy tasting as nutritional yeast.
Simple and Scrumptious! One question, altho mine tastes great and the texture is nice, my mozzarella has a grayish-tan color and not the lovely white color like yours. Any ideas what causes this? Thank you so much for a terrific recipe!
I’m so glad that you liked the recipe. Sorry, I can’t think why yours would have that color.
Hi, would you have a recipe for feta cheese? I’ve seen lots using tofu or nuts, but would rather stay w/a coconut base. Cheers!😊
I have a recipe for vegan feta, but I use tofu as a base. I have tested other methods, but I find that tofu works best. You can find that recipe here… https://thehiddenveggies.com/vegan-feta-cheese/
My body doesn’t tolerate nutritional yeast or soy for an alternative . Have you come across anything else that flavors in place of it ?
I did see the previous comment from someone just hoping something has popped up since then.
I too try to avoid nutritional yeast, as it among others seems to have a lot of uric acid. There is something else that develops a natural cheesy flavor which is a great healthy solution, but you will have to search more on the internet or experiment about the exact way to go about it – it is fermented chickpeas. Raw chickpeas soaked in water at room temperature naturally undergo a lactic fermentation. I noticed that by accident, when I made a chickpea sourdough for bread, and was surprised to see that the end baked bread actually had a pleasant cheesy flavor. What I did is I broke up 1/2 cup of raw chickpeas in a standard blender (just pulse to break up a bit, you want large pieces and not to pulverize them), then mixed with 1/2 cup flour and 1 cup water and left at room temperature loosely covered. Depending on temp, it will get very frothy in abt 24 hours. You strain and discard the chickpeas and use the slurry. You can definitely do it without the flour too. I suppose you could incorporate this liquid to replace the water (or part of it, if you do not want a very strong cheesy flavor) of the cheese recipe, leaving out the nutritional yeast.
“1 can of coconut milk” is not exact, how many ml?
They are usually 400 ML. Enjoy! 🙂
Hands down the best vegan cheese recipe I’ve come across in 5 years of looking. A meltable version too – great! I love the option to adapt it for plant-based milk.
Thanks so much! I’m glad that you like the recipe. Coconut milk is my favorite method for making vegan cheese!
How many grams does 2 Tbsp. of nutritional yeast weigh? Do you use the flaked or powdered variety in these recipes? Thanks.
Turned out great
So glad that it turned out well!
I have blood sugar issues and cannot consume higher-carb foods. Is it possible to substitute unflavored powdered gelatin for the agar? If so, what is the ratio? Thanks.
I have never tested it with gelatin, but agar agar is very similar to gelatin and I don’t believe that it contains many carbs.
I will be trying all of these. Becoming a vegan I sure miss the cheese. This is exciting I’m sure hoping that it comes out like the pics and taste like cheese. Thank you! I’ll let you know how it goes!
Absolutely AMAZING
So glad that you liked the recipe, Victoria!
Delish! So easy to make (I cannot cook food) and definitely less expensive than store bought.
So glad that you liked it, Jane!
What size can coconut milk, I have a small 165ml, also a 400ml.
If a final quantity is stated then the can size is simplified.
You will need a 400ml can. Enjoy!
Can I replace the nutritional yeast with something else?
I am trying to lower the protein(Phenylalanine).
Can I use coconut cream or rice milk instead of coconut milk?
If I do these replacements, will it also work for your other cheeses?
Thank you very much.
There is nothing else that gives it that cheesy flavor like nutritional yeast does. You can use some miso for an umami flavor, but it’s not as cheesy. you can use coconut cream or rice milk in place of the coconut milk.
Hi,
I don’t eat dairy and ok with gelatin. Can that be substituted for the agar agar powder?
I can’t eat any of the vegan cheeses in the store, they have ingredients I don’t want to eat and so happy to have come across your recipe!
I think that you could, but I have never tested it that way. I think the process of getting it to set is different.
How long does this last? Only 5 days? Or is there a way to add anything so it lasts much longer?
You can freeze it and it will last for a few months.
I made a lazy version in my Instant Pot with minimal substitutions. This is my new favorite cheese substitute- not buying any more. I swapped out the coconut milk for homemade cashew cream. I just stuck everything in my blender with the agar agar powder, put it in a Instant Pot safe bowl, pressure cooked for 15 minutes with the pot in pot method, and then let it cool. Perfectly sliceable and insanely easy and delicious by itself or on anything. Just one bowl, a spatula, and the blender to clean.
Hi Monica, I made the Vegan Provolone today & I’m so excited. It turned out great !
Thank you so much for your recipe & I look forward to making the other types of cheeses.
Vegan cheese is so expensive here in Melbourne, Australia.
You have so many recipes that I cannot wait to make. I’m always looking for new ones.
Thanks again. Jen.
I’m so glad that you liked it! I’m excited for you to try the other flavors too!
Good afternoon Monica. This is fantastic and I’m so grateful that it’s easy. Do you have a version of this where it uses oat pulp/oat milk. I’d like to not waste the pulp from the oat milk, and I do sorely miss cheese.
Hi Ruby, sorry, I do not have any vegan cheese recipes that use oat pulp. I do use oat milk a lot in my pizza cheese recipe, but I don’t use the pulp. https://thehiddenveggies.com/vegan-pizza-cheese/
Thanks for this recipe! Or recipes I should say. Meltable and “Block”. We just found out ny daughter has a milk allergy and she misses cheese. We cook your recipe all the time! I use it for our homemade cheese sauce.
I’m so happy that you are able to make my recipes for your daughter with a milk allergy! I’m so happy when people don’t have to give up foods they love.
Can you tell me the nutrition information (as best you can) and especially wanting to know if there’s any additional sodium. Thanks.
The nutritional information is listed at the bottom of the recipe card. There is about 300 mg of sodium if you use the recommended amount of salt, but you can use less salt for a lower sodium option.
So happy to be back on the website after several years, an original treasure from the early days of vegan cooking online!. Do you have a recipe for vegan blue cheese? I have been told there is a roqueforti mold powder, but I don’t know anything about it and if it is truly vegan.
So glad to have you back. Yes, I do have a blue cheese recipe. I use tempeh as a natural culture, have never used the mold powder however. Here is the blue cheese recipe… https://thehiddenveggies.com/vegan-blue-cheese/
This ‘cheese’ is great! I’m not a vegan, but both my husband and I like it. I would probably leave out the garlic as a general rule, but it is very tasty and I will make it again. Going to try the melty one next. 🙂
I’m glad that you liked it!
Hi! Can glucomannan (konjac root) replace the tapioca starch for meltable stretchy cheese?
Can I add smoked paprika to the cheese
mixture while it’s cooking or just before pouring in mold?
Yes, smoked paprika gives it a great smokey flavor! Enjoy!
I’m so glad I found this recipe and I will try it soon.
Please be aware that most canned coconut milk comes from Thailand where they use monkeys to harvest the coconuts. As with most cases involving animals and money making the monkeys are held captive and are not treated well.
I was able to find canned coconut milk from the Philippines on Amazon. Currently I have the Natural Value brand.
I’m looking forward to exploring all of your recipes!
Yes, you have to be cautious about the brand of coconut milk that you choose. I wrote this article about this issue, you can find it here… https://thehiddenveggies.com/is-coconut-milk-vegan/
I was on a hunt to make a vegan cheese that was similar to babybel and this is it! I can’t do nutritional yeast due to food allergies so I just omitted. This was delicious as a queso for chips. Even my toddler literally drank it. Thanks for the recipe!
I’m so happy that you and your toddler liked the recipe!
I was surprised that everything worked out! I did had a short of agar agar, I think it was about 1 1/4 tbsp or 1 1/2. But the texture is actually perfect. I did added 2 extra tbsp of nutritional yeast, when cooking the mixture it still smelled liked coconut instead off cheesy smells. I must say…. if I want to make this recipe more often, I really have to find my way to change the flavor. Cause that is the only thing that doesn’t really match up my wishes/expectations. But! Making vegan cheese for the first time, it was a good experience! 😁
I’m glad that it worked out well for you. You may want to play around with some of my flavored cheese like vegan pepper jack or garlic herb for more flavor.
For the meltable version you say to cut the water to 1/4c, is the 1/4c for the tapioca starch in addition to that? So like am I still using a 1/2c? Sorry for the confusion lmao
Yes, you want to use 1/4 cup of the water to mix with the tapioca starch, so you will still be using 1/2 cup of water in total. 🙂
Made this cheese but its quite slimy and rubbery, any ideas on how to make it less slimy and more like cheese
It tasted ok, but just the texture was weird, I still gave it full stars as reading other reviews it must be something I’ve done. Appreciate your feedback to help me get this right
The agar agar has a rubbery texture, but it should not be slimy. I find that different brands cook up differently. You also want to be sure to use agar agar powder and not flakes. You can also try kappa Carrageenan instead of agar agar – you may like that texture better.
Love this recipe I find cashew cheese can be a bit grainy (but I don’t have a great blender) this was so lovely and smooth – I used cornflour instead of agar agar because I’m cheap and I always have it in the cupboard so it’s more like a cheese spread – but that is my preference.
I love how creamy coconut cheese is compared to cashew cheese. You need to use agar agar or kappa carrageenan if you want it to set firm and slice it, but cornstarch or tapioca starch will thicken it into a nice sauce. I’m so happy that you liked the recipe!
Hi, instead of a comment I have a question.
I’m allergic to seafood (and that includes seaweed and sea salt). Is there any substitute for agar agar and Kappa Carrageenan (because I googled it and both are made of seaweed).
I’m really looking forward to making my own cheese because the ones in the store contained SEA SALT and I can’t eat them.
I’M ALSO ALLERGIC TO MILK, CHICKEN, egg, gluten, honey, pork, citric acid, bio engineered food, and others. So you can imagine my PAIN.
Wow! Those are some difficult allergies to deal with. I don’t think that there is anything else that you can use that will make it firm up enough. You can use chickpea flour. If you sign up for my free cheesemaking eBook, there is a recipe in there that tells you how to do this. Hope that helps.
Hi guys,
Love the recipes, but we’re from Europe. What size cups do you use so I can convert it into grams?
Sincerely,
Sarah
We use 8 oz cups which I believe is about 226 grams.
What size snap ware containers are you using?
They are the 2 cup ones. Enjoy! 🙂
This is absolutely fabulous! The texture is great, and the flavor tangy and cheesy. When it’s warm, it’s gooey and just like cheese fondue. Thank you!
So glad that you enjoyed it! 🙂
Thank you for this recipe! It is perfect. I use 3 TB of nutritional yeast and a tad bit more salt. I also add fresh dill from the garden. So delicious!!!!
Sounds yummy! Glad that you liked it! 🙂
Wow looks interesting.. will get recipe in email
Looking forward trying it
Yes, if you sign up for my cheesemaking eBook.
Sorry i want to make the meltable version and this line had me stumped
Add 2 tbsp plus 1 tsp of tapioca starch (7 tsp) to 1/4 cup of cold water and stir until it dissolves.
Two tbsp of what?
regards
You need 2 tbps of tapioca starch plus one more additional teaspoon of tapioca starch. I know it’s a very exact amount, but after many tests, that is the exact amount that works best.
I bought agar agar a while ago. How do I know that it is still good? Thank you.
It should have an expiration date on it. If not, you could dissolve a tsp in 1 cup of water and see if it jells up. Also, if it has any smell or taste, throw it away. It should be tasteless and odorless.
Unfortunately, I cannot use nutritional yeast. I guess there is no good replacement for it.
Do all your cheeses use nutritional yeast?
Thank you
One good replacement is sunflower seeds, you just have to blend it all together
Ok, first of all THANK YOU so much for this very detailed knowledge that you share with us, I’m so thankful!!
Second, I tried the cheddar cheese version today but I had gelatine instead of agar-agar, and I had to use up my animal-derived ingredients, so I tried.
I saw many people having issues with the texture when using gelatine, so I decided to halve all the liquid ingredients and adjust the dry ones by taste. I used 3.5 sheets of gelatine (around 5g or a bit more) for 200 ml coconut milk + 60 ml of water. I would define the texture as a soft mozzarella or a fresh goat/cow cheese, it’s perfectly fine to put on bread and it holds itself. But the flavour, OH THE FLAVOUR, MAMA. It’s so on point, like. Who knew you could nail cheese flavour so much with a bunch of spices. I added extra cumin and nutmeg for extra spiciness. Be mindul with the salt cause yeast is already salty. Delicious!! Thanks so much again!
You’re welcome, Ana. I’m so happy that the recipe worked well for you. (I think that you are using a flavored nutritional yeast if it is already salty. I always use plain nutritional yeast in my recipes, so that I why it needs additional salt.) 🙂
I cannot have nutritional yeast. Are there any good alternatives? Thank you
You can use about 1/2 teaspoon of soy sauce or liquid aminos to give it more of an umami flavor. Umami mushroom powder also works, but nothing is as cheesy tasting as nutritional yeast.
Curious. What is the reason you can’t have nutritional yeast?
Looking forward to giving this a try! Who knew it could be so easy. Thanks for providing all this great information.
You’re welcome! It’s super easy! I hope that you enjoy it!
Have you ever added a small amount of vegan lactic acid (1/4 tsp)? If so how did it work and taste?
TIA
I have never tested it with lactic acid, but let me know if you try it. I would start with a very small amount, maybe even 1/8 teaspoon. 🙂
Ok I will try the 1/8 tsp and let you know. 😊
Hello – I am interested in making the cheese from coconut milk. However, I cannot have nutritional yeast. Any recommendations to an alternative product?
There is really nothing else that will give it that same cheesy flavor, but you can simply omit it. A dash of liquid aminos or umami mushroom powder will give it an umami flavor that’s good, but not necessarily a cheesy flavor.
This is GREAT information. I love the detail and explaination of why we are doing what. Thank you! Maybe I can go vegan!! Thank you!
You’re welcome! I’m so happy that you found this post helpful! 🙂
Is it possible to swap coconut milk with almond milk? Thanks.
Yes, you can. Simply use 1 3/4 cups of almond milk plus 1/3 cup of any neutral-flavored oil to replace the coconut milk and water in this recipe. You can leave out the oil, but it will taste more like fat-free cheese. Enjoy! 🙂
Would it still firm up if you use almond milk?
Yes, it will still get firm with almond milk or any type of plant-based milk.
Looks really delicious and thanks for sharing the recipe, everyone will surely love it.
Hello Monica, first of all let me thank you for your books! I purchased all three and am happy working through them. We are especially big fans of the butter recipes! As for cheeses: I have made several so far, and they are quite good and quickly consumed ;), but all the hard sliceable cheeses have the same funny little underlying taste (hard to describe, a little synthetic tasting maybe?). I would really like to identify the culprit so I can experiment with substitutes. Could it be the agar agar? Thanks again & best wishes
You’re welcome. I’m so happy that you like my cookbooks. I’m not sure what the taste would be, but I’m guessing that it is your agar agar. I have had a few people report that agar agar tastes bad to them, but it should have no flavor at all. I would try it again with a new batch of agar agar. I like the Telephone Brand, plus it comes in small envelopes, so it stays fresher. Hope that helps.
Hi I made this cheese today but had to use cornstarch. I tried thickening it as it boiled but it still was quite runny like in between watery and pancake mix like. I have it setting in the fridge but I am not sure if it will thicken. Maybe it needs to sit along time? More than 2 hours? I could not find the agar!
Cornstarch will not work to thicken it into a sliceable cheese. It will make a great creamy cheese sauce though. There are only 3 things that I have found that work for sliceable cheese… agar agar, kappa carrageenan, or chickpea flour. You can find the recipe for swapping out the agar agar in my free cheesemaking eBook.
Thank you for your response. I will find agar agar and remake it. I did try the cheese before putting it in the mold and it was fantastic. I will let you know when I make another.
You’re welcome. I hope that you find some agar agar. Enjoy!
Hi. Thanks for having these cheese recipes available. The vegan provolone firmed up nicely and had a good flavor. However, the rubbery texture is not what we are really looking for. If we made a batch that is meltable, is that going to be less rubbery? Any other suggestions?
The agar agar has a rubbery texture. Some people preferr kappa carrageenan instead of agar agar, but I find them to be very similar. You can also use chickpea flour instead of agar agar. (I explain how to do this in my free cheesemaking ebook that I give to subscribers.) You may like the chickpea flour method the best. You can get the ebook here… https://view.flodesk.com/pages/60a913073a1f1d563171d1fd
Hello, which provolone recipe, (meltable
or sliceable) would work best for Stromboli?
I would use the meltable provolone or mozzerella. Enjoy!
Absolutly delicious, I just made it today and it was a huge success at our home. I couldn’t get my hands on agar agar so I used cornstarch instead and it was perfect. Thanks for sharing this wondrous recipe Monica!
I’m so happy that you liked it, Matthew! 🙂
Did you use the same amount of cornstarch as for agar agar, Matthew?
hi there! i’ve tried the meltable version, and realised there are some bits which looked gummy. Could it be due to not stirring thoroughly such that the agar/tapioca clumps up? or would it be too much of agar/ tapioca starch? other parts look fine!
thanks!
Be sure to add the tapioca starch to cold water and have it dissolve completely before adding it to the cheese sauce. I bet you were seeing small pieces of tapioca starch that weren’t dissolved. If you know it wasn’t that, then maybe the agar agar if you didn’t stir it up enough while it was cooking. I hope that you give it another try. Enoy!
This is the most concise, comprehensive and understandable tutorial on vegan cheese I have ever come across. I now feel truly confident to try my hand at making my own. There are some delicious vegan cheese on the market but I want to make my own. Thank you for sharing your knowledge with us.
Thank you so much! I worked really hard to help people understand the process, I’m glad that you found it helpful!
I’m really keen to make this but worried as in Australia I believe our spoon and cup measurements are different to yours. Have you ever measured these recipes in metric?
If you click on the word “metric” under the ingredient list in the recipe card it will automatically convert the recipe to metric for you. Enjoy! 🙂
Thank you that sort of worked. It converted the 2tbs of agar agar to 2 tbs but the 2 tbs yeast to 1tbs + 1tsp.
I’ll have to experiment.
When I make this, the taste of the coconut is overpowering. It does taste good, but is there anything I can do to make it less pronounced?
Different brands have more or less coconut flavor. Try a different brand. (Organic coconut milk also has a stronger flavor.)
Hi Monica
I’ve made the hard cheese and added diced pickles the taste is great!
But is there something I can add during the making process to make the texture a little bit crumbly (like cheddar cheese)
Thanks
I have a recipe for cheese made with chickpea flour instead of agar agar in my cookbook. That has more of the texture that you are talking about. Agar agar has a very smooth almost rubbery texture. Any cheese recipe that uses agar to make it set will have this consistency.
Please do not replace the agar agar 1:1 with carageenan. I have done that, texture is really odd.
I have had some people tell me that they prefer the texture of carrageenan and some people say they prefer agar agar, so you just need to experiment and see what you like. Some people don’t like either and use chickpea flour (the instructions for that are in my ebook).
I can’t rate these recipes because I can’t find the ratio of ingredients. Can you please be explicit with these as I’m completely in the dark.
The recipe with the measurements is in the recipe card at the bottom of the post. If you want a recipe for one of the other flavors that I mention, you have to click on the highlighted words and it will take you to the corresponding recipe. All official recipes are in the recipe cards at the bottom of all the posts. Hope that helps! 🙂
Hello. I am interested in the volume of the can: 0.33; 0.5 or 1 liter. The volume is not specified in the recipe
You want to use a 13.5 oz. can of coconut milk.
Hi,
Thanks for these recipes. Given i have heart condition i would like to reduce the amount of oil /fats in my diet. As a consequence do you know if there are any substitutes to using neutral-flavored oil , the coconut milk and any nuts in your recipes that would still make the chesses work?
The cheese will work with simply soymilk or oat milk and no added oil if you wish for a low-fat version, however, it will taste like low-fat cheese too.
Hello Monica ! This made my day to see my friend on here as usual coming with the best vegan recipes – we still make cecina to this day and salute you 🙂 love to you and the family ! Co
It made my day to hear from you, Cayce! Enjoy the cheese! Love to you and your family too! 🙂
This recipe seens amazing! Can’t wait to try. Can I make this cheese without the Agar? I want to bake a pizza for my partner and I don’t have these around :/
You can leave the agar agar out and it will be a delicious cheese sauce. Enjoy! 🙂
Just wondering if you can taste the coconut at all in the recipe…
Yes, you can taste a slight coconut flavor. Most people don’t notice it, but if you don’t like coconut, you may want to use a different type of plant-based milk. I also find that different brands have more or less coconut flavor.
It works with soy milk too.
Yes, it does. Not as creamy, but still good. Enjoy! 🙂
Love the taste of this cheese. However it turned out more of a jelly consistancy which is not very nice. I think the amount of Agar Agar was of but I don’t know if it was too mutch or to little…
Different brands of agar seem to have different strengths. It sounds like you need to increase the amount of agar agar you are using. You may want to start with 3 tablespoons of agar-agar powder and see if the consistency is better. (Make sure that you are using powder and not flakes too.) Hope that helps! 🙂
Could I use gelatine
Since I am vegan, I have never tested it with gelatine, so I don’t know how it would work. I have had other people try it, but I don’t think that it came out great for them. Gelatine uses a different process to activate it, so you couldn’t use the same method of boiling for 6 minutes.
Hi Monica! I really like your website and love your recipes. I was vegetarian for over two years but I finally managed to convert a few months ago. I found really difficult to give up cheese. What helped me in converting is after a friend’s suggestion trying Violife vegan cheese. I don’t know if you have tried this brand. I really like the taste and has no preservatives. I tried making my own vegan cheese but it didn’t turn out well. I think the tips you provide are interesting and will give it a go. Maybe this time it will work for me.
Wow I love your website, such simple and delicious recipes.
You often use garlic powder, unfortunately I can’t have garlic anymore, can you recommend a good substitute?
Thanks
Thanks! I’m so happy that you like my site. You can use about 1/2 the amount of onion powder instead, it’s not the same flavor, but is a good option.
We are in lockdown. So I don’t have AgarAgar nor Kapa Carageenan. Any subs?
The only other swap is for these is chickpea flour. I share the recipe for that method in my cheese cookbook.
I have tried several vegan cheese recipes. This is the best, I love it very much
I’m so happy that you liked it! 🙂
Hello. Is it safe to store this cheese outside of the refrigerator if it is coated in cheese wax?
I have never done that and I’m not sure about its safety. It will mold quickly if kept at room temperature, so I wouldn’t do it. Store in the fridge or freezer.
Hi, Could you use refined coconut oil in place of coconut milk in this recipe? Thanks!
I wouldn’t swap out just coconut oil or it will be too greasy. You can use the plant milk directions and use coconut oil for the oil part.
Hello Monica
Am looking at your page in the hope of saving money on specialty vegan cheese. Therefore do you know of anything that could help preserve the cheese for more than the 5 days, or if not yes freeze it, gotcha.
I really don’t know of anything that would work to preserve it. It does freeze really well, so that is probably your best bet. Enjoy! 🙂
Wow, talk about perfect timing! I’ve decided to go dairy free for the month of March (and gluten free) to see if some of my muscle pain goes away, and I’m already missing cheese. I used to have a herd of dairy goats and made several kinds of cheese all the time. In fact, I still have cultures in my freezer.
So, I was going to look around for a vegan cheese recipe and as soon as I signed up for your blog, there it was.
I hope that my cheese recipes help you with those cheese cravings to give you time to see if going dairy-free helps. I’m so happy to have you following along with my blog! 🙂
I made this recipe with the wrong type of yeast and it tasted way too much coconut/garlic… 🙁
You definitely only want to use nutritional yeast and not any other type of yeast. Coconut milk with a higher fat content seems to have less of a coconut taste.
Hi! This looks s good! Do you use the entire can of coconut milk, or just the cream that has separated on the top? Thank you!
You want to use the whole can of coconut milk, not just the cream. Enjoy! 🙂
I’m very confused with the can of coconut milk. Is it the Thai coconut milk. It doesn’t say full fat. If I need full fat, that would be coconut cream, no?
And I’m safe to assume it’s not the coconut milk in the cartons as a diary replacement beverage.
You want to get the canned coconut milk, not the stuff in a carton. It doesn’t say full fat on it, just don’t buy the “lite” coconut milk. I find that the coconut milk that has at least 14 grams of fat per serving works best. You can also use a can of coconut cream. I hope that helps. Enjoy! 🙂
Would I be able to use arrowroot in place of agar agar? I’d like to try this recipe because 1. I was shocked to see that vegan cheese could be made so simply! & 2. I cannot for the life of me find a dairy free cheese that my 10year old daughter will eat! Lol thank you!
I’m sorry, but you have to use agar agar or kappa carrageenan, arrowroot will not work instead. I hope that you are able to make it and your daughter likes it. 🙂
I have been looking for a vegan cheese recipe and I tried this after looking at a bunch of recipes online. More specifically, I tried vegan mozzarella. I followed the exact recipe and even bought the telephone brand agar agar powder. However, the cheese never became thick enough. To make it thicker, I boiled it longer than suggested (doubled the time), and even with that, it looked less thick relative to the video, and had some liquid oil around it. After it waited in the fridge uncovered for 3 hours, there were white blocks of solidified coconut oil around the cheese block. I assume the difference is due to coconut milk but I am not sure. Do you have any recommendations on how to fix this? Thank you so much!
I’m not sure what happened to it, I have never had this experience. Did you use full-fat coconut milk? It sounds like the fat may have separated (maybe from boiling it too long.) The cheese sauce doesn’t get super thick until you add the tapioca starch mixed with water. Try it again and be sure to use 2 full tablespoons of agar agar and it should set firm after 6 minutes of a low boil.
Hello there and thank you for the recipe !
What kind of coconut do you use? Is it completely natural 100% coconut ? or does it contain gums and more ingredients?
I usually use 100% coconut milk, but I have used both types and they both work well. Enjoy! 🙂
We can’t use coconut milk, what do you suggest for a substitute??
If you can’t use coconut milk, my 2nd favorite method is simply to use 1 3/4 cup of soy or oat milk and 1/3 cup of canola oil (or other neutral-flavored oil) in place of the canned coconut milk and water. Enjoy! 🙂
can you use rice milk?
You can use rice milk if you want, but rice milk is very thin, so it will not be as rich and creamy. It will come out best if you use 1 3/4 cup of rice milk and 1/3 cup neutral-flavored oil.
I’ve had my fair share of vegan cheese (I’m not vegan but I follow an autoimmune diet), and the brand I liked had way too many additives. I was skeptical about this recipe. In fact it took me about 6 hours to even try the finished product (the smoked gouda) and all I’ll say is RUN, don’t WALK to your nearest asian market and buy some agar agar and make this recipe. It’s 100% spot on! I followed everything to the letter including the telephone brand of agar agar and it was absolutely perfect! THANK YOU.
You’re welcome! I’m so happy that you liked it, Dom! 🙂
This looks amazing. I live in South America there is no store bought option for vegan cheese here and most of the recipes online call for cashews which are ridiculously expensive. I just had a question about the coconut milk, it’s difficult to find canned coconut milk where I live, although fresh coconuts are readily available and rather cheap. Do you think the recipe will work with homemade coconut milk if so what would be the ratio water-to-shredded coconut for a creamy coconut milk?
Hi Kris, it should work with homemade coconut milk. I would use about 60% coconut water and 40% coconut shreds. Blend it very well before using. You want it super creamy.
Is there anything I can use instead of tapioca? I live in rural Ireland and can’t travel more than 5km away so I’ve no access to any shop that has it.
Hi Grace – Unfortunately, nothing else works to give vegan cheese the ability to melt and stretch, however, it does make a great firm sliceable cheese without it.
I’m on a mission to find a good recipe for vegan cheese. I’ve tried numerous nut cheese recipes, all tasted great but I couldn’t get a firm cheese, even using agar agar powder.
I just tried your recipe with a few tweaks. I Eliminated adding the half cup water and used only 13.5 oz of the cream from a can of full fat coconut milk. I added a fire roasted red bell pepper, a tsp of white miso paste, a 1/2 tsp of dijon mustard and a 1/4 tsp smoked paprika. Eliminated the salt since miso paste is already salty. I put everything in to my high speed blender except the agar and blended until very smooth and creamy. Then added 2 heaping tbs of telephone brand agar agar powder and blend..
Then transferred the mixture to a sauce pan and followed your instructions of simmering while mixing for 6 minutes.
I tasted some scraps of the mixture off my whisk and it’s delicious!!! Looks like it will firm up nicely which is what I was going for!
Thanks for the recipe!
I’m so happy that this vegan cheese recipe worked well for you. It’s fun to play around with the flavorings and come up with your own creations! 🙂
I cannot thank you enough! I just cooked the sliceable version and for the texture and consistency of some drops that fell off and the remaining in the saucepan I can totally affirm that it is a huge success. I am so happy cuz I miss cheese so much since I started being vegan. I followed for tip with the agar agar: bought the telephone brand in the local Asian market one pack for 2 dollars. No coconut flavor in the scraps that I tasted. Absolutely yummy! Cant wait to try the other versions.
You’re very welcome! I’m so happy that you liked it, Jen!
I am so thrilled you have no idea. I have attempted vegan cheese making about 6 times in the past, all ended up in the garbage. After watching your video on making Provolone I figured I would give it one more try and boy am I glad I did. It turned out absolutely perfect! Now I can make all the other types of cheese. So Happy!!!
Thank you so much.
You’re welcome! I’m so happy that you had success with my recipe, Michele! 🙂
Hi Monica, I tried to make the herb and garlic version of this today. I used the right amount of agar (2 tablespoons), let it set and it came out jelly-like. After reading some of the comments I decided to remelt and double the agar (so I added 2 more tablespoons) as I’m in Europe. I let it set again, however this time it is super rubbery and has a slippery coating to it. Any advice on what I did wrong? The taste is super good so I’ll still eat it but wondering for next time… I’m used to eating violife cheese so maybe I’m just not used to the texture?
Hi Natalie, it’s hard to know the strength of the agar that you are using. Maybe use 3 tablespoons next time so you have somewhere in between. It does have a fairly rubbery texture that some people just don’t like. If you like the taste, play around with the amount of agar, or try kappa carrageen, some people like that texture better.
Hi Monica
Thank you so much for sharing this vegan cheese recipes !!! Love it !!!🤩🤩🤩👍I’m trying to make vegan cheese now………🤗
You’re welcome, Christine! I’m so happy that you like it! 🙂
Hi! Your recipe is great and easy to follow! I enjoyed making it with my son! The flavor is great too! Although i was wondering why ours turned more gelatinous than creamy? Yours looks creamy. Did i use too much agar agar? Your input would be very helpful! Thank you so much!!
Hi Carla, different brands of agar agar seem to come out slightly different. You can try reducing the agar a little or adding a teaspoon of tapioca starch to the liquid ingredients before heating. This should help it become creamier, but it will be less firm.
This is the absolute best vegan mozzarella cheese! It tastes like cheese and has a great texture when melted!! Thank you!!
I’m so happy that the mozzarella recipe worked well for you, Rachel! 🙂
I’m very interested in trying your recipes, especially these:
Mozzarella for mousakka and pizza
Cheddar for mac and cheese
Swiss Cheese for quiche
I think the answer is probably obvious, but would you please confirm if I should make the meltable versions for these dishes? My family is especially fond of quiche and, so far, I’ve found nothing commercal that is satisfactory.
Yes, the meltable versions would work best for those recipes. You can find a video of me making the meltable versions in my Mozzarella post if that helps. Enjoy! 🙂
Hi, is salt necessary to the recipe. I need low to no salt vegan recipes. Is also looks like some salt is provided by canned coconut milk, canned powdered coconut milk be used due to no sodium in powered.
Thanks you.
Hi Rich, you can definitely reduce the salt that you use, however, cheese is salty so if you leave it out totally it will be sweet and not savory. I would use less than 1/2 tsp of salt or I don’t think it will taste like cheese to you.
Hello Monica, How about Mrs Dash as a salt substitute . Thanks you . Rich Koerner.
Mrs. Dash would definitely help to give it more flavor.
I added some white miso paste i think it’s a good salt replacement and a bit cheesy too!
Yes, I use miso in a lot of my cheeses. I love the flavor that it brings to them and is a nice alternative to salt! I’m so happy that you enjoyed the recipe! 🙂
Thanks for another wonderful cheese Monica. I’m so happy I found your blog!
You’re welcome, Sue! I’m happy that you found me too! 🙂
Could I make it with corn starch instead of agar agar powder?
Hi Alice, it will not work with cornstarch. You need to use agar agar or kappa carrageen to make it set firm enough to slice. Cornstarch will make a thick cheese sauce, but not a firm cheese that you can slice.
Hi Alice, I think I put too much salt. Can I re-boil my vegan block cheese again and add some coconut milk again and also extra yeast for extra flavor? Throwing away kind of wasteful 😭
Hi, is there are difference between tapioca flour and tapioca starch? I just wanna make sure I’m getting the right thing.
There is no difference between them, just a different name for the same thing. Enjoy! 🙂
Such a fantastic recipe thank you! Made it for the first time today and it has turned out so well! My only question is whether I could substitute the coconut milk for anything else so it doesn’t have such a coconut flavour?
What a great recipe! Just made it and trust me it tastes soooo good!
Thanks so much! I’m so happy that you guys like it! 🙂
hi monica..my name is iris i really love this recipe can i ask if its possible to make a vegan chesse that i can keep even it was not in the fridge?
Hi Iris, I’m so happy that you like my cheese! There are many recipes for vegan cheese out there that you leave out of the fridge to allow it to grow a probiotic culture. I don’t do that to my cheeses and I would suggest that you search for cultured vegan cheese to find one of these types. However, these take a few weeks to make.
This sounds amazing! Do you have any suggested alternatives for agar agar/carrageenan? My friend is actually allergic to seaweed products, as well, which both agar and carrageenan are derived from. Would love to know if you can recommend any other options for a firming substance that works with your recipe!
Hi Jessica, I don’t know of anything that will make the cheese set other than those 2 seaweed products or gelatin which is not vegan.
Thank you so much for creating these recipes! Out of everything to be missed when vegan, cheese definitely tops my list. I made the smoked Gouda for the first time tonight and while I think it came out exactly as it should, I’m wondering if there is any way to make it less… rubbery? Or are all the solid blocks that way? It’s not soft like jello but if I cut a slice, it’s quite a slick and wiggly texture that holds its shape. I’m going to try a melty option next but was so hopeful for a hearty dry Gouda. Thanks again!
Hi Brittany, I’m so happy that you like my cheeses! The agar agar has a little bit of a rubbery texture that you can’t really change, but it sounds like you may want to use a little more next time. Two tablespoons plus an extra teaspoon of the agar powder should give you more of the texture that you are looking for. (Some people report that they like the Kappa Carrageenan texture better than agar, so you can try that too.) 🙂
How do I store the cheese without sweating inside the fridge. what ever way I cover it it is going to sweat, and that would spoil the cheese soon. Thank you.Here in India we get only pure virgin coconut oil, it does have a strong smell. One of my very professional vegan friend told me that all I have to do is heat the coconut to smoking point, which would get rid of the coconut smell. Have you tried adding some okra pulp to make the cheese really stretchy for Okras are very stretchy?
Another thing I wanted to know, can we use yogurt to make cheese to get that tangy sour taste of cheese, I remember seeing it in one of Miyoko Schinner’s videos, The method is just the same as yours, thought I will give it a try
You can leave the cover off of the cheese until it has fully cooled so you don’t get condensation in the container. I don’t know about virgin coconut oil. I use canned coconut milk in mine. I have never tried okra pulp, but it sounds interesting. I have made it with soy yogurt and it will work. You can use yogurt in place of the milk, but I like the taste and texture of the coconut milk the best. Enjoy! 🙂
This recipe looks so interesting. I am excited to try it however, I am trying to go dairy free but not vegan. How much gelatin should I use to replace the agar agar?
As a vegan, I don’t use gelatin, so I have never tested it.
Love your site and cheeses! Have you experimented with pea protein at all? I’m looking for a slightly different texture; and noticed most vegan cheeses in stores has this in it. Any thoughts?
I have not experimented with pea protein at all with these cheeses. I have used it in some other recipes, but it seems to have a little bit of a gritty texture when I have used it in other things.
Monica – THANK YOU! I just found your site in my desperate hunt to try and figure out if it was possible to make vegan cheese EASILY! I have a 9 yo daughter who is allergic to soy, tree nuts, and potatoes! As you you can imagine…every single store bought cheese uses soy, tree nuts or potato starch! I cannot wait to try these cheeses. I cannot find chickpea miso anywhere (need b/c I can’t use the regular obviously). Any ideas? Again, THANK YOU!
I’m so happy that you found my cheese recipe too! That sounds like tough allergies to deal with! I’m not sure where you can find chickpea miso, probably only a healthy food co-op or something. If she can have sesame seeds, tahini also gives things a similar cheddar type of bite instead of the miso. I only use miso in my cheddar and Swiss cheese though, so you can make many flavors without it. Enjoy! 🙂
I just bought chickpea miso at whole foods but believe it still may have some ingredients in it that don’t work for you. that is why I hadn’t bought it before, but figured it was on sale and I can use it sparingly from time to time. can’t recall right now if it is a soy based ingredient or not though.
I have found chickpea miso at my local co op, here in WA state in the US. If you have a co op anywhere near you, might be able to find it there 🙂
I made it a little differently because I didn’t want the coconut flavour of the milk so I subbed it for cashew, soy and almond yoghurt i made that didn’t set firm with some refined coconut oil. It looked and smelled amazing while cooking, so thick and stretchy! Thanks for this simple, achievable and pretty inexpensive vegan cheese! Can’t wait to dig in
I’m glad that you liked it, Emma! 🙂
how many cups is the can of coconut milk?
I use coconut milk comes in cans that are 13.5 oz which is a little more than 1 1/2 cups.
I am amazed with my first attempt at this cheese! It was easy and turned out. I’m wondering if anyone has a suggestion to make it more firm/dry and less like jello?
I’m glad that you liked it, Lauren. Some brands of agar agar don’t seem to be as powerful as others. If it turned out soft or jello-like, add more agar agar next time. Enjoy. 🙂
wow this looks amazing! lactose intolerant and practicing vegan, i’d love to try this :))
however My family and i can’t have coconut, and dont have agar agar.. i saw the note at the bottom about the oil, but im not a fan of coconut or olive oil either.. or oil in general. is there a way to keep it low-calorie and coconut free?
i /do have xantham gum in my pantry, though..
There is no way to make it set without agar agar or kappa carrageenan. Xanthan gum will not make this set. You can use cashew cream instead of the coconut, but there is no way to give it the texture or mouthfeel of cheese without some fat and calories.
Bit funky taste on own but omg melted on a spinach wrap with vegan mayo. Deelicious..yummy would make again. Makes alot and cheap. Juz like provolone.
Glad it works for you, Sammi! 🙂
Does the base recipe get as thick and stretchy as the photos or only if you add extra tapioca starch? I’m making it with the 1 tsp in the recipe and I can’t get it to thicken. I’ve tried twice, the first time it tasted good, but the texture was kind of like jello because the agar agar seemed to settle to the bottom (leaving a thin clear layer). Second batch is cooling now, but still ended up completely liquid when I finished boiling.
The image of it stretching is the melty version with added tapioca. I’m not sure what is happening for you. It should get thick while you are cooking it -similar to pudding. I have never had my agar agar settle. It should we well incorporated after 6 minutes of boiling and stirring. Are you using agar agar powder or flakes? There is a video of me making it attached to my mozzarella recipe that you can check out. (It is the melty version though). I’ll be making a video of the sliceable version soon.
Have you tried making the cheese with full-fat Oatley oat milk? It’s very thick. I ask because I wonder if it will need the extra oil.
Thank you!
Hello Monica,
Thanks for the recipe. It seems amazing! I have a question about weight of this cheese. Do you have any idea about the weight of one container cheese?
Thanks for your answer
I have never weighed it before. I’ll try to remember to do so next time I make it and get back to you. My guess is about 12-14 oz?
Excellent. I didn’t have tapioca starch so I did use 1 tsp of cornstarch and it worked just fine!!
Used it to top vegan French onion soup! So delicious.
Great! I’m so happy that you liked it, Tara! 🙂
Could you use Ripple milk instead of coconut. It has more fat than other plant milks…I just don’t want to add oil for health reasons. Thanks!
Yes, you can. It still won’t be as creamy as full-fat coconut milk, but it will work. Enjoy! 🙂
Can’t wait to make this cheese. I’m trying to
Watch my weight. Can I use low fat coconut milk in place of regular fat coconut milk?
You can use low fat, but it will not taste as good.
Hi i just made your mozzarella, provolone, smoked gouda, and garlic with herb! they are all very delicious but i am curious as to how long these will hold in the fridge for? thanks!
They will last about 5 days or you can put them in the freezer for up to 3 months. I’m so happy that you liked them! 🙂
Hi Monica, i’m ready to try this recipe but I want to use kappa carrageenan instead of agar. How much kappa carrageenan do I use in place of the agar? Also, do you have a sour cream recipe that doesn’t use nuts? The cashew version I make has a great texture but the cashews are too sweet and almonds don’t get creamy enough even in my high speed blender.
Thank you
If you use kappa carrageenan instead of agar agar, you can use the same amounts. I do have a tofu sour cream recipe. I like it better than cashew sour cream too. Here is the link… https://thehiddenveggies.com/vegan-sour-cream-recipe-nut-free/
Hi, I made the provolone cheese and I am so happy to report that it was super easy, it tastes good, and it really melts. Tonight, I made quesadillas and I was happily surprised when I saw the cheese bubbling. It tasted super delicious!! Next time, I think I would like to add more nutricional yeast for more cheese flavor, more tapioca for more stretching, and maybe a little bit more of lemon. THANK YOU SO MUCH FOR SUCH A WONDERFUL RECIPE!! ^_^
I’m so happy that you liked it! Enjoy! 🙂
WELL….. I scrolled aaaaaaaall the way down past these amazing comments just to add in my two cents. This. Is. AMAZING!! I couldn’t have envisioned a better outcome, it was actually perfect & even my dairy loving partner is asking me to make more. I’ve been juggling my way through LOTS of different (expensive) dairy free cheeses for my son & I, so it’s amazing to have finally found it…. added bonus I get to make it myself!! Thank you thank you thank you!!!
Thanks so much! I’m so happy that you and your family like it! I felt the same way when I finally figured out this recipe! Although I do make cashew cheese occasionally, this coconut cheese is always by far my favorite! 🙂
Thank you for all these quick and easy – and yummy looking – recipes! I was wondering if there is any way to modify this recipe so you end up with a cream cheese like consistency…? I can’t stand the texture of cashew based vegan cream cheeses and can’t use tofu based recipes since I’m soy intolerant. Been trying desperately to find a good cream cheese substitute (similar to daiya) that I can make myself. I’d love if you had any suggestions on how to modify this recipe to get something spreadable like cream cheese.
Hi Dawn, I have a vegan cream cheese recipe on my site, but it does use tofu. You can play around with the amounts of agar agar and tapioca to achieve different levels of firmness. I would reduce the agar agar to 1 tsp, and add 1 tbsp tapioca starch, and 1 tbsp potato starch to get a very soft cheese that you can spread. It will not be the same texture as the daiya, but a good mild spreadable cheese. I hope that helps! 🙂
Thanks for the tips! I’ll have to get my hands on some potato starch and give it a shot!
Hi Dawn,
Great recipe. I’m transitioning to a plant based diet and I would like to try this recipe. I don’t have access to agar agar, so for now I’ll substitute gelatin. What’s the substitution ratio for gelatin : agar and how would this change the boiling time (I know gelatin don’t need to be boiled to be activated). Thanks
Since I’m vegan and have been for a long time, I’ve never tried it with gelatin. I don’t believe that the gelatin has to be boiled to activate it as the agar agar does. I have read that 1 teaspoon agar powder is equivalent to 8 teaspoon gelatin powder. Let me know if it works for you, I get this question often and would like a good answer for people. 🙂
Thank you for sharing the recipe. I just made this, and so far so good. But I have a question about the instruction. Do I leave the lid off when I leave it in the refrigerator for 2 hrs to cool down? Thanks
Hi, yes, you will want to leave the lid off until it has cooled so condensation doesn’t get back into your cheese. Enjoy! 🙂
This recipe is great, especially with the coconut oil variation! I do 1 1/4 C water and 1/2 C refined coconut oil and the other things, it’s seriously it’s so cheap that way, and a great base for flavors! I add chili peppers and more noosh, it tastes like pepper jack!
Thanks, Tiffany! I’m so happy that you like it! I have a new recipe for pepper jack too. You can find it here: https://thehiddenveggies.com/pepper-jack-cheese/
Hello dear! What is noosh? Sorry I am French and i annoté find the definition of this word. I finally concluded that it mustn’t be TLC? Tell me More 🙂
Hi, nooch is another word for nutritional yeast which is a flaky yellow powder that has a cheesy flavor. 🙂
This was my first time making plant-based cheese. It turned out well except had some issues. When I decreased the temperature trying to get the barely boiling as instructed, it was too low so it stopped boiling. It went over 6 minutes. So I increased the temperature which took another few minutes until it was boiling again. Altogether from when it first started boiling to when I finished, it was about 12-13 minutes. It just didn’t become very thick or stretchy while cooking, however I added the extra starch so it’d be meltable. Maybe that’s why it was never thick or stretchy like in the pictures. While on the counter cooling it was already forming a skin on top and hardened all the way through within 2 hours. I haven’t tried it yet to see it’s melting but it’s a solid cheeze recipe in the end. 🙂
For this I used coconut milk from Sprouts brand that includes guar gum in the ingredients. I also have other coconut milk that doesn’t include guar gum. The listed ingredients are just 60% coconut and water. Does your coconut milk include the guar gum or not?? Not sure if this would affect the final product.
Hi Vera, Your cheese will get stretchy from adding the tapioca starch, so it won’t get that stretchy look if you are making the firmer version. You may have cooked it too long heating it for 12-13 minutes, but it could be fine. Adding more starch will actually make your cheese softer not harder, so if it wasn’t super firm, that is why. The guar gum does not affect the final product. I have found that the fat content of the coconut milk makes the biggest difference in the taste and texture of the cheese. Enjoy! 🙂
Hi Monica! I made this twice. The first time I did not stir for the entire 6 minutes and it did not firm up after it was refrigerated. The second time I made sure to stir for 6 minutes while it was heating. It did not firm up in the fridge after 2 hours either. Any ideas or tips on what I may have done wrong? Thanks
I’m not sure. Mine always firms up for me. Did you use 2 TBSP of agar agar NOT 2 tsp? How much tapioca starch did you use? What brand of agar agar did you use? Was it flakes or powder? These are all things that would affect the hardness of your cheese.
I’ve been having a really hard time finding cheese recipes that are solid that dont ask for agar powder or flakes. My sister wants cheese but can’t have anything seaweed based.. Is the agar an essential part of these (cuz they sound really good and one of the best sounding so far)? Or can the agar be substituted for something else that would have a similar effect if its needed?
Hi Lauren, agar agar is really important to get the cheese to set properly. You can only use agar agar or kappa carrageenan to get the same effect to set the cheese, but they are both seaweed-based. You could add about 3 tbsp of potato starch instead of the agar and it would make it firm up once it cools, but it won’t give you the same texture that the seaweed products will. I hope that helps! 🙂
I have been wondering if agar agar works differently than animal product gelatin. I am only asking because I have gelatin in my cupboard, but will have to wait for agar agar to be delivered and I am ready to try this cheese right away. Hahaha Thanks for the recipe!
Leah, I have heard that it is different, but I have not personally used it. If you try it, let me know if it works.
Hi! Thanks for the recipe. I was looking for an easy option without cashews. Works really well. I it’s ok to suggest anyine wanting it more “cheesy” grey poupon mustard amd a lite extra lemon juice with a tiny sprinkle of nutmeg helps. Also. Agar agar, tapioca amd nutritional yeast are all available on Amazon if you don’t have a health food shop nearby. My local Asian store sells tapioca and luckily nutritional yeast is becoming very available here in the UK. I just tried a garlic and herb adaption and was a beaut!x
So happy that it worked well for you! This is a pretty basic version, but I also have recipes for cheddar and Swiss cheeses if you want something with more of a bite. 🙂
Hi there just made the smoked gouda cheese – not tasted it yet 🙂 was so easy to make and is setting up nicely – I am wondering I know its extra work, but would evaporated soy/nut milks work, as it will be more concentrated for a creamy flavor and not put quite so much oil in ??? I am really looking forward to trying it “set” as I tasted it when stirring it and it tasted delicious 🙂 I am not a huge fan of bought vegan cheeses I have them as I had no choice – until now 🙂 Thank you for all your hard work and being so kind to help others out.
I have never tried it with evaporated milks before, but I have made it with soy and cashew milk and it turns out well, but not as creamy as coconut milk. You can make it lower fat if you want, but the fat is part of what makes it taste similar to real cheese. 🙂
Hi, thank you for the lovely recipe, just a question: can I substitute nutritional yeast with regular yeast?
Hi Ina, no you can’t. Nutritional yeast is a totally different thing than regular yeast. It is essential in giving it a cheesy flavor and there is really no substitution for it. I hope that you are able to find some and make it! 🙂
I’m planning to make this recipe, I’ve bought all of the Ingredients, however, i find it kind of useless that you haven’t mentioned what quantity of coconut milk to use….. candy don’t just come in one size. How much did you use?
Where I live, I have only seen canned coconut milk come in 1 size – a 13.5 oz can. That is what I use for this cheese. Enjoy! 🙂
I bought everything to try the recipe, but cant find nutrinional yeast. Can i use miso instead?
You can add about 1 tsp of miso instead of the nutritional yeast, however, the nutritional yeast gives it a nice flavor that really can’t be replaced. If you plan on making vegan cheese or cheese sauces frequently, it’s worth ordering it online if you can find it locally. Enjoy! 🙂
This recipe looks great, it’s very similar to the one I have made in the past. Ill have to give yours a go 🙂
Hope you enjoy it, Emily! 🙂
I just wanted to come back to say that I’ve tried a few vegan provolone recipes since first trying yours and there are none better (or even close!). Thank you so much for sharing 🙂
Aww! Thanks so much! So happy that you like it! 🙂
This is meant to be a fairly neutral cheese. If you are looking for one with more bite, try my cheddar cheese recipe. That may be the flavor that you are looking for.
I really loved this recipe. I have the unfortunate combo of being Celiac, having Crohn’s and being mildly Lactose Intolerant too.
I did not find Agar Agar powder and so unfortunately had to substitute it with Gelatin. The taste was excellent, but while stirring on medium heat, it did not get as thick as described in the recipe. However it set rather well! And I cut it into perfectly cheese like slices.
I also did not find Tapioca starch and so had to use corn flour as a substitute.
Unfortunately though it set well and the texture was perfect, when put on a warm slice of bread, it immediately melts into a gooey (but delicious) sauce. I’ll try not adding the flour and see how that goes.
Thank you for a great recipe!
You’re welcome! I’m so happy that you were able to make the recipe work for you and it came out well even with some substitutions. 🙂
If you have any Asian grocery stores near you, that’s where I get my tapioca starch. It’s also on Amazon along with agar agar. I’m surprised you don’t use tapioca starch since it does such great things for gluten free baking!
If you can find tapioca pearls which is usually near the pudding mixes, get those and blend into a fine powder. That is what i did. It is also usually cheaper than buying the already ground stuff
I’ve been wanting to go vegan but cheese has always been the holdout because vegan cheese has never cut it in terms of the melty factor and acting like real cheese. I’d love a vegan cheese that acts and melts like American cheese tbh. How well does the agar agar do at getting the cheese all melty like American cheese? is there a point where you can get it to melt like American or does it get to the level of just normal cheese?
Also, I’m a “health vegetarian/vegan” and i like getting protein in my diet. Would it ruin the consistency if I added soy protein to give it similar nutritional content to store bought cheese? Is it worth trying or no? Thank you for this recipe
Hi Brad. There is no homemade cheese or even cheese on the market that will melt the same as real cheese. This cheese will melt well if you get it hot enough. If you are using it for grilled cheese or quesadillas, make sure to cook it on low, so it heats the cheese in the center all the way through. It will melt well in the microwave too. I have had a lot of non-vegans and new vegans love my cheese and say that the texture was great. Some people don’t like the consistency of agar agar and think it is too rubbery. You will just have to try it yourself and see. As far as the protein goes, I have never tried adding additional protein. I think that it would make it gritty and one of the best things about this cheese is that it’s super creamy. Hope you enjoy it! 🙂
I am all alone and more often then not what I try (cheeses etc) get mouldy even when refrigerated because I can’t finish them off in due time. Can I add some ingredient to prevent this? Bought cheese keeps for quite a long time.
Hi Joe, There isn’t anything that I can think of that will make it keep longer, but it does freeze well. It will keep for up to a week in the refrigerator, and 3 months in an air-tight container in the freezer. Enjoy! 🙂
Followed the directions carefully and the cheese setup perfectly. I grated it roughly and added it to pasta with roasted veggies. The cheese added a silky creaminess to the dish that was lovely. The flavor is similar to a mild mozzarella, but the melted texture is creamier. I’m thinking about trying a firm version with a softer version inside, like a burrata.
Wonderful recipe!
Thanks Lee! So happy that you liked it! I love that creamy texture that you get from coconut cheese too! Hope you try some other flavors too. Enjoy! 🙂
How many ml is one can of coconut milk?
There is 400 ml in 1 can of coconut milk. Hope that helps! Enjoy! 🙂
This recipe looks delightful! Unfortunately I have a sensitivity to coconut products and was wondering If there were any modifications I could make in order to make this recipe without missing out on much creaminess from the coconut milk/cream?
Thank You!
You can use any plant-based milk and neutral-flavored oil. About 1 1/2 cups of milk with about 1/2 cup oil will make it rich and creamy. Hope that helps. 🙂
Is there any way to remelt it to add more nutritional yeast? I didn’t see the part about adding more to make it more cheesy and it’s not as cheesy as I would like!! Just starting out being vegan and I think cheese is something I will miss the most😞
Hi Brianne, you can remelt it and add more nutritional yeast. Just melt it slowly over low heat, stirring frequently. If you want a cheesier taste, you may also want to try my cheddar cheese or my nacho cheese recipes – they are the cheesiest ones that I make. I think that cheese is the hardest thing to go without when you become vegan. I’m impressed that you are ambitious enough to try making your own already! Good luck! 🙂
Hi the recipe looks awesome. I have a question though…what if I try to make it without using any plant milk at all? How much water and oil would I need to substitute the can of coconut milk 13.5 oz as you said you used? I’m trying to save money currently and all plant milks are a little too pricey for me right now, even home made ones. Thanks a lot
I haven’t tried it with just water, but I think that it could definitely be done. I would add about 1 1/2 cup water and 1/2 cup of oil instead of the coconut. (I pay about $1.50 for a can of coconut milk at the Asian Market and they also sell it at The Dollar Tree for $1 if that helps). Good luck! 🙂
I’ve read all the questions and understand that tapioca gives you the best stretch, but is there any substitute that gives you a little stretch? I am highly allergic to tapioca, but would like a little stretch to the cheese. Thanks!
I’m sorry, I haven’t found anything else that gives it the stretch that tapioca does. Potato starch will give it a little, but nothing like tapioca.
Hello! I need your advice, please! Is there any other alternative to agar agar, as it is hard to find, also from what I’ve read it is best to consume local stuff. What do you think about linseeds or chia seeds? Do you think they’ll do? Or if not, what do you suggest?
Thank you in anticipation!
Hi Irina, I’m sorry, but there is no substitution for agar agar in this recipe. Nothing else sets up the same and give the same texture. Try my coconut alfredo sauce if you don’t have agar agar. It is the same great flavor, but in a sauce form, so it doesn’t need the agar agar. 🙂
I am not vegan, but need to leave dairy out of my diet. I tried the Garlic and Herb cheese yesterday. Unfortunately, I have been unable to find agar powder locally, so decided to try the recipe with gelatin, mainly because I had it in the house and thought it would give me an idea of the taste before I ordered it online. I really liked the taste, but the texture left much to be desired. I used two packages of gelatin, which is enough to set 4 cups of liquid. It set quite well but it is very gelatinous and had a translucent colour rather than creamy white. It really reminded me more of an aspic. I have now ordered the agar powder and look forward to trying it again. My granddaughter is vegan and I look forward to sharing this recipe with her.
I have never used gelitine instead of agar agar, so I can’t speak to that. I hope that you like it when you try it with the agar agar instead. 🙂
Hello!
We’re trying this recipe out with all the ingredients you say but we don’t find nutritional yeast. We’re Gonna try with cashewnuts and see how it goes! I’ll let you know. Thanks for this and have a nice day!
The nutritional yeast is what gives it the cheesy flavor. I hope that you still enjoy the cheese without it! Let me know how it goes. 🙂
Wow! I was very hesitant to try to make my own cheese, but it has come out really well! I wanted to make some to reduce the amount of plastic packaging we bring home. It was so easy and I can’t wait to try other flavours. Even my omni husband really liked it and he is hypercritical about vegan cheese. To anyone waiting or holding off making this – DON’T! You will love it!
I’m so happy to hear that you and your husband liked it! 🙂 Hope you like all my other flavors too!
Hey! I’m going to try and make this recipe although I could only find agar agar flakes instead of the power, how much would you recommend to use in place of the powder?
Thank you 🙂
Hi Emma, there is a 1:3 ratio when it comes to powder vs flakes. So, for this cheese, you will need to add 6 tbsp of agar agar flakes instead of 2 tbsp of the powder. Hope that you enjoy this cheese! 🙂
Does this freeze well? How long can it be frozen for and how long to defrost it?
Thanks!
D. Stangle
Yes, this cheese will freeze well in a sealed airtight container for up to 3 months. It will take 2-3 hours to defrost depending on the size of the block of cheese you freeze. Hope that helps. 🙂
Hi. I was excited to make this as we are minimizing nuts and so many vegan cheezes are nut-based. I followed the instructions exactly and it has gelled but it has separated into layers with the top being white like coconut. Any thoughts? Thank you.
Beverly, I have no idea what could have happened to make it separate. I have made this cheese about 100 times in many different ways and I never had it separate. Did you use canned coconut milk or raw coconut?
Some canned coconut milk has emulsifiers to keep the fat and water homogenized and some doesn’t. What type do you use?
Hi Mary, I use the coconut milk without the emulsifiers, the type that settles out with watery milk on the bottom and the thick cream on the top. Hope you enjoy the recipe! 🙂
Can I use cornstarch or whole wheat flour instead of the tapioca flour?
Hi Brandee, sorry, cornstarch will not work the same as tapioca flour. If you want it to melt and stretch, then tapioca flour/ tapioca starch is your only option. If you want a sliceable hard cheese to eat cold, you can just leave out the tapioca starch altogether. Hope you enjoy it!
Hi Monica, I noticed several readers asking about substituting Agar Agar. There is another substitute that can be used, it is called Kappa Carrageenan. Not just ordinary Carrageenan. It works the same as the agar. Hope this helps.
Thanks so much for letting us know Lynne. Where do you buy Kappa Carrageenan?
Yes, kappa carrageenan is a good substitute for agar. From what I had read, I use 1/2 the amount noted for the agar powder and it has worked well, for me at least. As the original poster mentioned, it needs to be the kappa kind (there are a couple of types). I bought mine directly from Modernist Pantry, from their website. It seemed pricey but I purchased the 14 ounce (400 gram) size a number of years ago, have made lots and lots (and lots) of cheese with it, and still have about 5 ounces left, so it turned out to be a good value.
Good to know! Thanks! 🙂
Can you leave out the water all together??
You can, but the liquid to agar agar ratio is what is going to give you the right texture. If you leave out the water, your cheese will be very firm and a little rubbery.
I love this cheese except I do not put all that garlic power in it. I don’t know if this garlic powder I have is stronger than most or what but it overpowers the vegan cheeses. I literally used the tiniest pinch. I also added 1/4tsp rice vinegar along with adding the extra tsp of nutritional yeast and the extra tapioca to make it stretchy. It is delish! Thank you!!!
So happy that you like it! You may have a strong flavored garlic powder. Some brands are stronger than others. Enjoy! 🙂
This was great I made it with silk soy milk. First time I made it I used the 1/2 cup oil and it was way too much oil. Next time I used an 8th of a cup oil. So I did 1 and 1/2 cup soy milk with another 1/4 cup filled half with soy milk half with oil. Worked great! I also added in a couple of dashes of liquid smoke. I ended up stirring it for probably 8 minutes after I turned it down because it didn’t seem stringy enough after 6 minutes. This is my go to cheese now! It tastes way better than store bought and is so much more cost effective! Thanks for sharing!
You’re very welcome. I’m glad you found a way to make it work for you! 🙂
Is there ANYTHING I could use other than the nutritional yeast? I am allergic to all forms of yeast and every vegan cheese recipe calls for it. Any ideas of a replacement? If it helps to know, I would mainly want a melty, mozzarella flavor cheese for pizza, lasagna, etc. Thank you for any insight you can give!
There is nothing else that I can think of that has the same cheesy flavor that nutritional yeast does. You could leave it out completely and I think it would still taste okay, especially if you made the smoked gouda version or the garlic herb version. Let me know if you try it. 🙂
can I use arrowroot instead of tapioca or does tapioca work best?
Tapioca works the best if you want it stretchy. 🙂
Could you please tell me what size tin of coconut milk you used? I cant wait to make this!
My coconut milk cans are 13.5 oz. Hope that you enjoy the cheese!
Hi, I was wondering if you have a recipe to make Brie Cheese? I love baked brie and would love a non dairy option.
Cheers
I don’t have one yet, but I’m working on it. 🙂
i want to try this as i am atotal cheese freak and its so hard to give up cow cheese. I am deadly allergic to seaweed products. what can i use in place of agar agar?
I don’t know of anything that would be similar to agar agar except for gelatine, but that would not be vegan. You can try my vegan cheese sauce or coconut alfredo recipe. They have the same great flavor but don’t call for the agar agar. Hope that helps. 🙂
Hi, This recipe looks amazing! Just wondering if it’s possible to sub tapioca with arrowroot powder? I know there’s a difference but curious if it would give a bit of stretch since I would like to use it for pizza.
Thanks!
Thanks! I have not tried arrowroot powder in my cheeses yet, it may provide a little bit of a stretch, but not as much as tapioca. If you try it, please let me know if it turns out! 🙂
Could I use a plant milk with de-odorized coconut oil. The oil firms up when cold and you don’t get the coconut taste.
Yes, you can. It’s not as creamy, but it has no coconut taste. That is what I do for my vegan cheddar cheese recipe. The cheddar has more of a bite when made this way. Enjoy! 🙂
My cheese keeps coming out like jelly. I tried to save it with cornflour. What am I doing wrong??
If you want a firmer cheese, you should leave out all starches. I know that it seems counter-intuitive, but starches make it more of a jelly texture. Agar agar alone will make it very firm. The agar agar is a gelatine-like product, however, and does gel, so you may just not like that texture.
Hi 😊. I just making it right now …hopefully I did it right.
I would like to serve it with the berries that you top on the cheese. …by any chance you ha e the recipe ?
Hi Chana, I hope that you like it! I don’t have a berry sauce recipe specifically for the cheese. I have a berry compote that I put over my vegan cheesecake. You my be able to modify that to what you are looking for. Enjoy! 🙂
Hello monica,
did you try to make the cheese using coconut yoghurt for a better flavour?
I have not tried it yet, but as when i do it will be without garlic powder, as part of a complex diet, i still need to disguise the coconut flavour & yoghurt made using probiotic powder has very little coconut flavour.
I have tried it with soy yogurt, but never coconut yogurt. That is a good idea though, I will have to give it a try. If you make it that way, let me know how it comes out!
Hi Monica, thank you for sharing this amazing recipe! Any thoughts on how to achieve anything crumbly like Feta?
Thanks Zoe! I have tried a few things to make a cheese like this crumble for a vegan feta, but have not been successful yet. I have found that seasoned tofu makes a great crumbly feta. I have a recipe on my blog for tofu feta that you can check out too.
Is is possible to use guar gum instead of agar agar?? I went to several health food stores and it’s the closest thing I can find to it
Hi Katie, sorry, you can not sub the agar agar for anything. It can be hard to find, but you can order it on Amazon. If you have any Asian Markets in your area, they also carry it.
Hi! Is it possible to use arrowroot powder in place of the agar-agar! Not sure I’ll be able to find it locally and would rather not have to resort to Amazon just for one infgredient! Thanks, and happy holidays!
Hi Heather, I’m sorry, but there is no substitute for agar-agar in this recipe. It is a bit of a pain to find. They have it at most Asian Markets or Natural food stores or co-ops if that helps. I wish that something else worked, but there is nothing else that will give it that same texture.
Amazing recipe! I haven’t been successful making cashew cheese and it gets expensive. This recipe is so good I’m trying not to eat it all up! My 9 month old daughter who has a dairy intolerance also loves it 🙂
Thanks Anjali, I’m so happy that you and your daughter like it! I’m so happy that there is a cheese that she can enjoy! It is so much cheaper than cashew cheese for sure! I love the creamy flavor of the coconut milk too!
What are your thoughts on letting it curd for a couple of days?
Also adding some blended sauerkraut for some “sourness” ??
I can’t wait to make this!
I have not tried letting it curd. Sauerkraut or the juices from it would give it a little bite. I also like to add a little miso to it for more of a cheddar flavor. You could try that if you are looking for the cheesy tang. 🙂
My goodness, this cheese is sensational!
I can’t stop munching on it!! My husband doesn’t really like the texture with the agar though, so I’ll try decreasing the amount and maybe up the tapioca a bit.
Anyhow, thank you so much for this no-fuss recipe!
Thanks, so glad you like it! The texture is not for everyone. You may want to check out my coconut Alfredo sauce or nacho cheese sauce for him. Same great cheese flavor, but in sauce form, so there is no agar agar!
Excited to try it again using agar agar.
I tried subbing gelatin and well it was just gelatinous coconut milk haha. So I don’t recommend trying the gelatin!
Thanks Alicia! I have had the gelatin question a few times, but since I’m vegan, I have never tried it. Thanks for testing it out and getting back to me about it!
Thank you very much for the reciepe 🤩🤩I am from Sri Lanka.. I was so exited to findout that cheese is possible with coconut. I did so much reserach to findout making vegan cheese but using cashew is bit expensive.
Finally i made it today 🤩🤩🤩 so for the canned coconut i use natural coconut and scarped it and took the extract. And i did not use water in the beginning since coconut extract contain water compared to canned one. My sister sent me Agar agar poweder from Singapore since i could not found it in the local market. Also i could not found nutritional yeast so i did not add it. I did not had tapioca flour as well so i add some grind sago since it is made from tapioca. And the tasete was amazing ..
Also i did a spicy version of it adding pepper 😉. Again thank you for this
Wow Melanie! I’m so impressed that you made this recipe work for you! I’m so happy that you liked it! I hope that you are able to find nutritional yeast someday, but I’m happy that you liked the flavor even without the nutritional yeast! Do you have vegan cheese at stores in Sri Lanka or do you have to make things like this yourself?
No so far I have not found any vegan cheese in the market.
I’m glad that you can make this version! 🙂
Can u use can of coconut cream In place of coconut milk.
Yes you can use coconut cream in place of coconut milk. It works great with either one.
Hi there, im from Sri Lanka and have not heard of Nutritional yeast- Is it like yeast used in rising bread? Im afraid thats the only type we have here. Can I use that?
As for coconut milk- we have fresh coconut here and i can scrape the coconut and extract the milk from the pulp itself.
Hi Dhilma, Nutritional yeast if very different from the type of yeast that you use to make bread. It is a yellow flaky powder that has a cheesy flavor. You can just leave it out, but it will not taste as cheesy. You could try using a teaspoon of miso for a cheesy flavor if you have access to that. I have not used fresh coconut. I think that it would work if you blend the coconut water and pulp together in a blender to get a thick milk consistency. I hope that you are able to make it.
Hi Monica, Is there a sub that you could recommend for the oil when using another plant milk like soy milk or just leave it out? We are a no oil. no nut family and miss cheese. Any tips appreciated. Thanks Peggy
Hi Peggy, you can just leave out the oil. I would use a thick soy milk like Silk brand or an equivalent to give it a more full flavor. (Replace the oil with soy milk though so you are using the same ratio of liquid to agar agar). Hope that works! 🙂
Hi, I made this today – it’s the best vegan cheese I have ever made & is delicious, inexpensive & quick to make! Thank you – having it on pizza tonight 🙂
Gill, I’m so happy that you liked it! 🙂
Shut the door! This cheese is legit! I’m not a blog commenter usually, but I want to affirm you! Make more things this fantastic! I’m living in Laos. Cheese is a bit expensive here. But it was so easy to find the ingredients. Almost every convenience store carries them! Thanks again!
This is good to hear! It is hard to know what ingredients people have available to them in other countries. So glad you like it Rachel!
Could I use rice flour??
Tash – No, unfortunately, tapioca flour is the only thing that makes it stretchy. You can leave it out completely for a harder cheese that just won’t melt as easily.
I’m confused. How does more starch make the cheese less solid ?
I know that this is counterintuitive, but the starch make it stretcher and if you add more than the amount I suggested, it will not set solid. (I tested this recipe many times adjusting the amounts of agar agar and tapioca starch to get it as close as possible to real cheese. When I added more tapioca starch, it wasn’t as firm and once I added more then suggested in the recipe, it was no longer firm enough to grate. 🙂
Pingback: Alsatian “Tarte Flambée” – Mindful Garden
This is great! Plus if you dip bread into it while it’s still hot it’s just like a fondue!! Lol, I love it.
Thanks Priscilla! I’m so happy that you like it as much as we do! Great idea for the fondue! 🙂
Made this last night. Very simple and sets beautifully. Tastes very coconut-y to me, which I don’t love, but might try extra nutritional yeast or the almond milk + oil next time, but a great foundation to play around with.
I’m glad that it worked for you! I have found that some brands of coconut milk have stronger coconut flavors than others too, so you may want to try a different brand. I use Chaokoh brand. It comes in a brown can. I find it for a good price at my local Asian Market.
Hey, there! I’ve got agar bricks that I pulsed into flakes. I know you said that the powder is ultra better, but will the flakes make a decent substitution?
I have never used the agar bricks before, but I have heard that you can pulse it down. Could you pulse it further into a more powdery substance? I used the flakes once, but it seemed harder to work with. I that is all you have, they will work, but just make sure you do the conversion correctly. You will need 10 Tbsp of flakes instead of 2 Tbsp of powder. I hope it works for you. Let me know.
Pingback: Scrambled Tofu – Mindful Garden
So happy to hear that you like this in your tofu scramble!
Hi there! When you mention 1 can of coconut oil, how much is that in cups? I’m writing from Argentina, and I’m pretty sure our measurements aren’t the same. Can’t wait to try this, it looks so easy to make!
Hi Antonella.You need use coconut milk not coconut oil. The cans of coconut milk where I live are always 13.5 fluid ounces. (That is just a little more than 1 1/2 cups). I hope that you are able to find it! By the way, I’m so excited that someone from Argentina is reading my blog! It has such a special place in my heart. I was an exchange student in Argentina in high school. (I lived in the city of Resistencia). Where are you? 🙂
Hello! Could gelatin be substituted for agar agar? I realize it wouldn’t be vegan, but we’re more concerned about dairy in our house!
Hi Devin. You could probably substitute gelatin, but I am not sure if the gelling strength is the same. You may have to play around with the proportions. I wish I had the answer for you, but I never cook with gelatin, so I’m not sure. (If you are trying to find a cheaper source for agar agar, I find it really cheap at my local Asian market. Good luck. I hope you enjoy it as much as we do!
I tried with gelatin and the texture was much to be desired 🙃. Excited to try it with the agar agar.
Hope that you like the agar agar texture better. 🙂
Is it possible to substitute vinegar for the lemon juice? (I can’t have citrus).
Yes, you could add a little vinegar or even mustard instead or a little bit of flavor instead of the lemon juice. If you want a mild cheese, like more of a mozzarella taste, you can leave it out completely. Enjoy! 🙂
Hi there! In your recipe it says to use one teaspoon of tapioca starch, but in your recipe notes you say to make it stretchier to use 2 additional tablespoons of it. Did you mean to say teaspoons? Or is the recipe supposed to say a tablespoon instead? Confused. Thanks!
Sorry about the confusion. To make cheese that is good for slicing and eating cold, I add 1 teaspoon of tapioca starch. For stretchy cheese that melts, I add 2 tablespoons + 1 teaspoon of tapioca starch. (I know that is a weird measurement, but that is the exact amount that I have found that makes it soft and stretchy, but still firm enough to cut or grate. Hope that helps. Enjoy!
Sorry I’m still confused about the tapioca starch. In your recipe you put 1 tbsp + 1 tsp and in your comments you said only one tsp if you don’t want it stretchy.
Hi Heather, If you want firm cheese that is good for slicing add 1 teaspoon of tapioca starch. If you want it to melt and stretch, add 2 tablespoons + 1 teaspoon of tapioca starch. So, the stretchy cheese will have 2 tablespoons more tapioca starch than the slicing cheese. Enjoy! 🙂
I’m vey excited to try this. Question though, could I use corn starch instead of tapioca starch or is there some reason that tapioca starch would be better for this?
You can just leave the tapioca starch out all together if you want a firm cheese for slicing and eating cold. However, if you want the cheese to melt and stretch, you absolutely need to use the tapioca starch. There is nothing else that gives it that same stretch consistency when it melts. I hope that you enjoy it! 🙂
I never thought that I could make cheese…its sounds like it would take more time than I have.
It literally takes less time than going to the store and picking up a pack of vegan cheese.
Just be sure to follow the recipe.
And the taste! OMG!
I love the variations – hard cheese for crackers and stretchy cheese for melting on sandwiches and pizza.
Thank you!
You’re welcome Emily! It is surprisingly easy to make your own! Glad you tried it!
This cheese is AMAZING!!! Thanks so much for making this recipe so easy to follow! I never thought that I could make vegan cheese, but it was really easy and it’s delicious!
The cheese really isn’t as hard as you would think. I’m so glad you liked it! 🙂
Hi there,
You say to use 1/2 cup of hot water… is that from the tap or boiled water straight from the kettle?
Hot steaming water that has just been boiled ?
Thank you
You just need to use water hot enough to melt any of the coconut milk that is stuck inside of the can, so hot tap water is fine. Especially when it’s cold, the coconut cream sticks to the can. This is just how I make sure to get all of the coconut milk.
I hope that you enjoy the cheese as much as we do!
Let me know if you have any other questions.
Hi,
Thanks for sharing these amazing recipe. It’s really easy to make.
Can i subtitute agar-agar with gelatin powder?
Since gelatin is not vegan, I have never tried it that way. I think it can be done, but gelatin works a little differently than agar-agar.