Vegan Cheddar Cheese Sauce
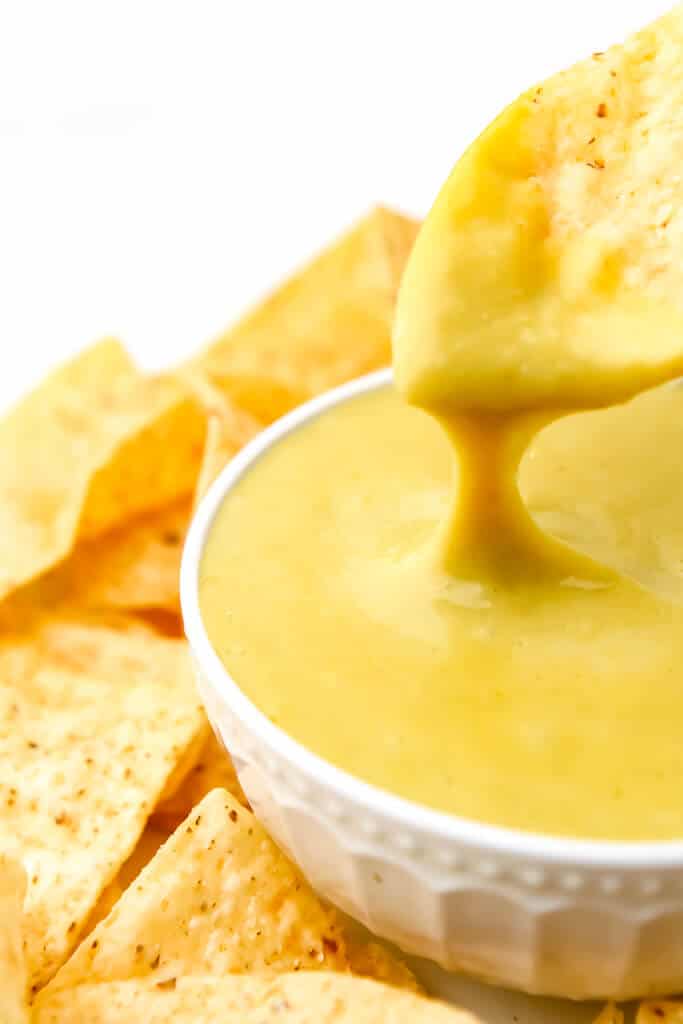
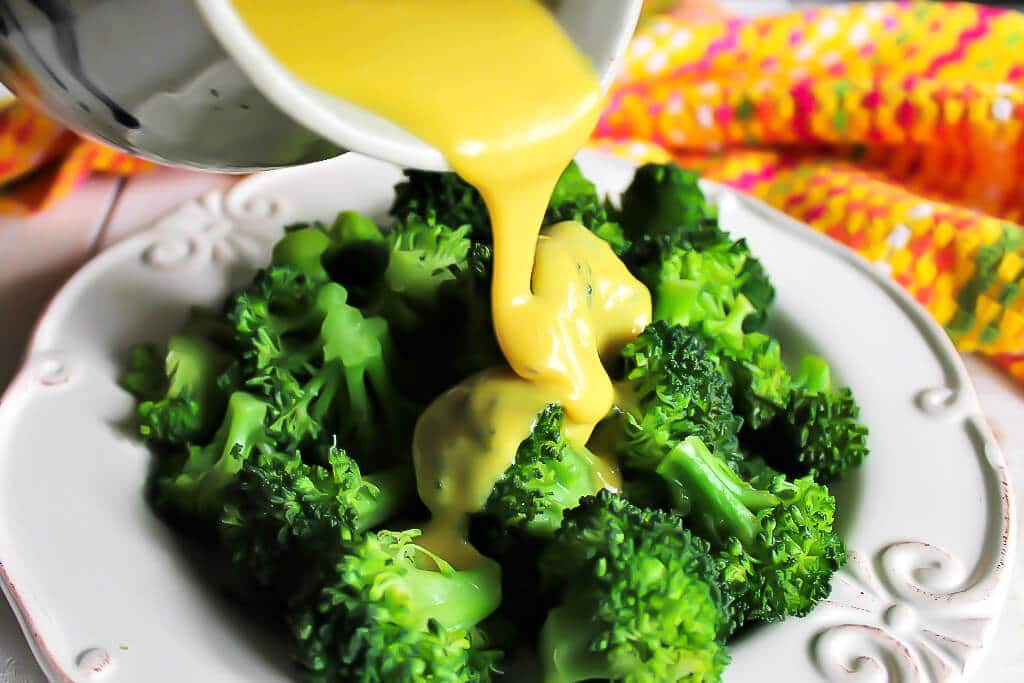
This is the ultimate vegan cheddar cheese sauce! Quick and easy yet free of dairy, oil, nuts, and gluten. This sauce has a rich and creamy texture and the sharpness of real cheddar cheese! It’s perfect for a cheese dip, vegan nachos, tacos, broccoli, or loaded baked potatoes.
Want to save this recipe?
Enter your email below and get it sent straight to your inbox. Plus, get more amazing vegan recipes that will satisfy your cravings!
Why you’ll love this recipe
- It’s easy to make and takes about 5 minutes!
- There are no nuts, oil, or gluten, but it is still creamy and delicious!
- It can be made extra stretchy!
- Kids love it and will eat their veggies with cheese sauce poured over them!
- The closest-tasting vegan nacho cheese to the real thing!
- It has a real cheddar cheese flavor!
- Nacho cheese sauce works great on broccoli, baked potatoes, and of course… nachos!
Ingredients and substitutions
- Plant-Based Milk – I usually use soy milk, but you can use any plain-flavored plant-based milk that you choose. This milk makes it rich and creamy. You can also use a can of coconut milk instead.
- Nutritional Yeast – to give it that cheesy umami flavor. Check out this link for more about nutritional yeast.
- Corn or Potato Starch – to thicken the sauce.
- Tapioca Starch – to make it stretchy like real cheese.
- Salt – for the saltiness of real cheese.
- Turmeric – for color. (optional)
- Miso – to give it that cheddar cheese bite! (This is optional, but you will want to use it if you are seeking a true cheddar flavor.)
Helpful tools
- Small Saucepan
- Whisk
How to make vegan cheddar cheese sauce
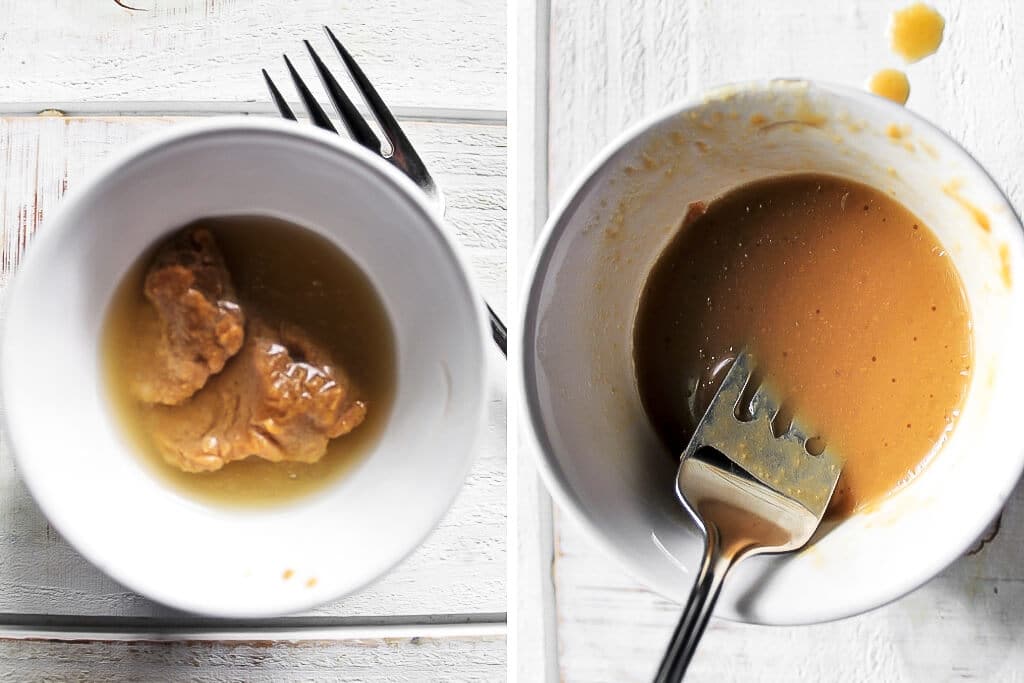
Step 1 – Mix together the miso with a small amount of water and set aside.
Step 2 – Add 1 ½ cups of cold plant-based milk to a saucepan.
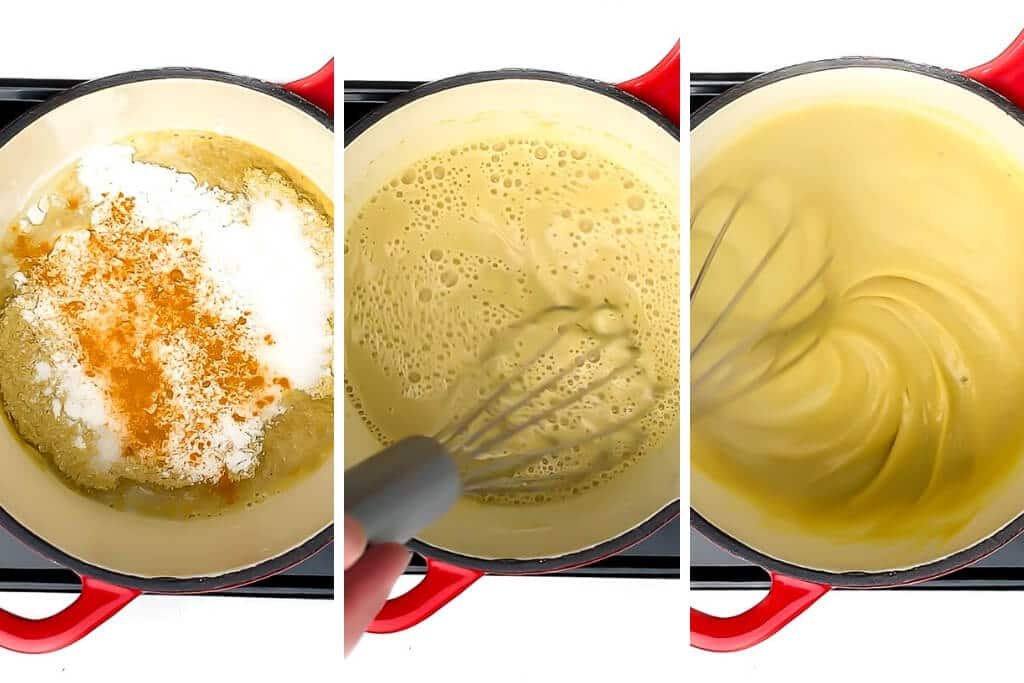
Step 3 – Put in the starches, nutritional yeast, salt, and turmeric, and stir well with a whisk.
Step 4 – Turn the heat to medium and stir constantly as it heats. After a few minutes (once your sauce starts to boil), it will thicken very quickly.
Step 5 – Boil for about 30 seconds, then remove from the heat.
Step 6 – Pour in your miso mixture and stir until smooth.
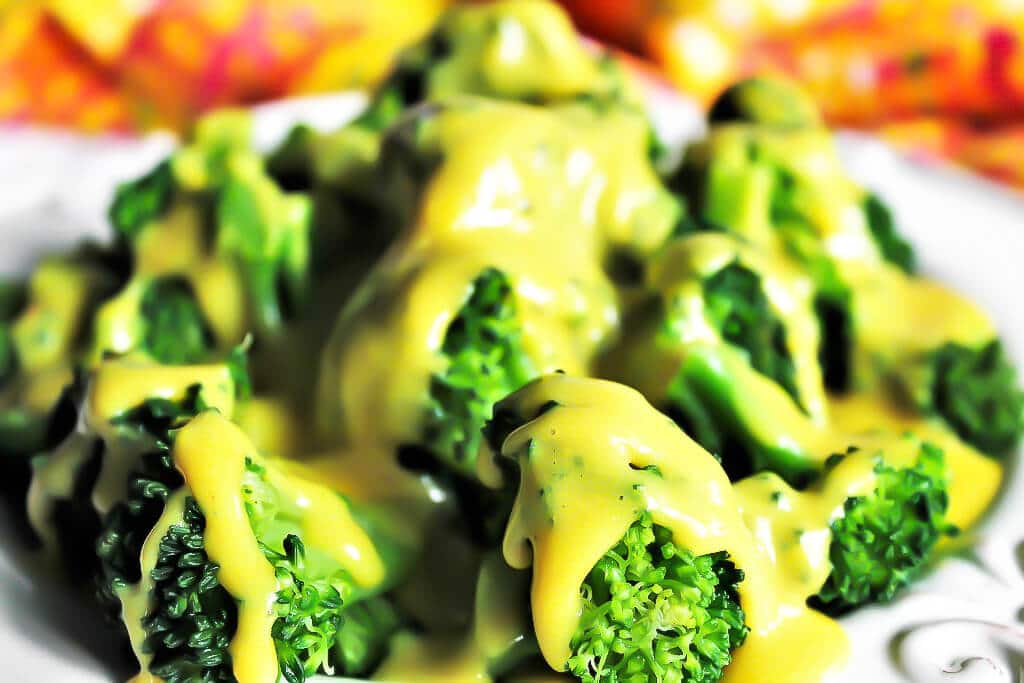
Serve your cheese sauce warm over broccoli, cauliflower, potatoes, or nachos!
Pro Tips
- Make sure to add the starches while the milk is still cold and give it a good stir before turning on the heat!
- Stir very frequently and do not walk away from the stove!
- Your sauce thickens very quickly once it reaches a certain temperature, and if you are not stirring it at that time, it will burn.
- Add the miso at the end of cooking, after it has cooled for a minute, to avoid overheating the miso and reducing its beneficial probiotics.
Serving Suggestions
Pour it over broccoli, cauliflower, or any veggies, and watch them disappear!
Use it to make loaded baked potatoes! Topped with nacho cheese and homemade bacon bits, you will have the ultimate vegan baked potato!

Pour it over corn chips and make loaded vegan nachos! Add all of your favorite toppings for vegan nachos supreme!
Storage and reheating
Store this cheese sauce in the refrigerator in a sealed container for up to 5 days.
To reheat the nacho cheese, add 1 tbsp of water and microwave for 1 minute, or reheat in a saucepan on the stovetop for about 3 minutes. Stir with a whisk until smooth and creamy again.
Note: The cheese sauce will thicken significantly when cold. This is normal, and it will regain its melty texture when reheated.

More vegan cheeses
If you are interested in learning how to make more easy homemade vegan cheeses, check out all of my vegan cheese recipes on the blog or my cookbook, “The Ultimate Guide to Easy Vegan Cheese Making.”
- Vegan Cheese with Garlic and Herbs
- Vegan Smoked Gouda
- Alfredo Sauce with Coconut Milk
- Vegan Mozzarella Recipe
- Vegan Cheddar Cheese – firm and sliceable
- Vegan Halloumi Cheese
Vegan cheddar cheese sauce recipe

Vegan Nacho Cheese Sauce
Ingredients
- 1 teaspoon white miso, (optional)
- 2 tablespoon warm water, (to mix with the miso)
- 1 1/2 cup soy milk (cold), or any other plant-based milk or a can of coconut milk
- 1/3 cup nutritional yeast
- 1 tablespoon corn starch , or potato starch
- 1 tablespoon tapioca starch
- 1 teaspoon salt
- 1 dash turmeric
Instructions
- Mix together miso with a small amount of water and set aside.
- Add 1 ½ cups of cold plant-based milk to a saucepan.
- Add in the starches, nutritional yeast, salt, and turmeric. Stir well with a whisk.
- Turn the heat to medium and stir constantly as it heats.
- After a few minutes (once your sauce starts to boil) it will thicken very quickly.
- Allow it to boil for about 30 seconds and then remove from the heat.
- Pour in your miso mixture and stir until smooth.
- Serve warm over broccoli, potatoes, or nachos!
Notes
- Add an additional tablespoon of tapioca starch to the cold milk, then follow the rest of the instructions as usual.
- Make sure to add the starches while the milk is still cold and give it a good stir before turning on the heat!
- Stir very frequently and do not walk away from the stove!
- Your sauce thickens very quickly once it reaches a certain temperature, and if you are not stirring it at that time, it will burn.
- Add the miso at the end of cooking, after the mixture has cooled for a minute, so as not to overheat the miso and reduce its beneficial probiotics.
- If you don’t use all of the sauce, it will keep in the fridge for up to 5 days in a sealed container.
- You can reheat the cheese sauce by adding a few teaspoons of water and reheating it in the microwave or on the stovetop.
 Did you make this recipe?Please leave a star rating and review below!
*Originally published on Sept. 16, 2018. Updated on 2/6/20 to include new images and an instructional video.
📌 Be sure to follow me on Pinterest for new vegan recipes!


Hi Monica, Can this be made with sunflower milk?
Yes, you can use any type of plant milk that you would like. Enjoy!
I cant use nutritional yeast due to histamine intolerance. Any ideas for substitutions??
You can use umami mushroom powder instead (you will not need as much, only about 1 teaspoon) however, it doesn’t have as much of a cheesy flavor. You may also want to try my veggies cheese sauce instead. It is made with a mix of veggies and has more flavor if you are going to leave out the nutritional yeast. Here is a link to that recipe… https://thehiddenveggies.com/veggie-cheese/
A little mustard helps. I also use a bit of onion powder or extract, and paprika. I use these in addition to the yeast, but I’m sure they should help the flavor even without it! 🙂
Whoops! I thought I clicked on reply to previous comment.
I don’t have potato starch. Can you suggest an alternative please? Could I substitute with extra tapioca?
Thank you
You can sub it for more tapioca starch or corn starch. Enjoy! 🙂
This is a great recipe – I added about 2 1/2 times the amount of nootch it calls for and it’s delicious 🙂
I’m glad that you liked it, Gillian! 🙂
This was so easy to make, I also added some dijon mustard as I used this in a vegan layered bake I make (like a lasagne without the pasta!) and wanted the cheese sauce to be quite strong in flavour. It was delicious.
I’m so happy that you liked it, Lucy! 🙂
This is a great recipe! I usually always use a cashew based cheese sauce but I saw this and figured I’d give it a try. I put everything in the pan at one time including the miso paste (excluding the water) and it came out awesome. Perfect consistency and taste. Looking forward to checking Out your other recipes.
I’m so happy to hear that you like it, Amanda! Definitely try out my other cheese recipes, most of them are nut-free. 🙂
I’ve seen a lot of recipes where tahini can be substituted for miso? Do you think that would work for this recipe?
Yes, the miso is just for flavor, and the tahini will give it a similar flavor. You may want to add a little bit more salt since you won’t be using the salty miso. Enjoy! 🙂
Hello, I’m excited to try your recipes! Thank you for ask if your hard work 👏🏼. I was wondering if I could use agar and arrowroot instead of the tapioca and corn/potatoe starch? If so, are the amounts the same?
Hi Haley, I wouldn’t use agar in this recipe unless you want the cheese to firm up. You can swap out both the potato starch and tapioca starch for 3 tablespoons of arrowroot powder (arrrowroot is a little less powerful than the other starches), but it will not be stretchy like you would get from tapioca. Enjoy! 🙂
Monica, I have made this delicious sauce twice. Both times, as soon as I mix in the miso, the thickened sauce turns completely watery! I made it tonight and used such a tiny amount of water to dilute the miso before mixing it in, thinking too much water might have been the issue before. Same exact thing happened. It’s like some kind of chemical reaction happens. Simmering the sauce again after the miso did not help, which I didn’t want that to be the solution anyway, so I don’t kill the miso. Placing it in the fridge overnight did make it thicker. What do you think could be happening?
Thank you!
Hi Morena, it does sound like a chemical reaction. This happens to me if I add any oil or butter to the sauce, but it’s never happened when I add miso. I’m not sure why this is happening. Maybe use a little more starch, so it is thicker to begin with?
Monica thanks for the reply. I forgot to mention that I did try adding more starch and it didn’t help. It could be my milk, now that you mention the fat. I’m using cashew milk and it’s probably too high in fat? Although the reaction happens when I add the miso, so maybe it’s something to do with the miso. I’ll try it again because the flavor is amazing and I really need to figure this out!!! Thanks.
Hi. First let me tell you I have made your cheddar and mozzarella cheese many times! They are delicious and easy. I would like to tackle the nacho cheese but I am interested in freezing it. Can this be frozen like the other cheeses and if so, how long and what is the best way to reheat it for nacho dip? Thanks for your great recipes!
I’m so happy that you like my cheeses! You can freeze the cheese in an air-tight container for up to 3 months. To heat it back up, put it in the fridge overnight to thaw. Then you can either microwave it for about 2-3 minutes or heat it in a saucepan on the stovetop. Enjoy!
Hi there, I’m so excited to try this recipe (and all of your vegan cheese recipes)! I noticed on some of your other cheese recipes, you used agar agar as a thickening agent. Can I substitute the corn starch or potato starch for agar agar instead? Thanks so much for helping my family live healthier! XO
Hi Christine, I use agar agar in some of the other cheese recipes to make them firm enough to set. Since this is a sauce, you don’t need that. If you want to avoid starch, you can use 1/3 cup of almond flour instead of the starch for a thick and creamy consistency. I hope that helps. 🙂
Thank you so much, that was incredibly helpful! 😀
Thank you for this recipe. I made it for my Super Bowl party and my guests all loved it. Super easy to make and well explained in the recipe. Thanks Monica!
I’m so happy that you liked it Mark! 🙂
Excellent! I’m not a fan of nutritional yeast so wasn’t sure I’d like this. I was shocked at the flavor. So yummy! I think my miso is on the salty side so I made a second batch with no salt to mix with my first batch. Now I have leftovers to enjoy all weekend. Thanks so much for the great recipe!
I’m so happy that you liked it! 🙂
This is by far the best vegan cheese sauce I have made, and I have made many! It is a keeper. Thank you so much for sharing.
Thank you so much! I’m so happy that you like it! 🙂
This looks like a great recipe, I’ll have to try it with coconut milk since I can’t have soy milk! I like the idea of making dairy free cheese sauce rather than buying it. This sounds delicious
Thanks Sarah, I hope that you enjoy it! 🙂
This looks amazing! I miss cheese so much.
I have a soy and mushroom allergy, is there an alternative that you can suggest for the miso paste?
Thank you! I’ve been looking at the other recipes on your site and am excited to try LOTS of new cheeses. <3
Hi Erin, Thanks so much! You can leave out the miso completely and it still tastes really good. They also sell soy free garbanzo bean miso if you can find it. Hope that you enjoy it! 🙂
Thank you Monica, I didn’t know about the garbanzo bean miso, I’ll give it a try 🙂 all of your cheese recipes look delicious, I’m looking forward to them.
I’ve tried a lot of the vegan cheese sauces, but this one is my favorite! I love the cheddar flavor that the miso gives it! It really tastes like real cheese sauce! Thanks so much for this recipe!
You’re welcome Kevin! I’m so happy that you liked it as much as we do! My kids won’t eat baked potatoes without this cheese sauce on it! 🙂
Hi, Ive noticed that you sometimes use tapioca starch and sometimes use tapioca flour. I was under the understanding that they were the same thing (the Bobs Red Mill brand implies they are on their packaging)
Any info would be much appreciated. Thanks for all of your recipes, you inspire me to make so any new things from scratch! 🙂
Jo
Hi Jo, yes tapioca starch and tapioca flour are the same thing. I’m so happy to hear that my recipes help you try new things from scratch! I hope you love this cheese sauce as much as we do! 🙂
Oh my gosh, this is DELICIOUS. I’m currently devouring it with tortilla chips, and I am going to be putting this stuff on everything!!
I had a weird experience, though. I followed the recipe almost exactly (added about 1/2 tablespoon tapioca starch to make it just a bit thicker), and I had a lovely, thick, gooey sauce. As soon as I added the miso + water mixture, my sauce completely liquified. I salvaged it by adding another couple of tablespoons of tapioca starch mixed with a small amount of cold water and heating it back up to a boil to thicken, and that worked perfectly. I just can’t figure out why the tiny bit of miso and water completely liquified the whole thing!
Hi Kathryn- I’m so happy that you liked it! It does thin out a bit once you add the miso. It comes out a nice thick consistency if you used 2 tbsp of tapioca starch even after you add the miso. Did you use corn starch too?
Just make this last night! It was awesome! My kids loved it too!