Pesto Hummus
This easy vegan pesto hummus is a creamy delicious dip or spread that you can whip up in minutes! It’s made without tahini and flavored with pesto. Perfect for adding to sandwiches, pasta, or wraps to make a filling meal. If you like the taste of basil, you will love this hummus!
Want to save this recipe?
Enter your email below and get it sent straight to your inbox. Plus, get more amazing vegan recipes that will satisfy your cravings!
Why you’ll love this recipe
- It’s vegan, gluten-free, soy-free, nut-free, and sesame-free so everyone can enjoy it!
- Kids devour it and love to dip veggies into it.
- It’s as delicious as it is healthy.
- There’s no tahini needed, so if you don’t like it or are allergic to it, you will still be able to enjoy this hummus!
We are big fans of basil in my house, so we use a lot of pesto! One day, I made a fresh batch of pesto. I was about to wash out the food processor to make a batch of hummus, when I thought, “Pesto in my hummus sounds pretty good!” So, I put in a can of chickpeas, more pesto, and some nutritional yeast to give it a cheesy flavor, and my Easy, cheesy, vegan pesto hummus was born!
Now I make a batch of basil pesto hummus every time I make a batch of pesto!
Ingredients and substitutions
- Chickpeas aka Garbanzo Beans – caned is easiest, but you can also use fresh cooked if you would like. You can also swap the chickpeas out with white beans for a white bean dip.
- Pesto or basil – for flavor. You can use store-bought pesto, make your own with my vegan pesto recipe, nut-free pesto, or simply use a handful of fresh basil. You can also use cilantro garlic sauce or another herb of choice if you don’t like basil.
- For homemade vegan pesto, you will need fresh basil leaves, garlic, olive oil, lemon juice, and pine nuts. (I use nutritional yeast instead of parmesan cheese to make it vegan.)
- Nutritional Yeast – for a slightly cheesy flavor. You need to use nutritional yeast, not brewer’s yeast (Optional).
- Salt – for flavor. You can also add some pepper or red pepper flakes for added flavor.
- Water – or aquafaba to achieve the desired consistency and make your hummus smooth and creamy.
How to make hummus with pesto
Step 1 – Pour chickpeas, pesto, nutritional yeast, and salt into a food processor (or blender).
Step 2 – Blend all of the ingredients for about 30 seconds.
Step 3 – Add water a tablespoon at a time until you get the desired consistency. (Usually about 2-4 tbsp. works well)
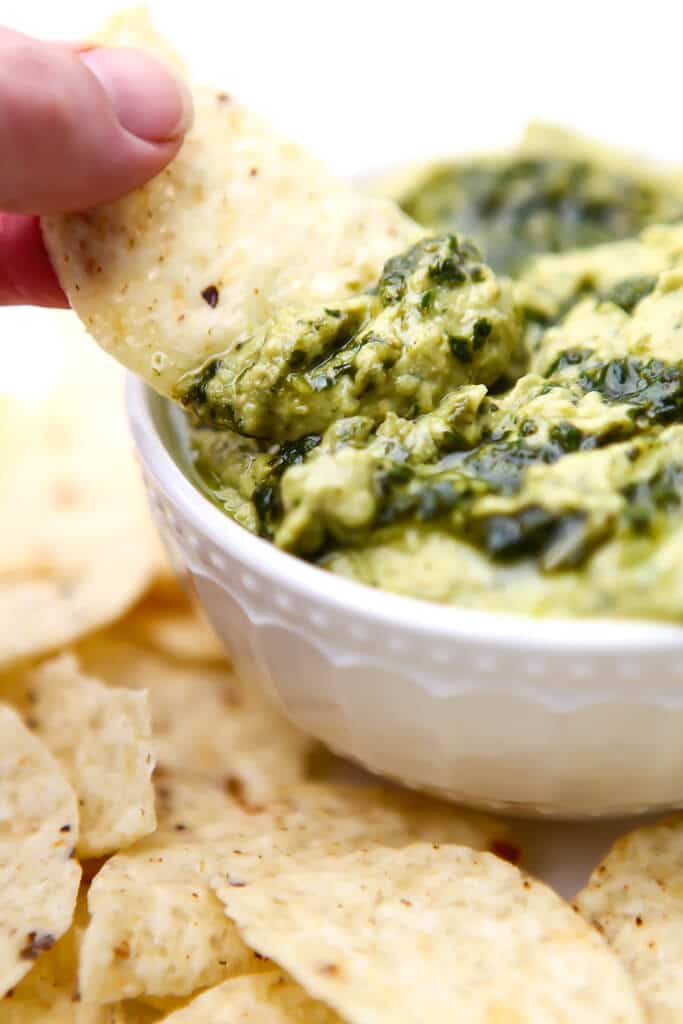
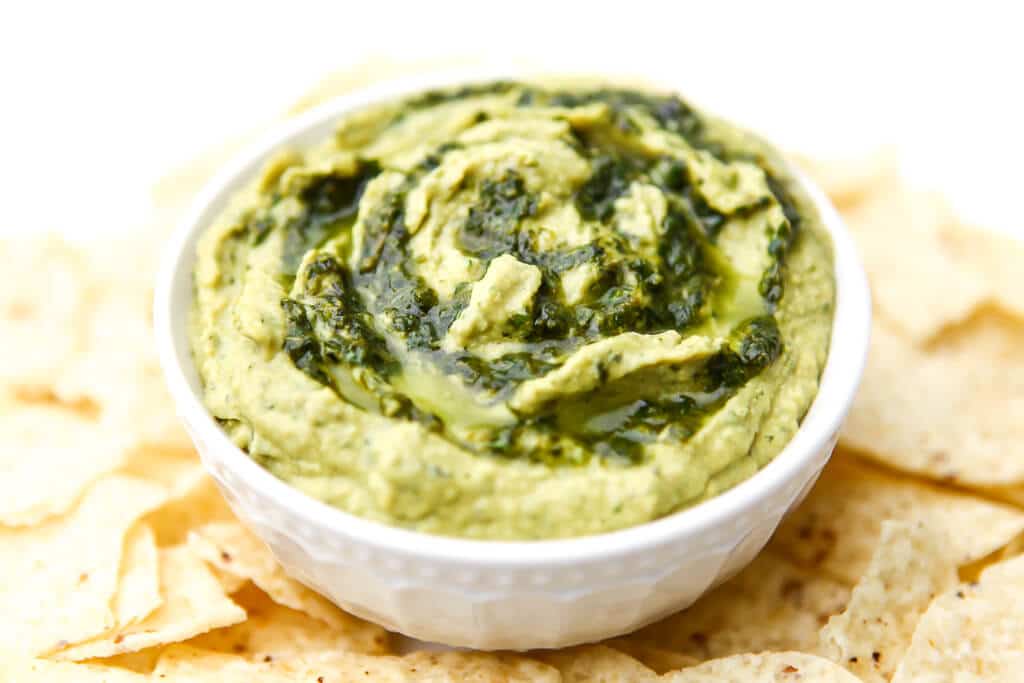
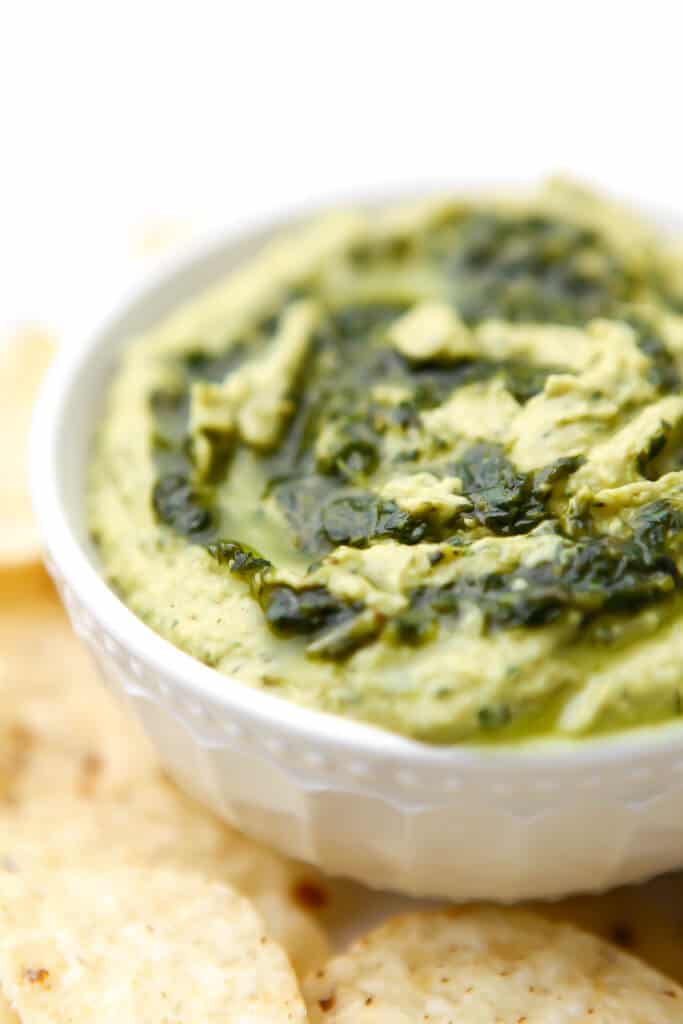
Step 4 – Garnish the top with more pesto if desired.
Serve your pesto hummus with chips, crackers, pita bread, pita chips, or fresh-cut veggies.

Meal ideas
- My kids love this hummus and they will eat a whole plate of fresh veggies like carrot sticks or sliced cucumbers dipped in it!
- Use as a spread to give sandwiches, pinwheels, and veggie wraps a satisfying creaminess and added protein!
- Top it with a dollop of extra pesto and serve it as a fancy dip at your next party or just eat it with a bowl of chips while you watch TV.
- Add an additional tbsp of water to make it thinner, heat it up, and toss it with pasta for a protein-packed creamy pesto pasta sauce. You can also check out my recipe for creamy vegan pesto pasta or vegan pesto pasta with veggies.
Using dried chickpeas instead of canned
To use dried chickpeas, just cook the chickpeas until they are very soft, an instant pot or a pressure cooker works great for this, then allow them to cool a little in the pot of cooking water before using.
How to use the liquid in a can of chickpeas
Save this liquid! It is called aquafaba and you can use it to thin out your hummus or save it for later to make vegan aquafaba whipped cream, aquafaba chocolate mousse, or even vegan lemon meringue pie!
More vegan dips and spreads
- Vegan Pate
- Easy Vegan Spinach Dip
- Easy Cashew Cheese Dip and Spread
- Whipped Tofu Dip
- Vegan Soy Chorizo Dip
- Vegan Garlic Aioli
- Garlic Cilantro Sauce
- Vegan Sun-Dried Tomato Dip
Pesto hummus recipe

Pesto Hummus
Ingredients
- 1 can chickpeas, or white beans drained and rinsed (about 1 ½ cups)
- ¼ cup pesto, Or a large handful of basil leaves, a small clove of garlic, and 1 tbsp of olive oil.
- 1 tablespoon nutritional yeast, (optional to make it cheesy tasting)
- ¼ teaspoon salt, optional
- 3-4 tablespoons water, or aquafaba
Instructions
- Add 1 can of drained and rinsed chickpeas, 1/4 cup pesto, 1 tbsp nutritional yeast, and 1/4 tsp salt to a food processor.
- Blend for about 30 seconds, then add water 1 tbsp at a time blending until desired consistency is reached.
- Serve with chips or cut veggies or use as a sandwich spread. Store in an airtight container in the fridge for up to 5 days.
- Garnish the top with more pesto if desired.
Notes
- Serve as a dip for chips, bread, or veggies.
- Works great as a sandwich spread too.
- Add 1 extra tbsp of water, heat, and use as a pasta sauce.
 Did you make this recipe?Please leave a star rating and review below!
Originally published July 18, 2017. Updated with new pictures and more detailed instructions 1/9/2020
📌 Be sure to follow me on Pinterest for new vegan recipes!


Hi there.
Your pesto recipe link is not working
Weird, I checked all the links and they seem to be working for me. Is it the one in the recipe card at the bottom or the one in the post? Thanks.
I worked around it, I’m sorry. My browser was blocking it. Thank you.
So good for dipping veggies in! It’s so much better than the store-bought versions and I love knowing exactly what’s in it, with no sugar, oil, or preservatives.
I’m so happy that you like it, Esther! 🙂
I used this hummus as a sandwich spread and it was amazing! I love basil anyway, but this is my new favorite vegan sandwich spread! Thanks for the recipe!
It’s one of my favorites too, Nicole! I can never get enough pesto! 🙂
This pesto hummus is delicious! I can’t have sesame seeds, so this is the perfect solution to still have flavorful humus without tahini! Thanks for the recipe! Such a great idea!